Policies
Policy management in the Admin Console lets you create, edit, assign, and delete policies that govern access decisions across your tenants and clients. The Admin Console organizes policies into two categories:
- Authorization policies — Keymate-native policies using six authorization models: RBAC, ABAC, ReBAC, PBAC, RADAC, and Dynamic. These are managed from the Authorization Policies page and can be assigned to tenants and clients.
- Keycloak policies — policies that operate at the Keycloak resource server level: Role, User, Client, Group, Time, Aggregate, JavaScript, Regex, and Client Scope. These are managed from the Policy Management page and are scoped to a specific resource server.
Goal
This guide walks through the full policy lifecycle for both categories: browsing policy lists, creating policies of each type, assigning them to targets, editing existing policies, and deleting policies you no longer need.
Audience
Platform engineers, developers, and architects who need to author and manage authorization policies through the Admin Console UI.
Prerequisites
- Access to a running Admin Console instance
- Your account has the required permissions for the operations you need to perform:
- Create scope on the Policies resource — to create new policies
- Read scope on the Policies resource — to view the policy list and details
- Update scope on the Policies resource — to edit policies and manage assignments
- Delete scope on the Policies resource — to remove policies
The Admin Console enforces permission gates on every action. Buttons and menu items for operations you lack permissions for are hidden automatically.
Before You Start
- Understand the authorization models available in Keymate so you can choose the right policy type for your use case.
- Decide whether your policy should apply at the tenant level, the client level, or both. Authorization policies are created globally and then assigned to specific tenants and clients.
- For ABAC policies, configure your policy vocabulary (attributes, operators, and value sets) before creating expression-based conditions.
- For ReBAC policies, ensure your FGA authorization models are configured in the FGA Engine.
- For Keycloak policies, you need at least one resource server configured. The resource server determines which Keycloak client the policy is created under.
Worked Example
Throughout this guide, we use a fictional RBAC policy named Acme Editor Access that grants edit permissions to users with the editor role. You can replace these values with your own policy details. For other policy types, we provide separate examples in each type-specific section.
Steps
Authorization Policies
Authorization policies are the Keymate-native policy definitions that you create, assign to tenants and clients, and manage independently of Keycloak's built-in policy system.
1. Navigate to the Policy List
Open the Admin Console and navigate to the Authorization Policies page. The policy list displays all authorization policies in a searchable, paginated table.
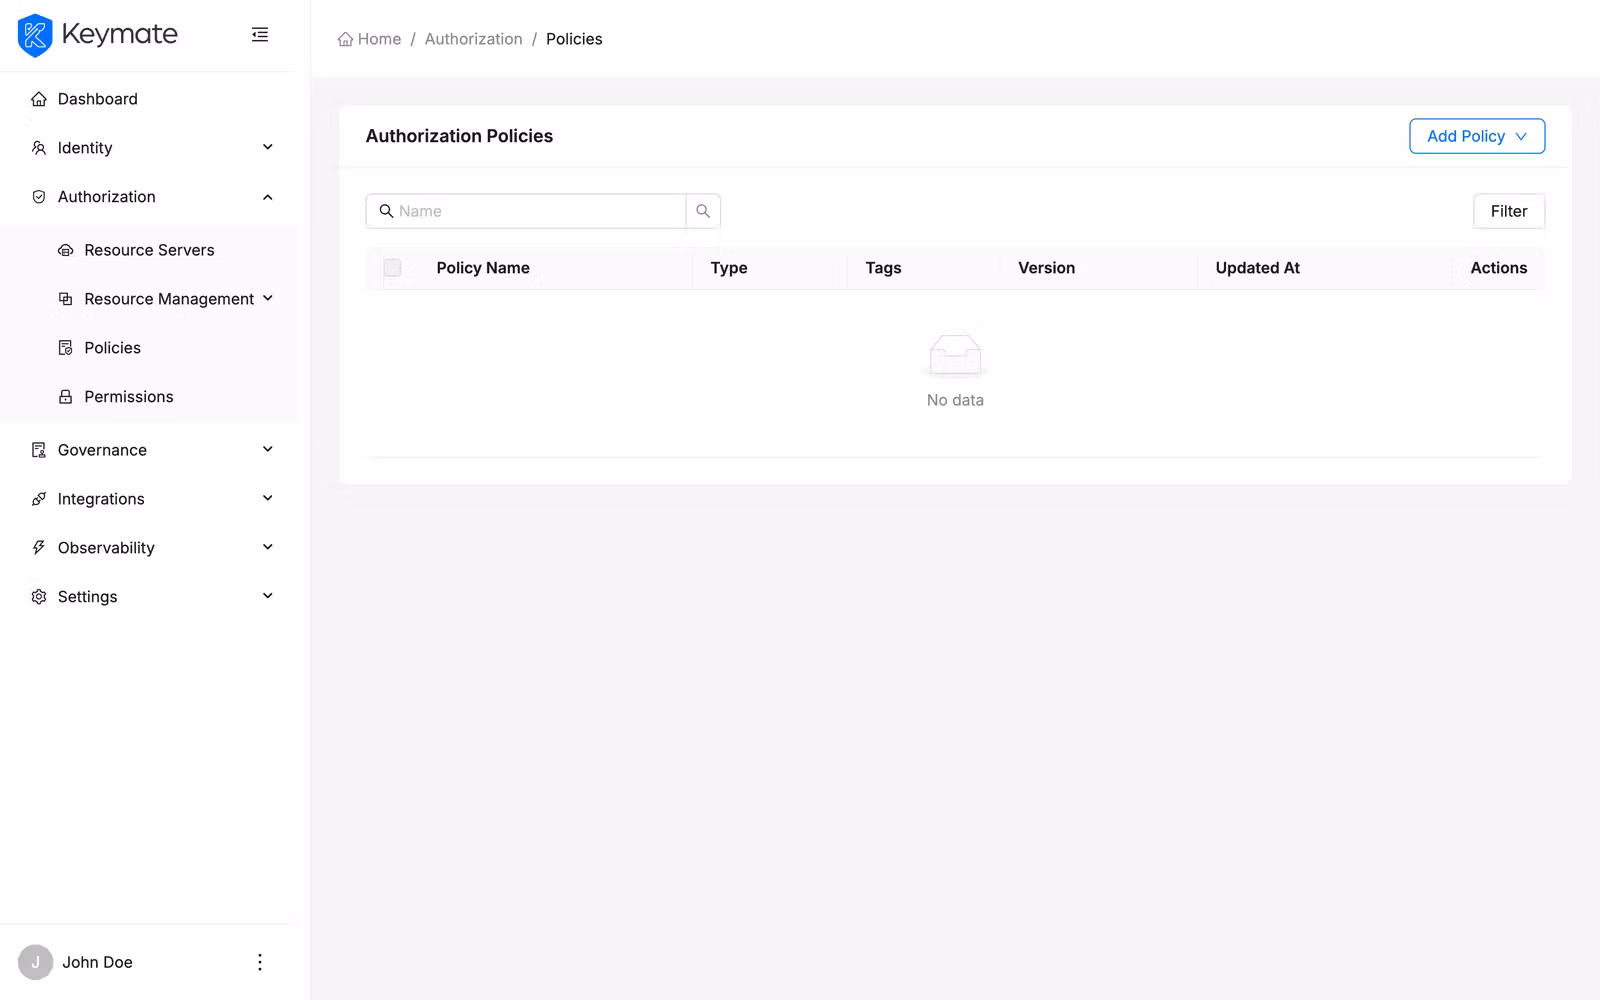
The table shows the following columns:
| Column | Description |
|---|---|
| Name | Policy name (links to the policy edit page) |
| Type | Policy type displayed as a label badge (RBAC, ABAC, ReBAC, PBAC, RADAC, Dynamic) |
| Tags | User-defined tags displayed as colored chips |
| Version | Policy version number |
| Updated At | Timestamp of the last modification |
Use the search bar above the table to filter policies by name. Click the Filters button to open the filter panel, where you can narrow results by Policy Type.
Select multiple rows using the checkboxes to enable bulk actions such as bulk delete.
2. Create a New Policy
Click the Add Policy dropdown button in the top-right corner of the policy list page. A dropdown menu appears with the available policy types:
- RBAC — Role-Based Access Control
- ABAC — Attribute-Based Access Control
- PBAC — Policy-Based Access Control (composite)
- RADAC — Risk-Adaptive Access Control
- Dynamic — JavaScript-based dynamic evaluation
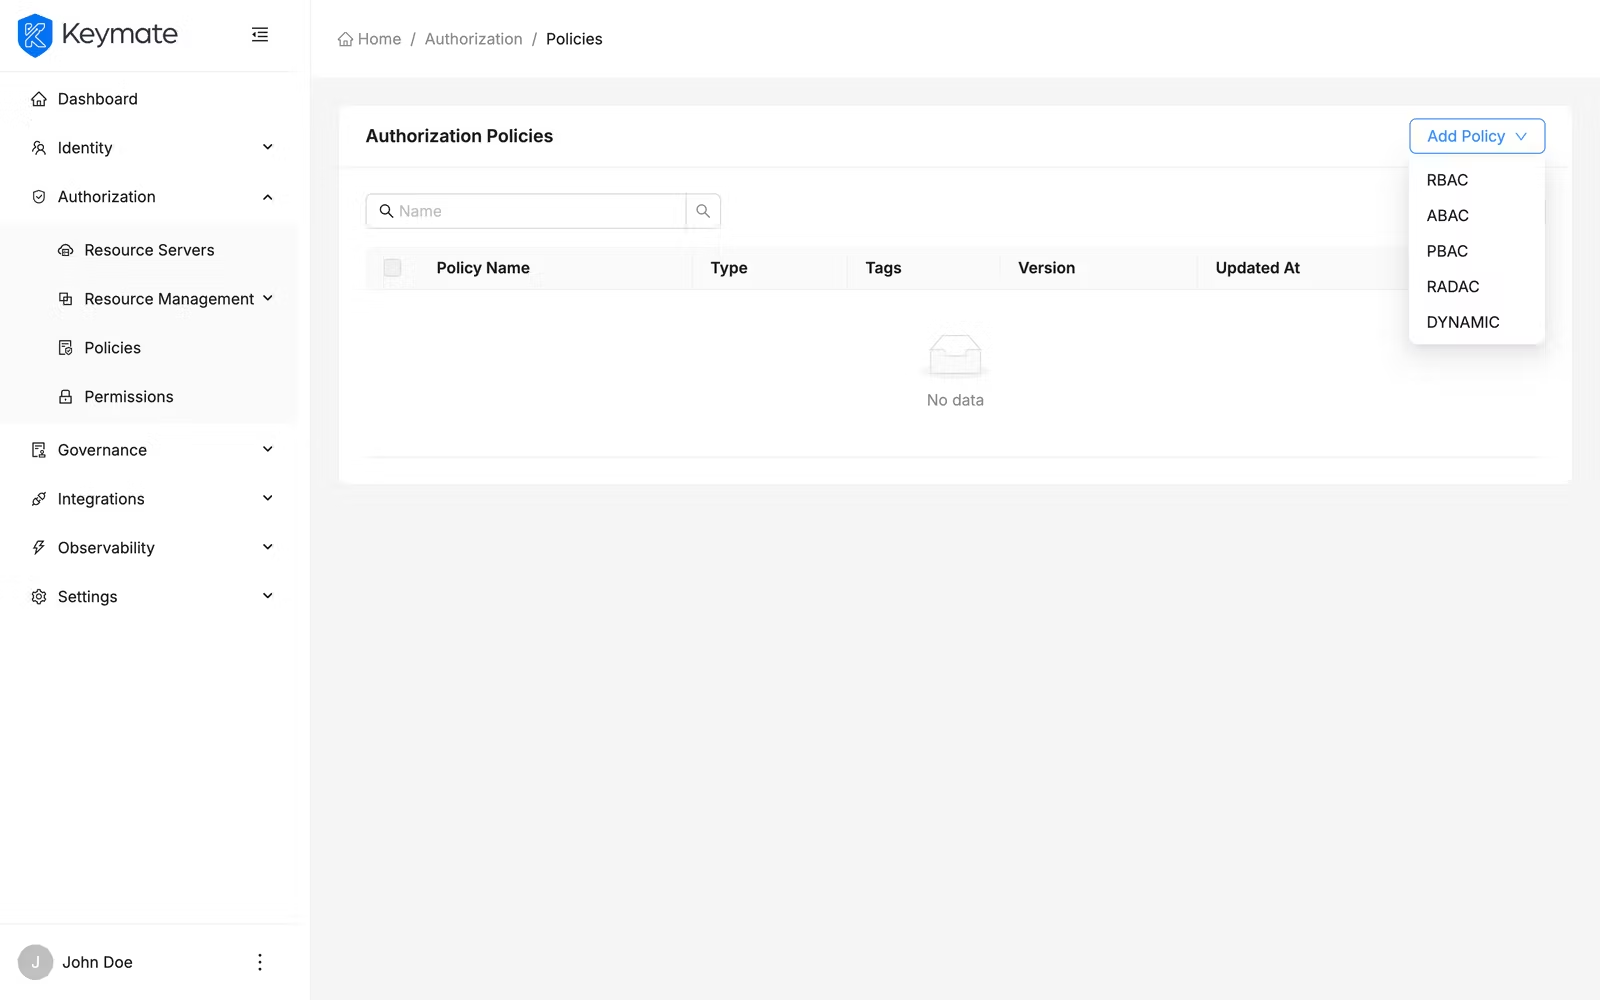
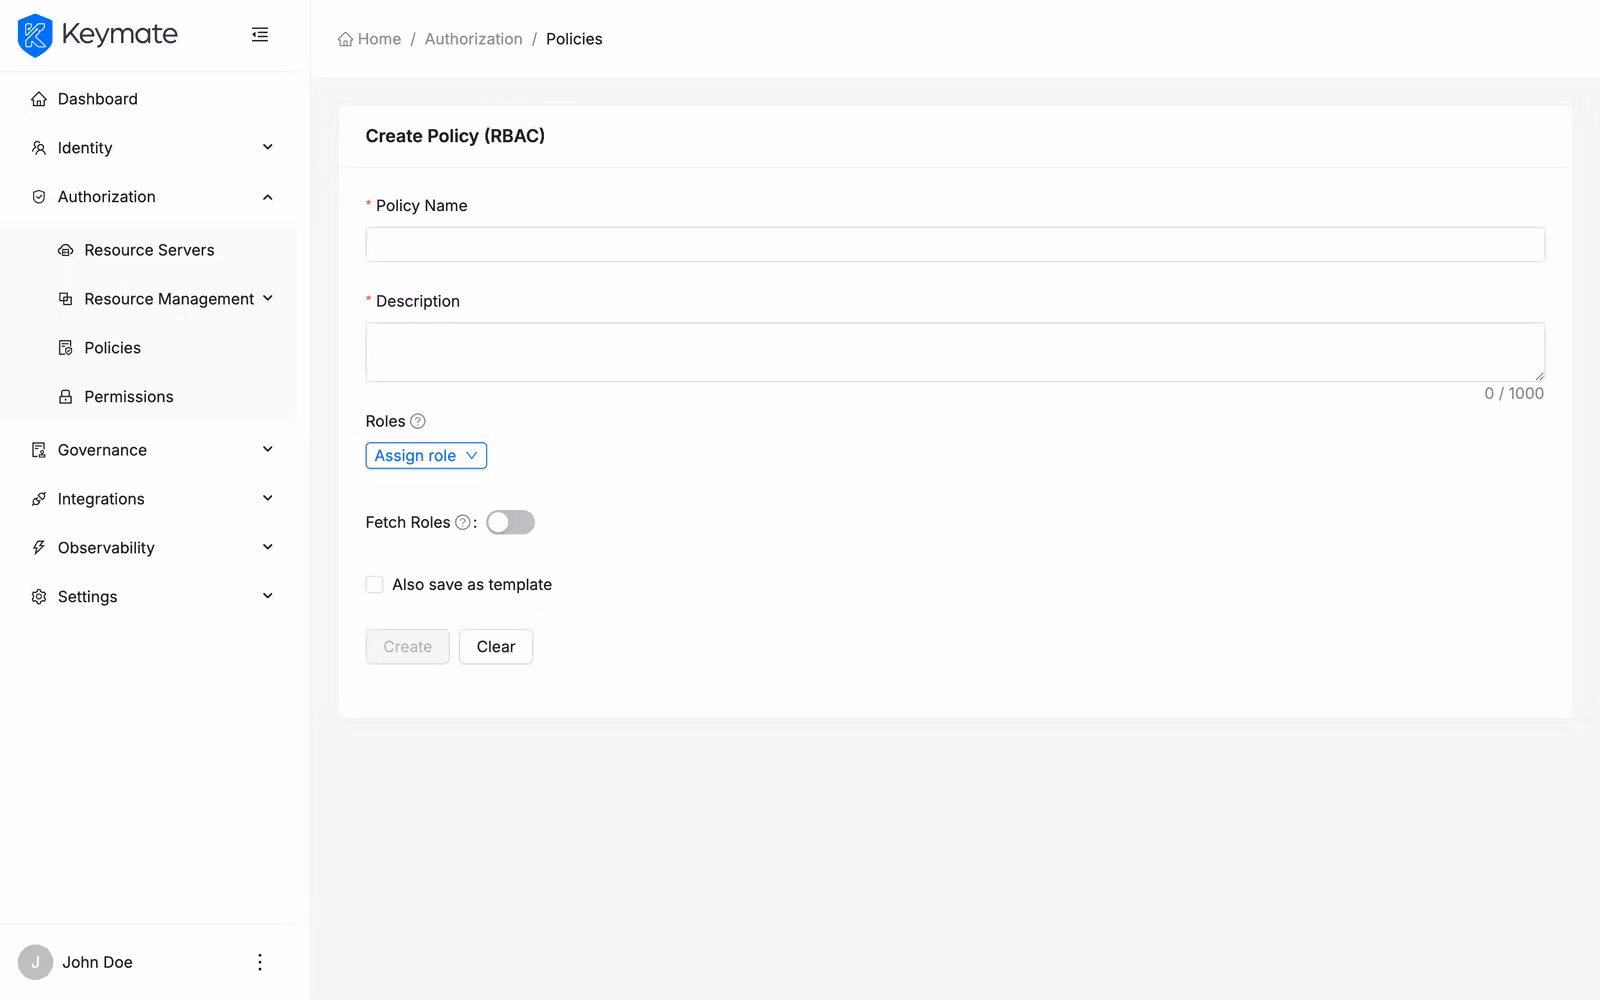
Select a policy type to navigate to the corresponding creation form. Every policy form shares two common fields at the top:
| Field | Required | Description |
|---|---|---|
| Name | Yes | A unique name for the policy |
| Description | Yes | A free-text description explaining the policy's purpose (maximum 500 characters, character count displayed) |
Below the common fields, each policy type presents its own configuration. An optional Also save as template checkbox appears at the bottom of every creation form — enable it to save the policy definition as a reusable policy template at the same time.
Click Create to save the policy. On success, a confirmation toast appears and the form resets. Click Clear to reset the form without saving.
The following sections describe the type-specific fields for each policy type.
2a. Create an RBAC Policy
RBAC policies grant access based on roles assigned to users. The RBAC form lets you select roles and optionally enable runtime role fetching.
| Field | Required | Description |
|---|---|---|
| Roles | Yes | The roles this policy evaluates. Click Assign role to open the role selection drawer |
| Fetch Roles | No | Toggle switch — when enabled, roles are fetched at evaluation time rather than using static assignment |
Assigning roles:
Click the Assign role dropdown, which provides two options:
- Client Roles — roles scoped to a specific client application
- Global Roles — realm-level roles available across all clients
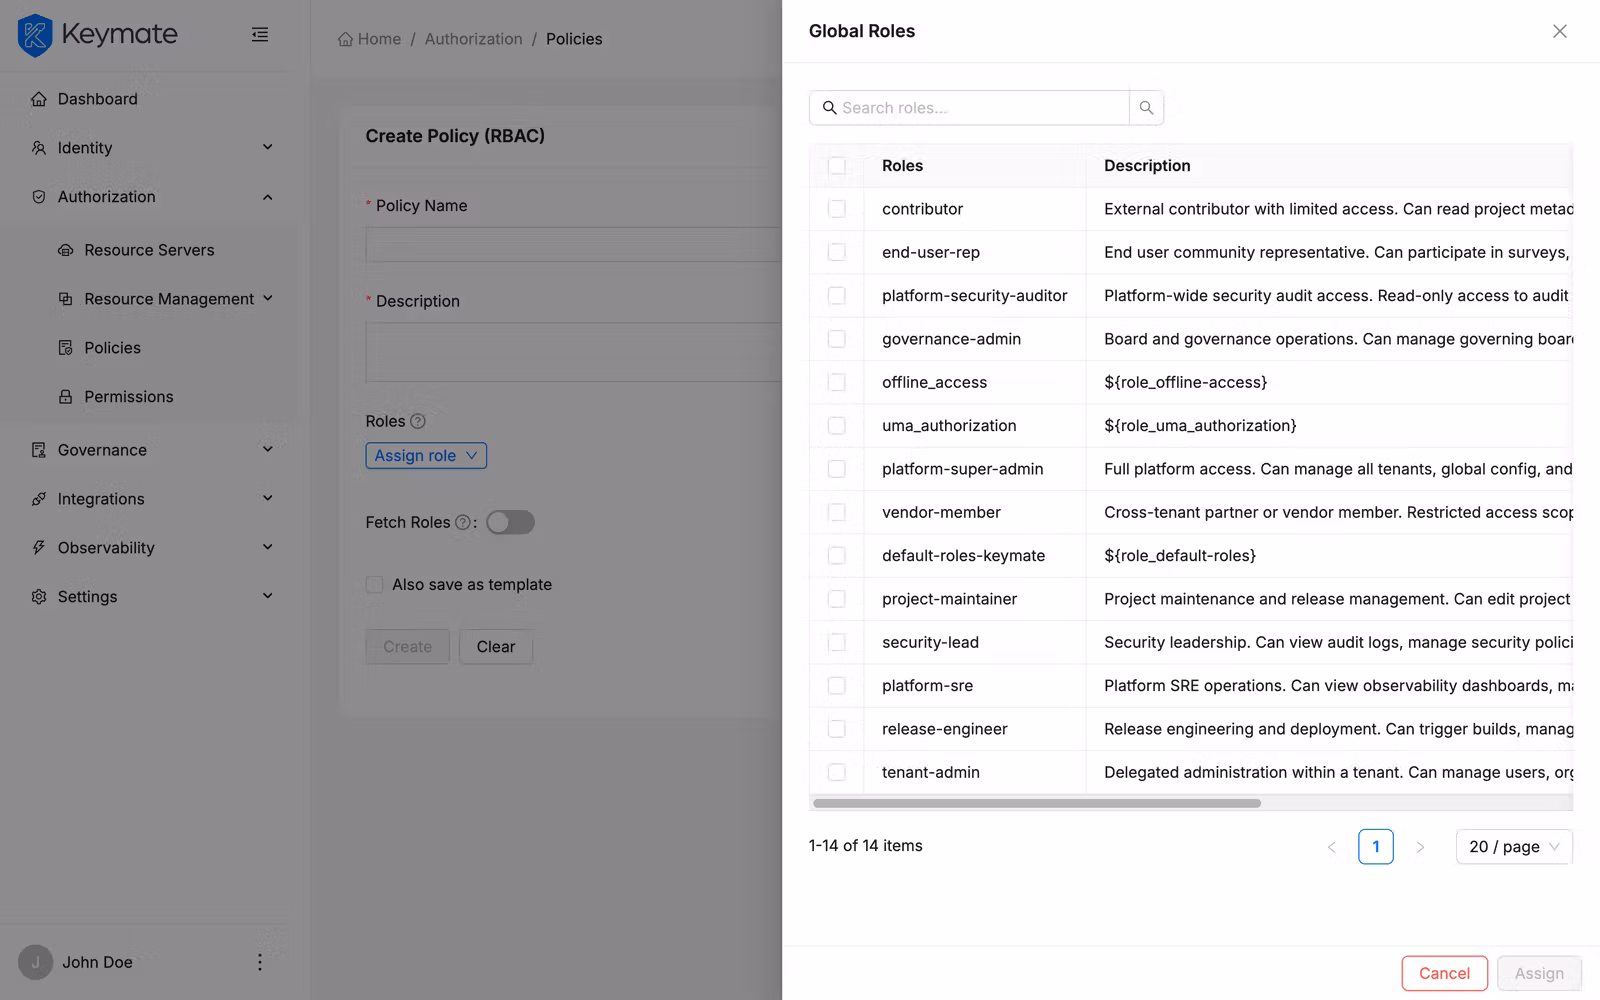
Selecting either option opens a drawer with:
- A search field to filter available roles by name
- A table with checkbox selection showing role Name, Client (for client roles), and Description
- An Assign button that adds the selected roles to the policy (displays the count of selected roles)
Selected roles appear in the Roles table on the form. Each row shows the role name (with a client tag if it is a client-scoped role) and a Remove button to unassign it.
2b. Create an ABAC Policy
ABAC policies evaluate conditions based on entity attributes. The ABAC form offers two authoring modes that you can switch between using the Expression Mode (Advanced) toggle.

| Field | Required | Description |
|---|---|---|
| Expression Mode (Advanced) | No | Toggle switch — off for the visual Expression Builder, on for the FQL code editor |
Visual Expression Builder (Expression Mode off):
The Expression Builder provides a drag-and-drop interface for constructing attribute-based conditions without writing code. The toolbar offers five buttons:
| Button | Description |
|---|---|
| Add Attribute | Opens a popover form to define an attribute condition (attribute type, attribute name, operator, value) |
| AND | Inserts a logical AND operator between conditions |
| OR | Inserts a logical OR operator between conditions |
| ( | Opens a parenthetical group for controlling evaluation order |
| ) | Closes a parenthetical group |

When you click Add Attribute, a popover appears with four fields:
| Field | Description |
|---|---|
| Attribute Type | The category of attribute (subject, resource, action, environment) |
| Attribute | The specific attribute name from the selected category |
| Operator | Comparison operator (==, !=, >, <, >=, <=, contains) |
| Value | The value to compare against |
Each expression item supports edit (click to reopen the popover) and remove (delete the item). Items can be reordered with drag-and-drop.
The Expression card below the toolbar displays the composed expression and validates it in real time. Validation checks for unbalanced parentheses, consecutive operators, and expressions that start or end with an operator.
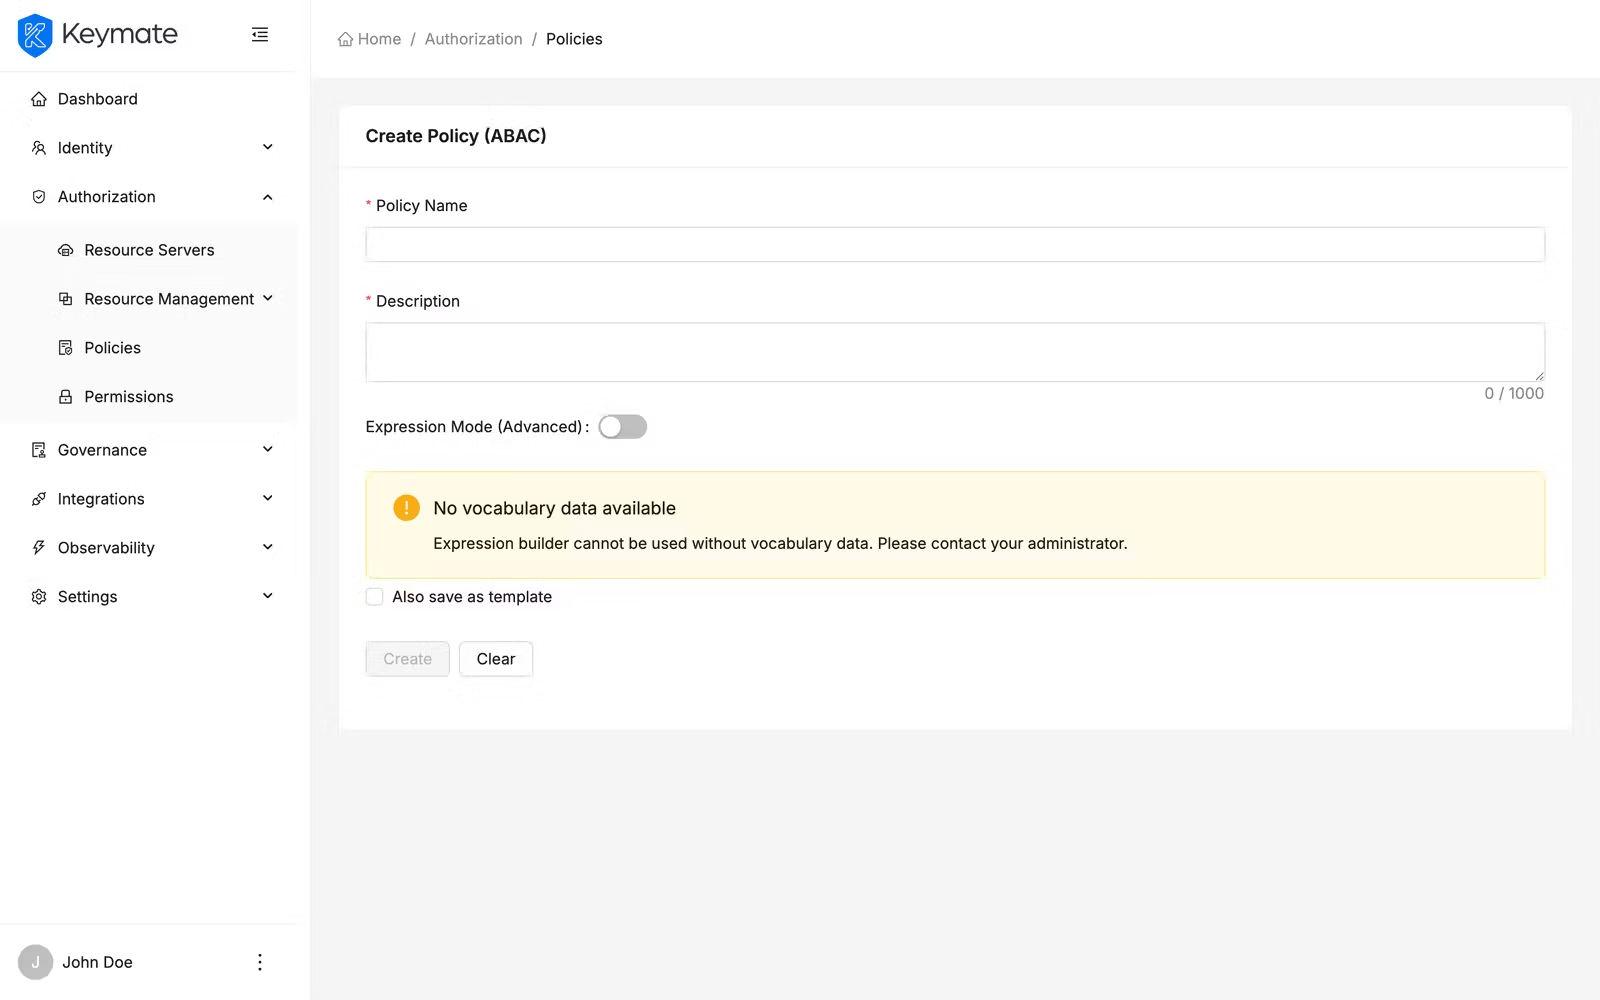
The Expression Builder requires a configured policy vocabulary. If no vocabulary data is available, a warning message appears prompting you to set up attribute definitions first.
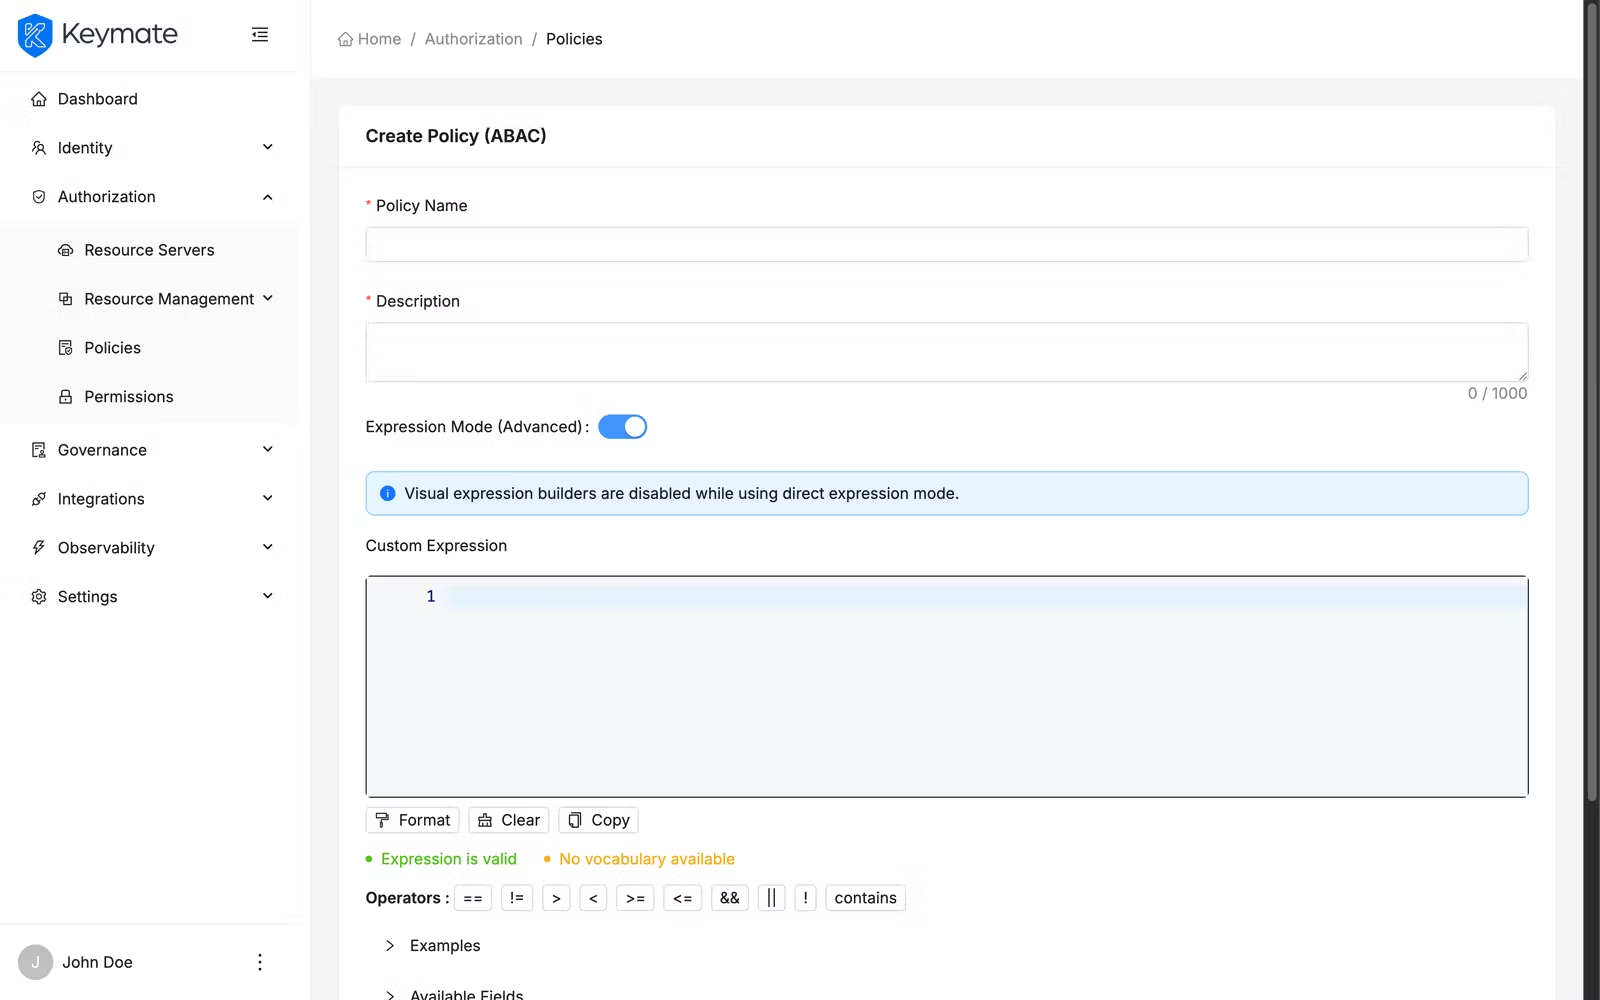
FQL Code Editor (Expression Mode on):
Toggle Expression Mode (Advanced) on to switch to the FQL (Fine-grained Query Language) editor — a code editor for writing expressions directly. An info banner confirms that expression mode is active and that visual expression builders are disabled.
2c. Create a ReBAC Policy
ReBAC is not listed in the Add Policy dropdown menu. To create a ReBAC policy, navigate directly to the ReBAC creation form via URL or through the policy type filter in the list view.
ReBAC policies evaluate access based on relationships between entities in the FGA authorization model. The ReBAC form connects a policy to a specific FGA model and relationship definition.
| Field | Required | Description |
|---|---|---|
| FGA Model | Yes | Select the FGA authorization model to evaluate against |
| Relation | Yes | The relationship type to check (options update dynamically based on the selected FGA model). This field is disabled until an FGA model is selected |
| Authorization ID | Auto | Read-only field auto-populated when you select an FGA model. Identifies the authorization model configuration used for evaluation |
Source section — defines where the requesting entity identifier comes from:
| Field | Required | Description |
|---|---|---|
| Source Schema Name | Yes | The entity type in the FGA model (for example, user, role, document, project) |
| Source Field | Yes | The field from the request context that provides the entity identifier (for example, token.sub, context.userId) |
Target section — defines where the target resource identifier comes from:
| Field | Required | Description |
|---|---|---|
| Target Schema Name | Yes | The target entity type in the FGA model |
| Target Field | Yes | The field from the request context that provides the target identifier |
Generic Context section — defines additional contextual parameters passed to the FGA check:
Each context entry consists of a Context Name (free text) and a Context Source Field (selected from available request context fields such as context.amount, resource.type, context.time, context.location). Click Add Context to add entries, and the delete button to remove them.
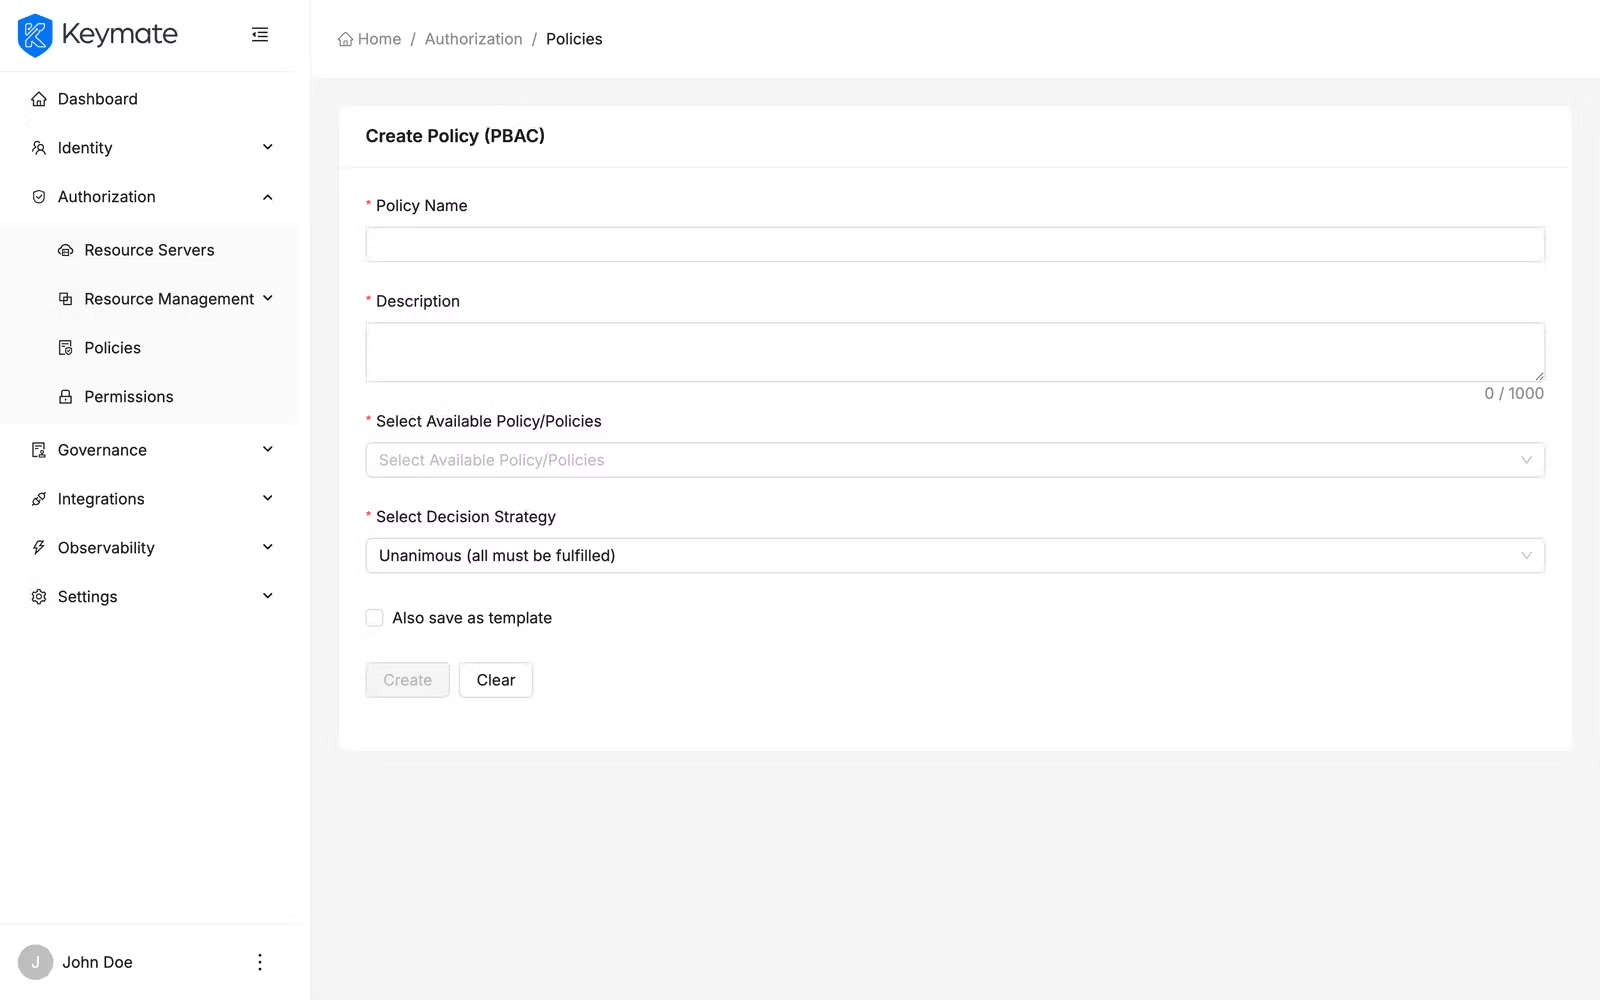
2d. Create a PBAC Policy
PBAC policies compose multiple existing policies into a single decision using a configurable decision strategy. This is the composite policy type — it references other policies rather than defining its own conditions.
| Field | Required | Description |
|---|---|---|
| Select Available Policy/Policies | Yes | Multi-select field with async search — search and select the policies to compose. Supports selecting multiple policies |
| Select Decision Strategy | Yes | How the composed policies are evaluated together |
The available decision strategies:
| Strategy | Description |
|---|---|
| Affirmative | Access is granted if at least one sub-policy permits it |
| Consensus | Access is granted if more sub-policies permit than deny |
| Unanimous | Access is granted only if all sub-policies permit it |
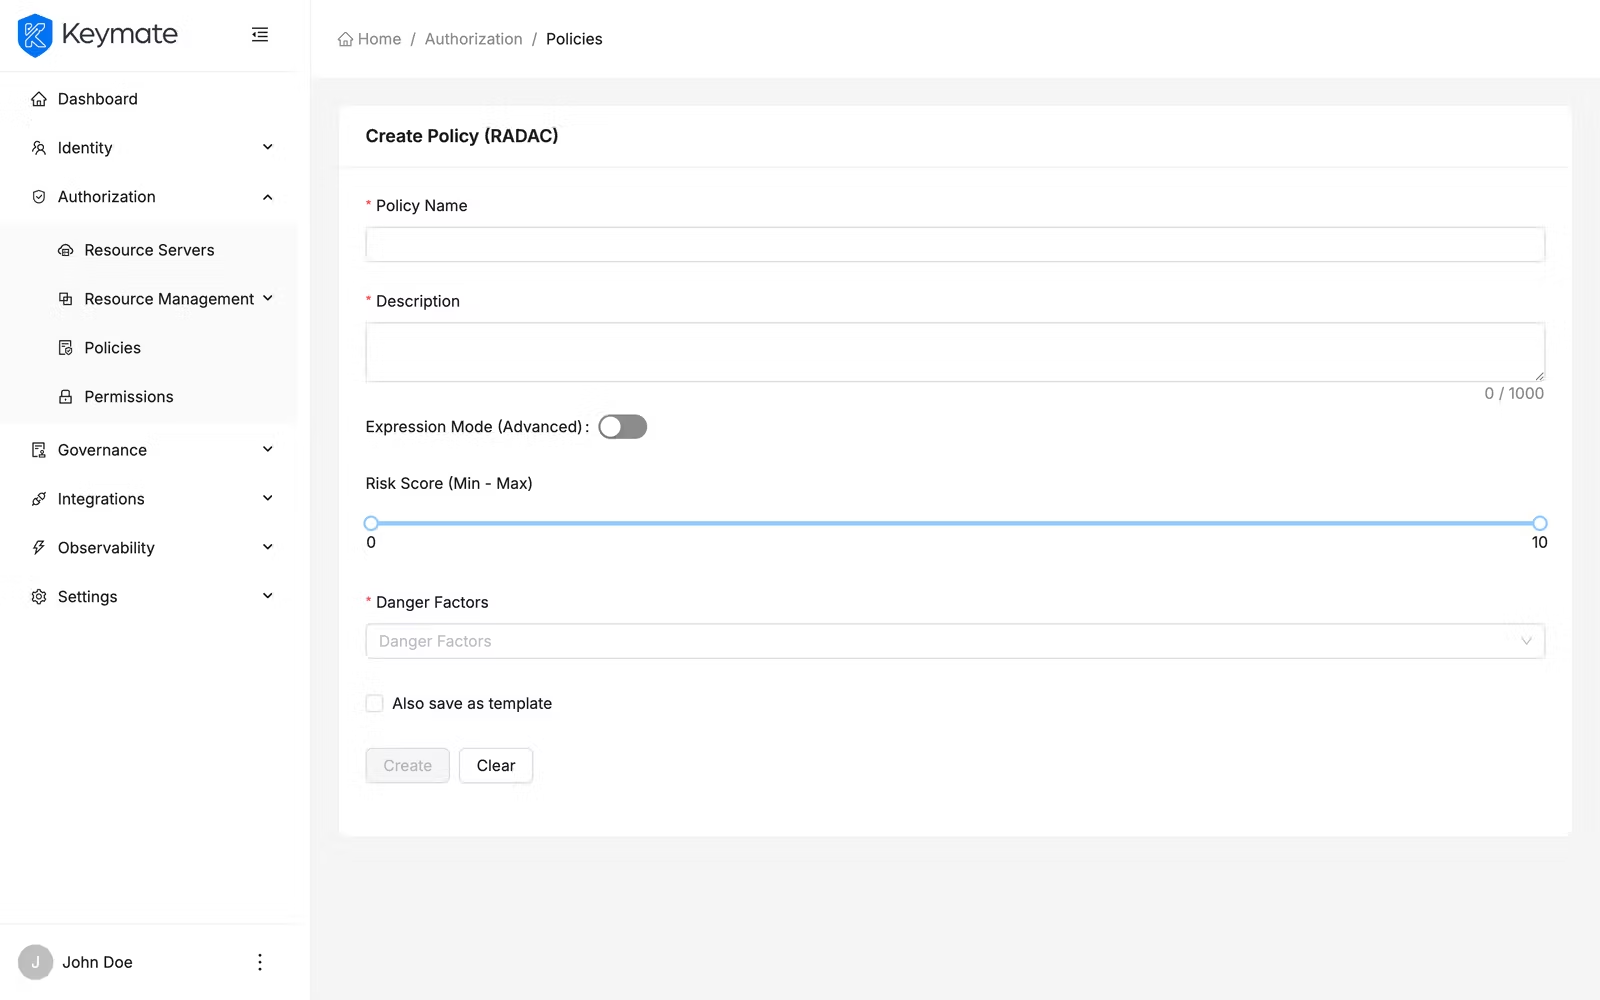
2e. Create a RADAC Policy
RADAC policies adjust access decisions based on real-time risk signals. Like ABAC, the RADAC form supports both a visual builder and an FQL expression mode.
| Field | Required | Description |
|---|---|---|
| Expression Mode (Advanced) | No | Toggle switch — off for the visual builder, on for the FQL code editor |
Visual builder (Expression Mode off):
| Field | Required | Description |
|---|---|---|
| Risk Score | No | A range slider (0–10) defining the minimum and maximum acceptable risk score |
| Danger Factors | No | Multi-select for risk factor types to evaluate |
Available danger factor options include:
| Factor | Description |
|---|---|
| IP_BLACKLISTED | Request originates from a blacklisted IP address |
| VPN_USAGE | Request is routed through a VPN |
| SUSPICIOUS_LOCATION | Request originates from an unusual geographic location |
FQL Code Editor (Expression Mode on):
Identical to the ABAC FQL editor — a code editor with syntax highlighting for writing risk evaluation expressions directly.
2f. Create a Dynamic Policy
Dynamic policies use JavaScript code to implement custom evaluation logic. Use this type when the built-in policy types do not cover your authorization requirements.
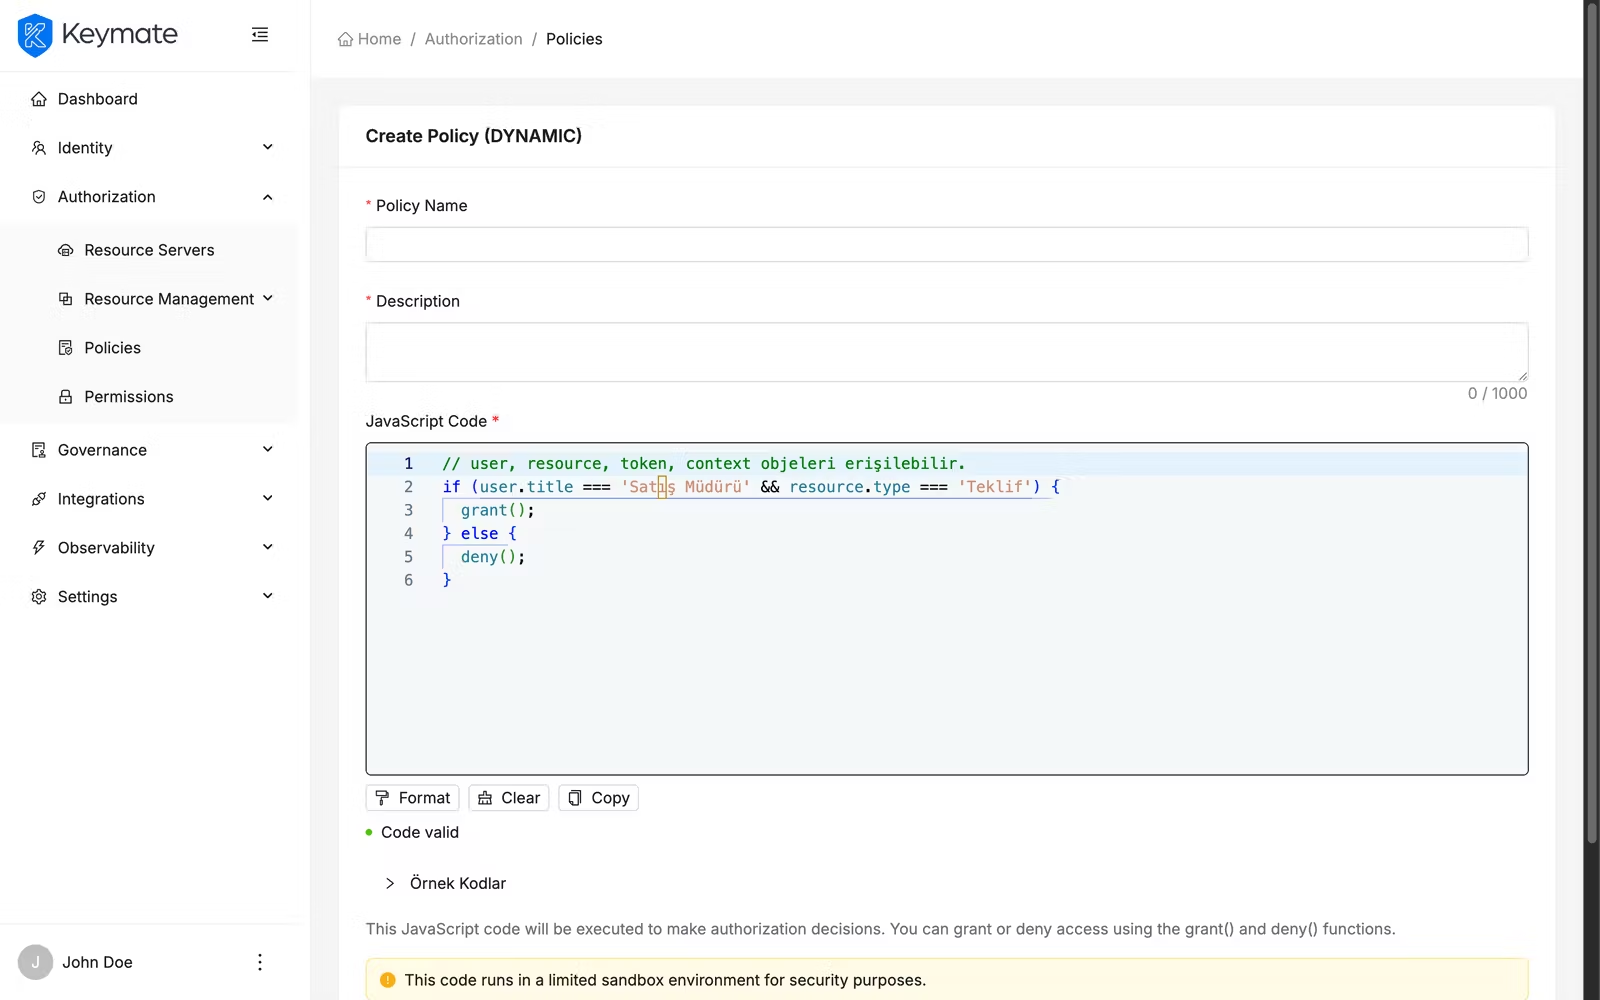
| Field | Required | Description |
|---|---|---|
| JavaScript Code | Yes | A code editor (300px height) for writing the evaluation logic |
The editor opens with a default script template that you can modify. Your script has access to the user, resource, token, and context objects and calls grant() or deny() to return the access decision.
Dynamic policies execute custom JavaScript code in a limited sandbox environment. Ensure your scripts are reviewed for security and performance before deploying to production.
3. Edit a Policy
You can edit an existing policy from the policy list page. Click the row action menu (three dots) on any policy row and select Update. This navigates to the policy edit form, which is pre-filled with the policy's current values.

The edit form presents the same fields as the creation form for that policy type. Modify the fields you need and click Update to save your changes. On success, a confirmation toast appears.
You can also open a policy for editing by clicking the policy Name link in the list table.
4. Assign Policies to Tenants and Clients
After creating a policy, you assign it to one or more tenants and clients to activate it. Policies are not enforced until they are assigned to at least one target.
From the policy list page, click the row action menu on a policy and select Assign. The Policy Assignment drawer opens from the right side.
The assignment drawer has two tabs:
| Tab | Description |
|---|---|
| Tenants | Lists available tenants for assignment |
| Clients | Lists available clients for assignment |
Each tab provides:
- A search field to filter by name or description
- A table with checkbox selection showing Name and Description
- Multi-select support for bulk assignment
Select the tenants or clients you want to assign the policy to and click Assign. On success, a toast confirms the number of successful assignments (for example, "3 item(s) assigned successfully").
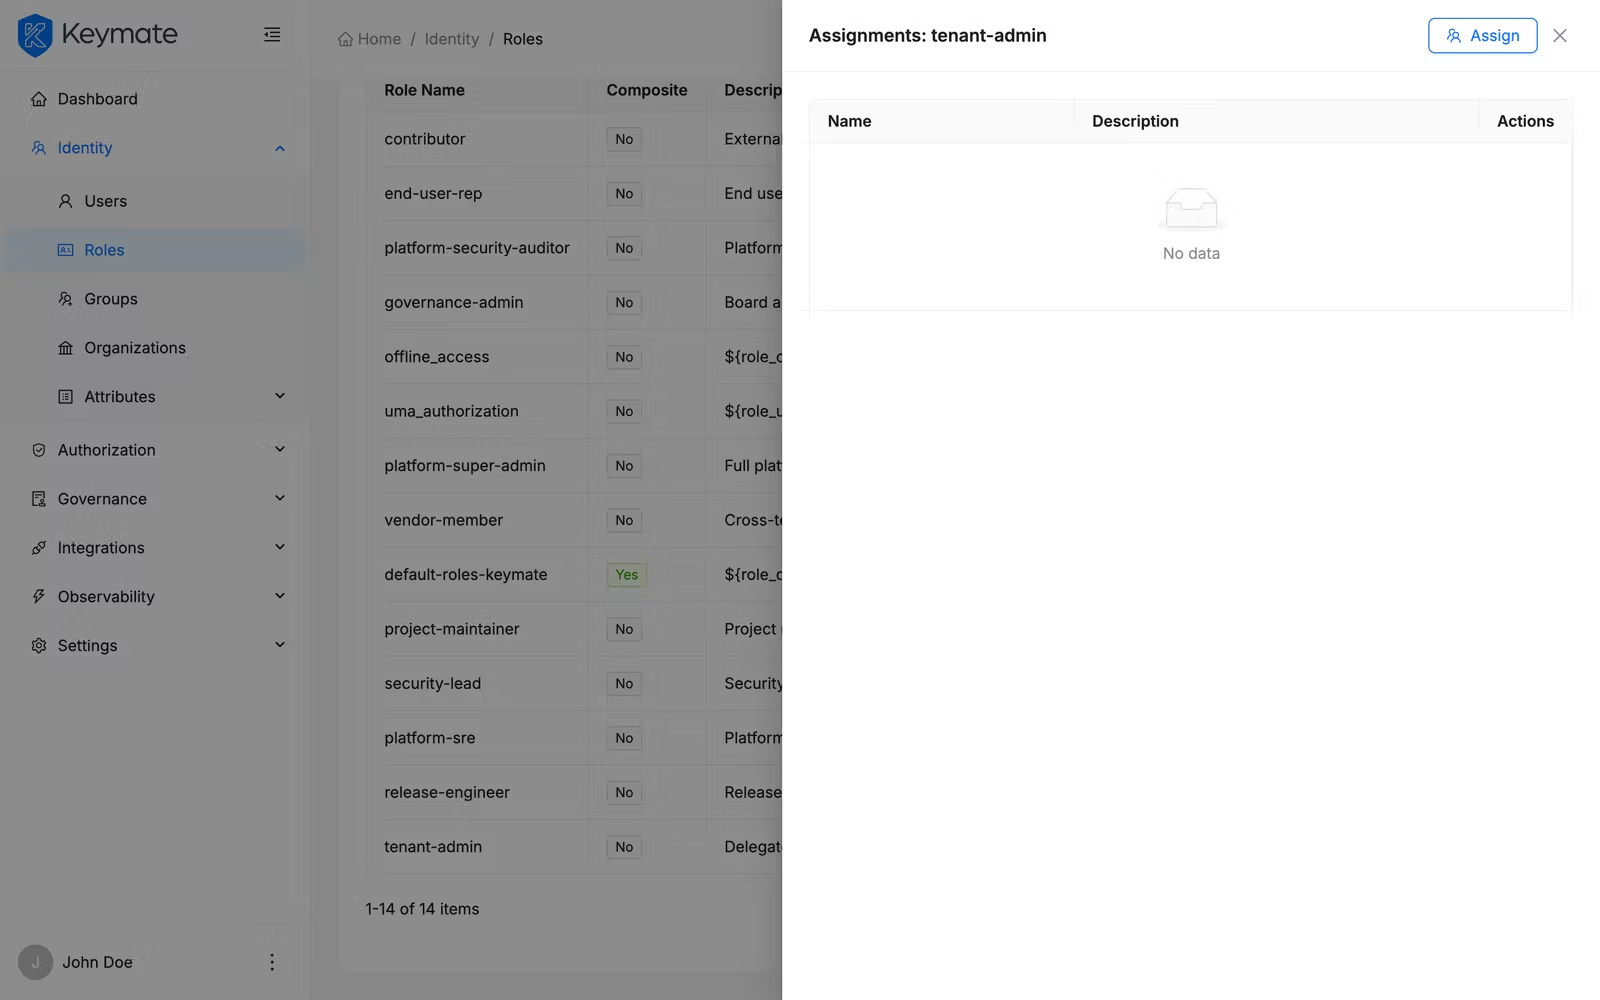
5. View Policy Assignments
To review where a policy is currently assigned, click the row action menu on a policy and select View Assignments. The Assignments drawer opens showing the current assignment state.

The assignments drawer has two tabs:
| Tab | Description |
|---|---|
| Tenants | Shows tenants with this policy assigned, including a count. Table columns: Name, Description, Actions |
| Clients | Shows clients with this policy assigned, including a count. Table columns: Name, Client ID, Realm, Description, Actions |
Each row has a delete button to unassign the policy from that tenant or client. Clicking delete opens a confirmation modal asking you to confirm the unassignment.
To assign additional targets from this view, click the Assign button at the top of the drawer, which opens the assignment drawer described in step 4.
6. Delete a Policy
You can delete policies individually or in bulk.
Single delete: Click the row action menu on a policy row and select Delete. A confirmation modal appears.
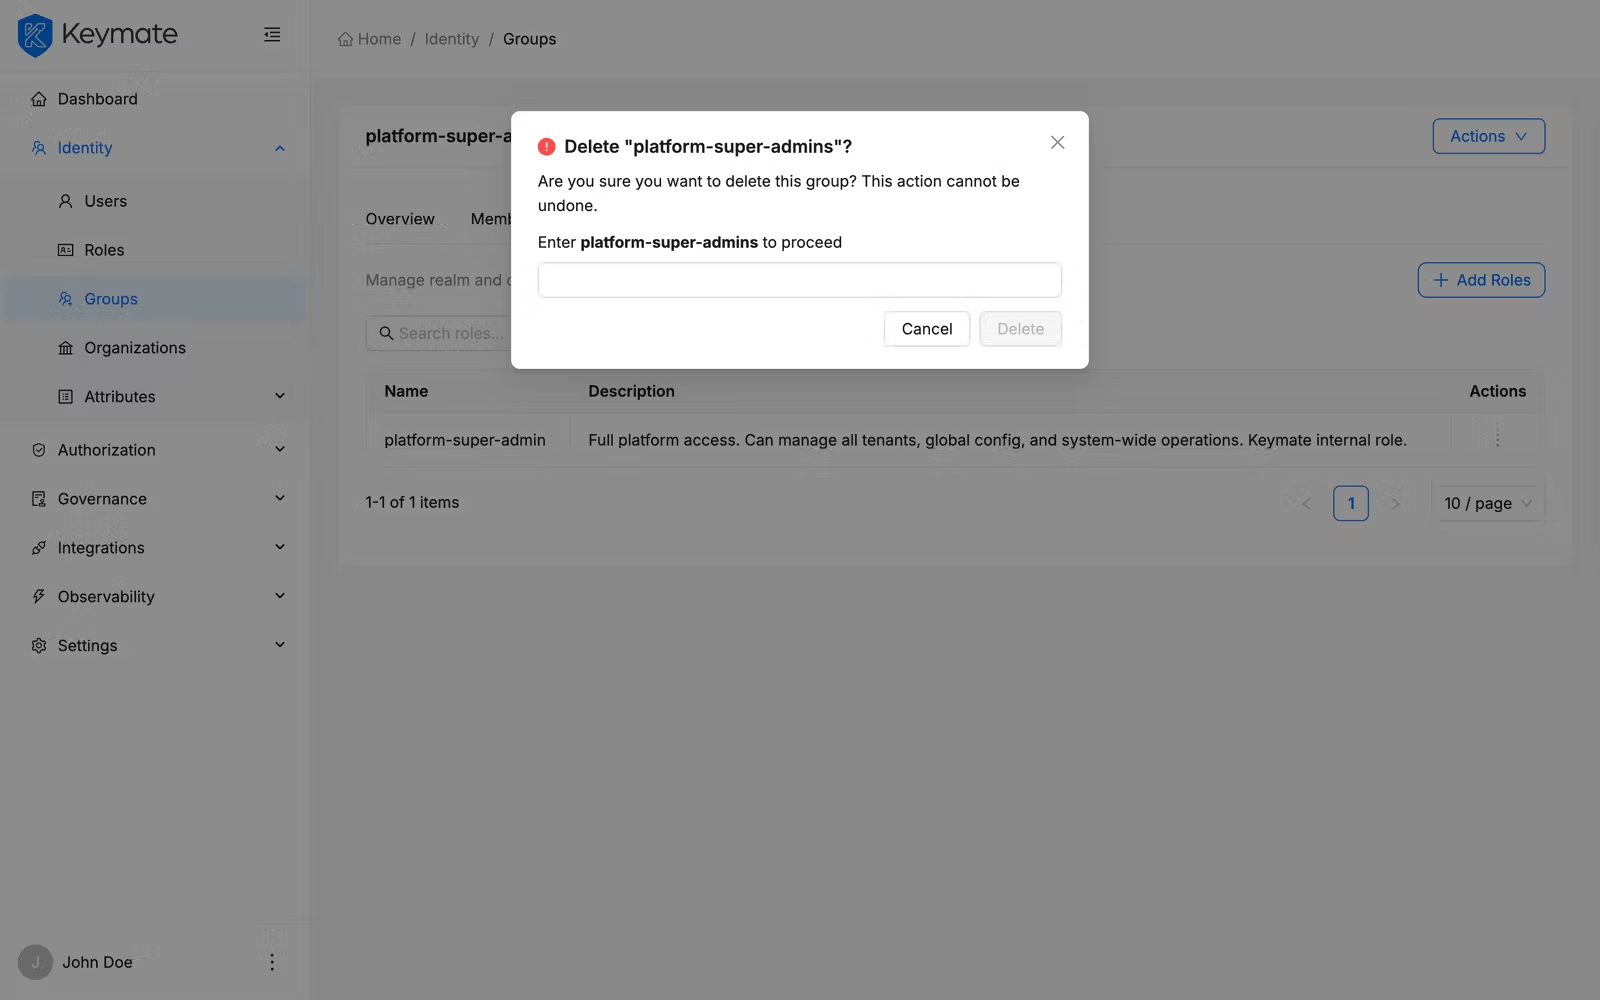
The modal displays the policy name and warns that "This policy and all its assignments will be permanently removed." You must type the exact policy name in the confirmation field to proceed. Click the delete button to confirm.
Bulk delete: Select multiple policies using the row checkboxes, then click the Delete button in the bulk action bar that appears above the table. A confirmation modal shows the count of policies selected for deletion and requires you to type DELETE to confirm.
Policy deletion is irreversible. All existing assignments for the deleted policy are removed. Ensure the policy is not actively used before deleting it.
7. Save a Policy as a Template
There are two ways to save a policy as a template:
- During creation: Enable the Also save as template checkbox at the bottom of the creation form before clicking Create. This saves the policy definition as a reusable template in addition to creating the policy itself.
- From the policy list: Click the row action menu on an existing policy and select Save as Template to convert it into a reusable template.
Policy templates are managed under Governance > Templates > Policy Templates and can be instantiated to create new policies with pre-configured settings.
Keycloak Policies
Keycloak policies operate at the resource server level and control access to resources and scopes managed by Keycloak's authorization services. Unlike authorization policies, Keycloak policies are scoped to a specific resource server (Keycloak client) rather than being assigned to tenants.
8. Navigate to the Keycloak Policy List
Open the Policy Management page. Before you can view or create policies, you must select a Resource Server from the dropdown at the top of the page. A hint message "Please select a resource server to view policies" appears until a resource server is selected.
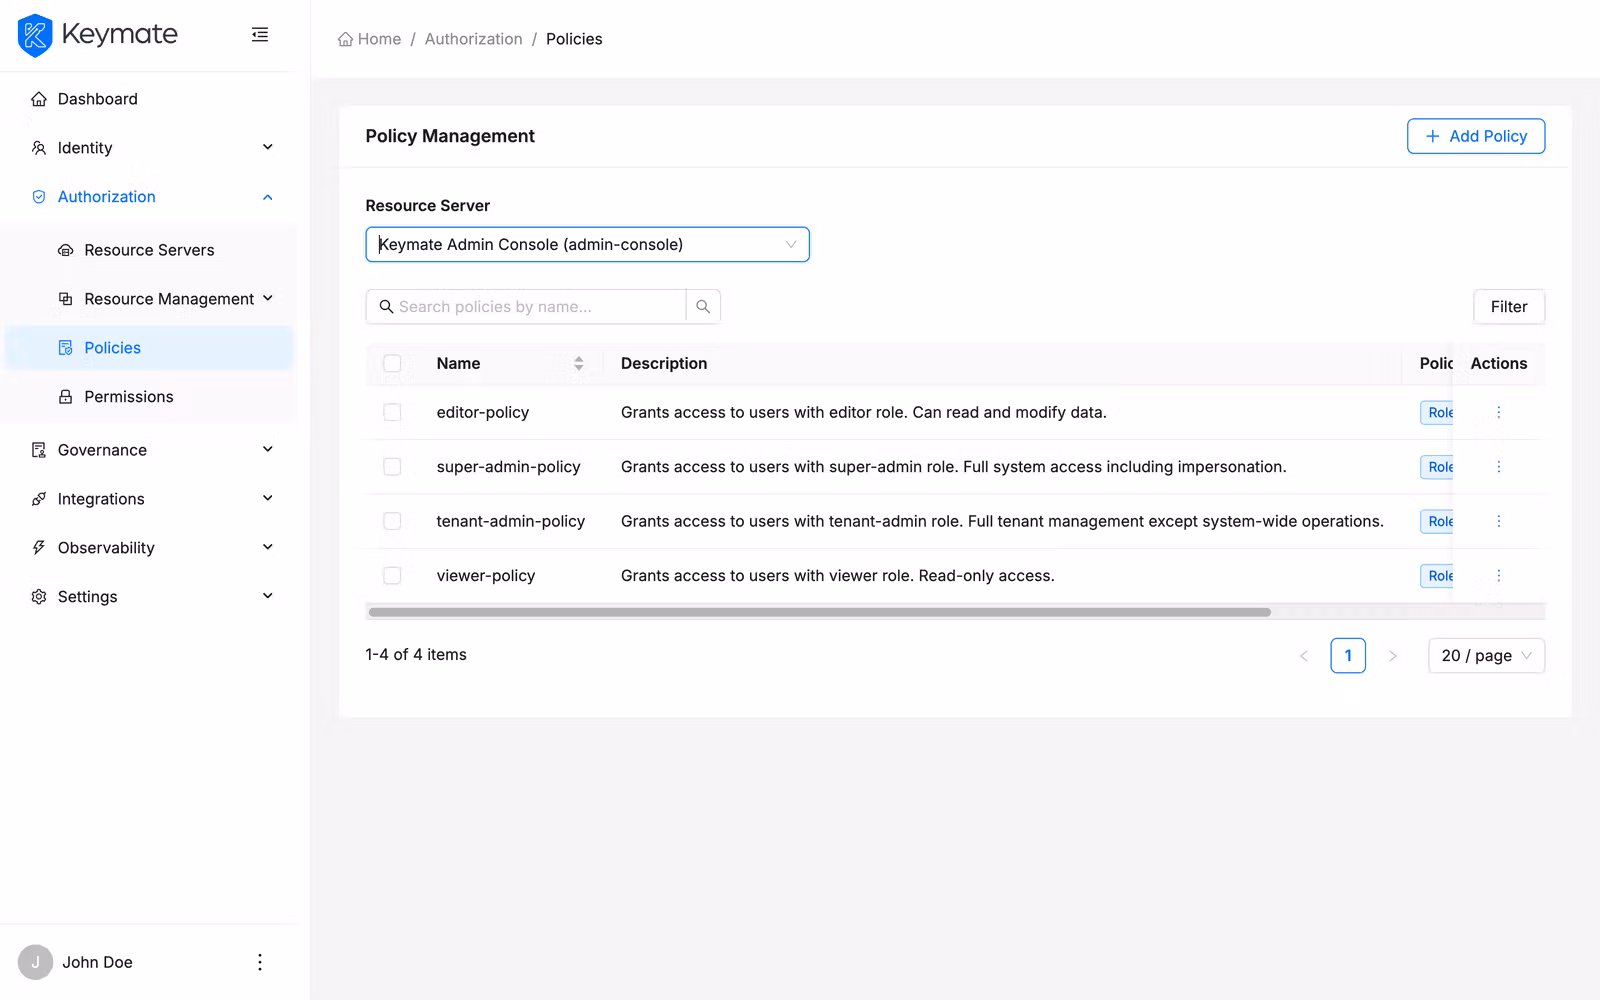
Select a resource server from the dropdown (use the search field to find it by name). Once a resource server is selected, the policy table appears below with the following columns:
| Column | Description |
|---|---|
| Name | Policy name (links to the policy detail page) |
| Description | Policy description text |
| Type | Policy type displayed as a color-coded badge |
| Logic | Evaluation logic — Positive (green) or Negative (red) |
| Decision Strategy | Strategy label — Affirmative, Unanimous, or Consensus |
Use the search bar to filter policies by name. Click Filters to filter by Type across all nine Keycloak policy types.
Each row provides two actions in the action menu:
- View — opens the policy detail page
- Delete — opens a delete confirmation modal
Click Add Policy in the top-right corner to start the creation wizard.
Select multiple rows using the checkboxes to enable Delete Selected for bulk deletion.
9. Create a Keycloak Policy
The Keycloak policy creation uses a three-step wizard. Click Add Policy from the policy list to open it.
Step 1 — Basic Information
The first step collects general policy properties.
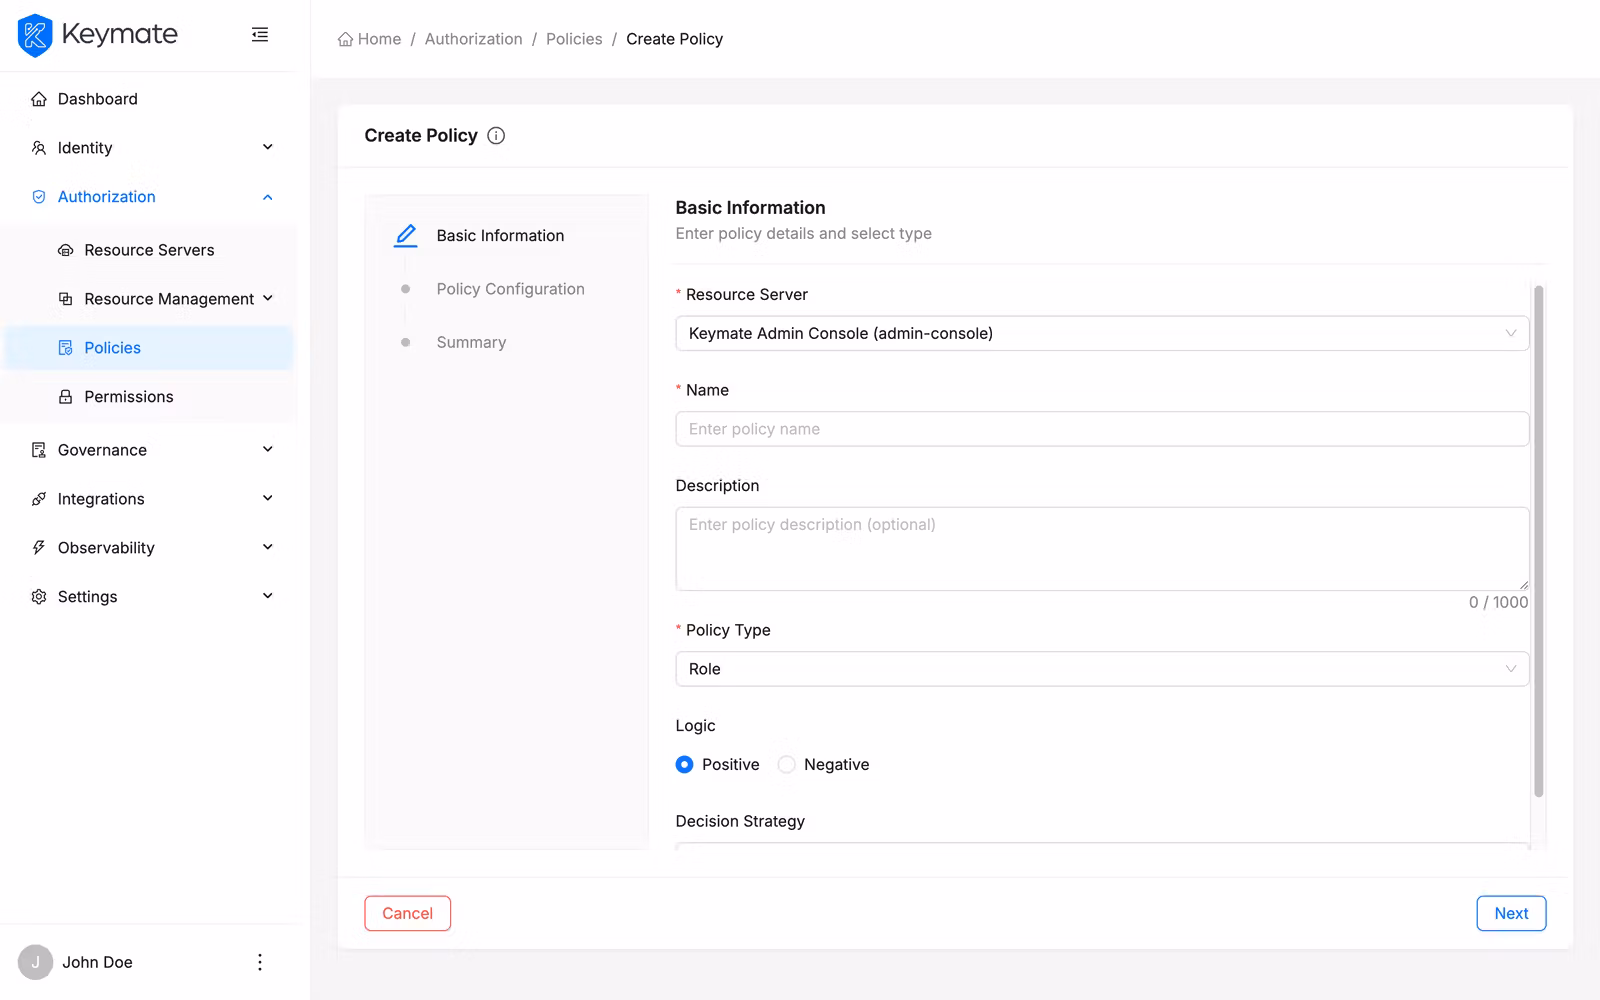
| Field | Required | Description |
|---|---|---|
| Resource Server | Yes | The Keycloak client this policy belongs to (pre-selected if you came from the list page, locked in edit mode) |
| Name | Yes | A unique name for the policy |
| Description | No | Free-text description (maximum 2000 characters, character count displayed) |
| Policy Type | Yes | Card-based selector — choose the type of policy to create (see below) |
| Logic | Yes | Radio group — Positive (grant when conditions match) or Negative (deny when conditions match) |
| Decision Strategy | Yes | Radio group with detailed descriptions (see below) |
Policy Type card selector:
The type selector displays two columns of cards side by side:
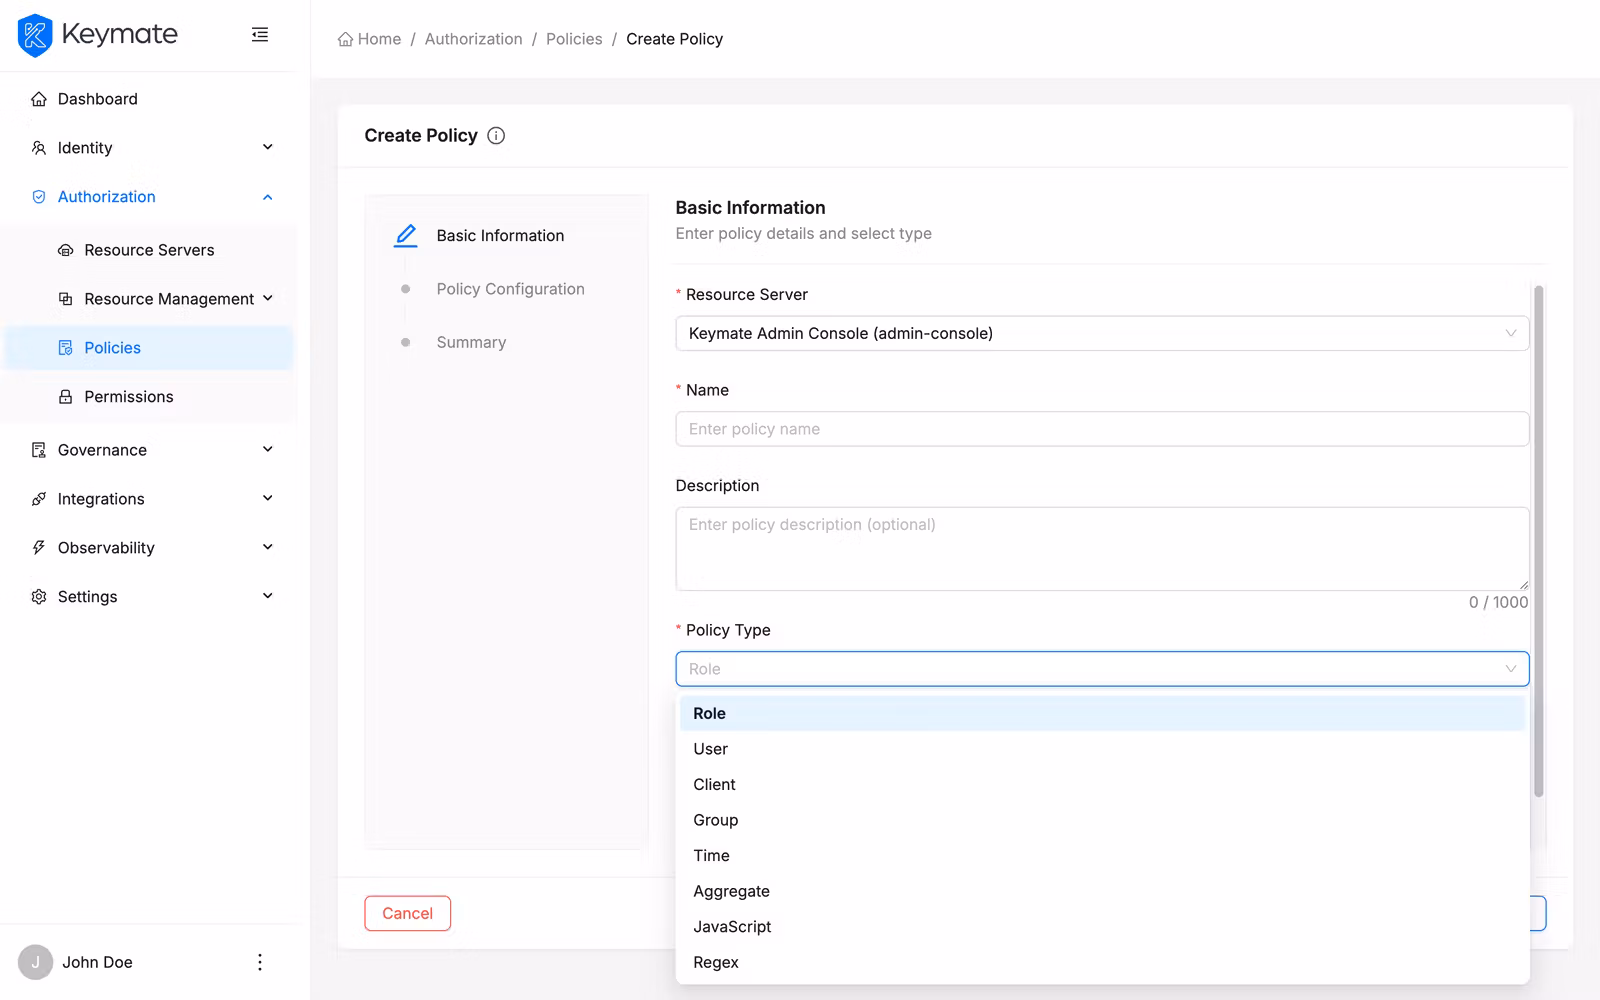
| Column | Types | Behavior |
|---|---|---|
| Keycloak Policies (left) | Role, User, Client, Group, Time, Aggregate, JavaScript, Regex, Client Scope | Selectable — click a card to choose that type |
| Keymate Policies (right) | RBAC, ABAC, ReBAC, PBAC, RADAC, Dynamic | Visible but not selectable — these types are under development |
Each card shows the type name in bold and a short description below it. The selected card displays a blue border, blue background, and a checkmark icon in the top-right corner.
| Keycloak Policy Type | Description |
|---|---|
| Role | Grants access based on realm or client roles |
| User | Grants access to specific users |
| Client | Grants access to specific clients |
| Group | Grants access based on group membership |
| Time | Restricts access by time conditions |
| Aggregate | Composes multiple policies together |
| JavaScript | Custom JavaScript-based policy |
| Regex | Matches claim values by regex pattern |
| Client Scope | Grants access based on client scopes |
Decision Strategy radio group:
The decision strategy is presented as a vertical radio group where each option shows a bold label, an info tooltip icon with a detailed explanation, and a short description:
| Strategy | Short Description |
|---|---|
| Affirmative | At least one must grant |
| Unanimous | All must grant |
| Consensus | Majority must grant |
Step 2 — Policy Configuration
The second step presents type-specific fields based on the policy type selected in step 1. Click Next from step 1 to proceed.
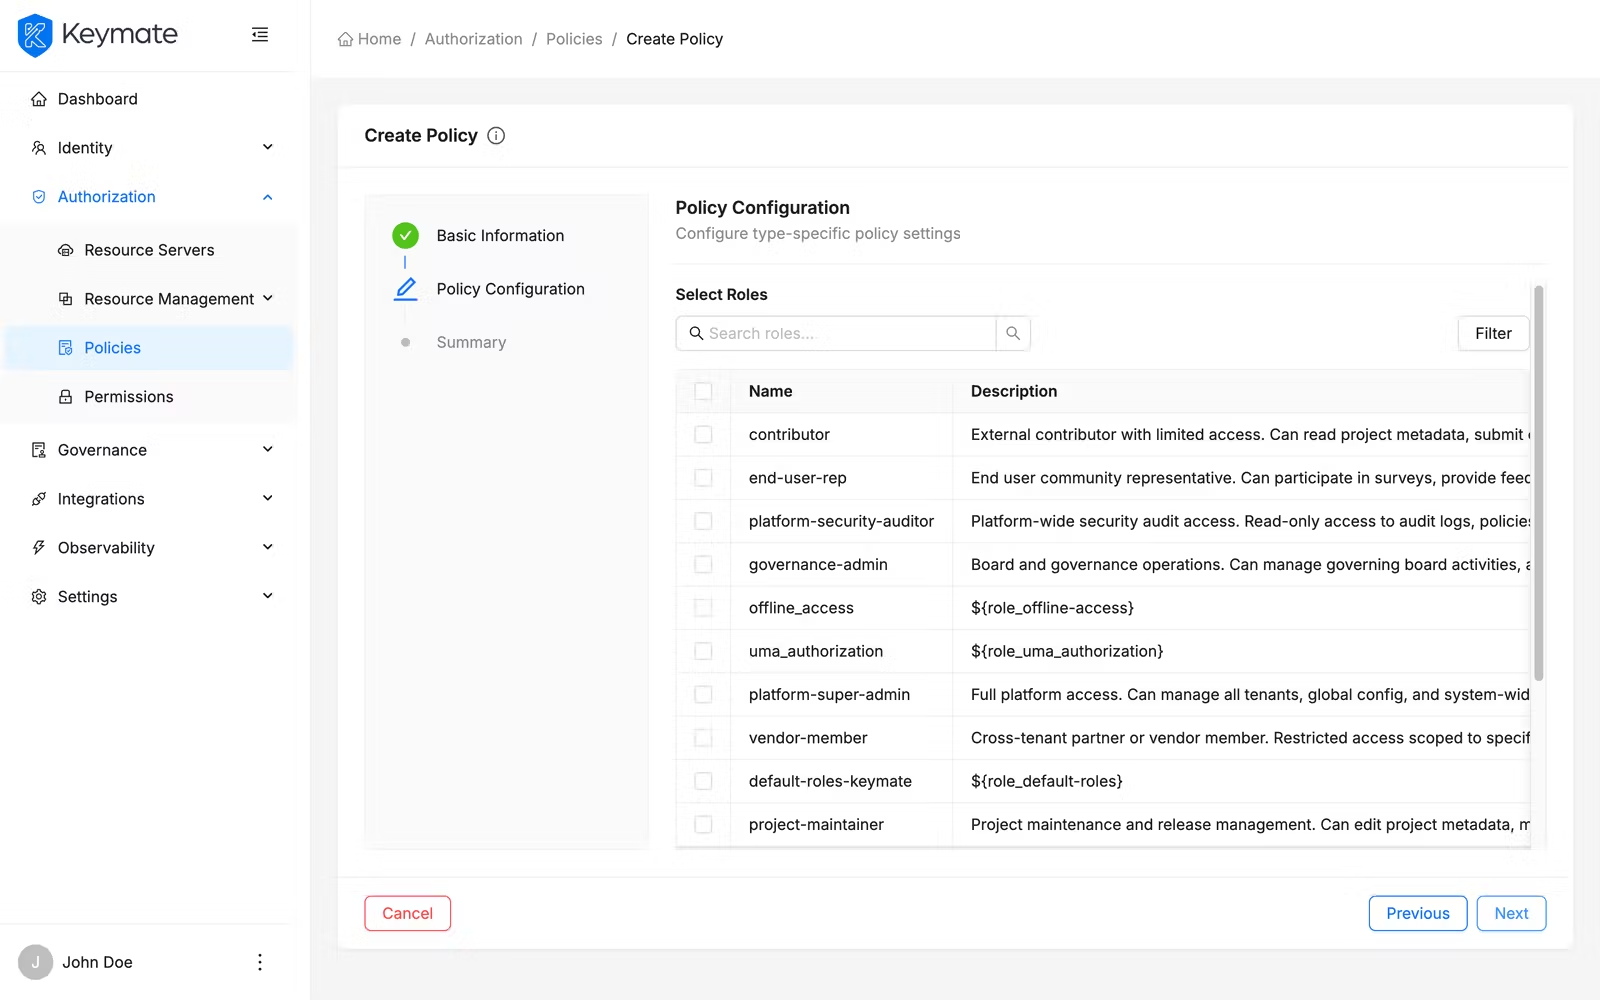
| Policy Type | Configuration Fields |
|---|---|
| Role | Role picker with multi-select. Selected roles table shows Name (with source: Realm or Client), Required checkbox, and a delete button per row |
| User | User list with search, pagination, and multi-select. Preserves selections across pages |
| Client | Async search and multi-select dropdown for selecting clients |
| Group | Groups Claim text field, group list picker with multi-select. Selected groups table shows Group Path, Extend to Children checkbox, and a delete button per row |
| Time | Date and time constraint fields: Not Before, Not On Or After, Hour Start/End, Minute Start/End, Day of Month Start/End, Month Start/End, Year Start/End |
| Aggregate | Policy search and multi-select for composing existing policies |
| JavaScript | code editor with syntax highlighting (350px height) |
| Regex | Target Claim text field, Regex Pattern text field, Target Context Attributes toggle switch |
| Client Scope | Free-form tag input for entering client scope IDs. Selected scopes appear in a table with Client Scope ID, Required checkbox, and a delete button per row |
The JavaScript policy editor uses a code editor with syntax highlighting, bracket matching, and intelligent code suggestions for a productive scripting experience.
Step 3 — Summary
The third step presents a read-only review of all configuration before submission. Click Next from step 2 to proceed.
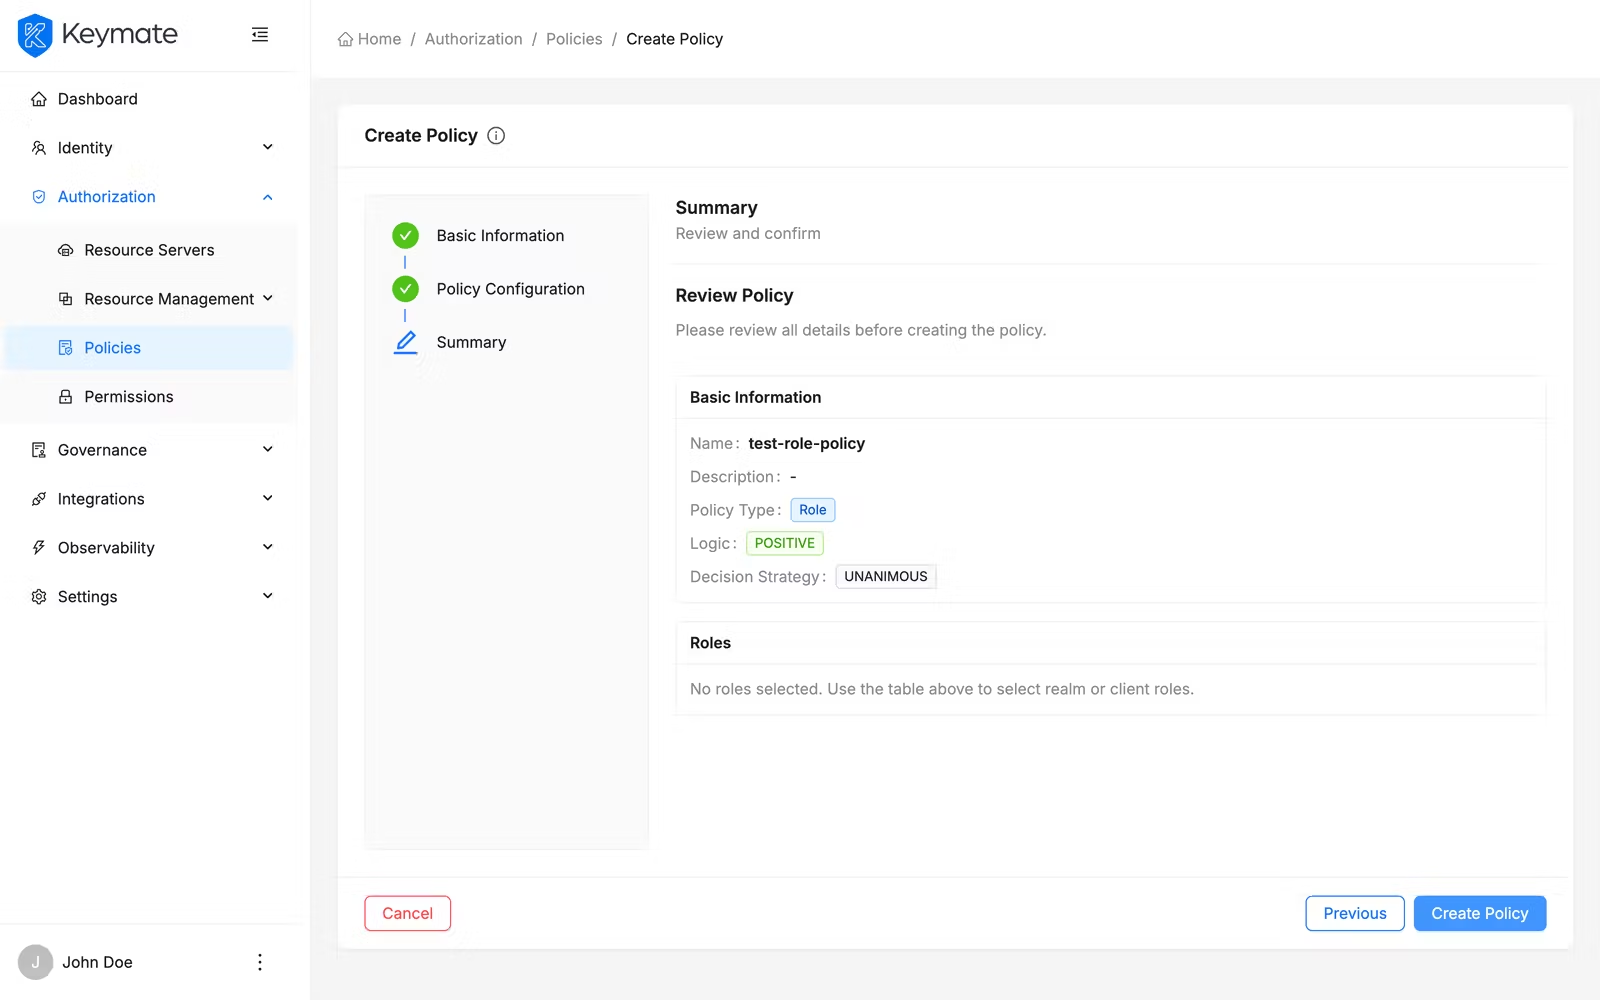
The summary page shows two cards:
- Basic Information — displays the policy name, description, type (as a color-coded tag), logic, and decision strategy
- Type-Specific Configuration — displays the selected items as color-coded tags (for example, blue tags for roles, green for users, purple for groups), with status badges like (Required) or (Optional) where applicable. For JavaScript policies, a truncated code preview is shown. For Time policies, the full date and time constraints are displayed in a table
Review all details and click Finish to finalize the policy. Click Previous to return to a previous step if you need to make changes. Click Exit to leave the wizard and return to the policy list without creating the policy.
10. View Keycloak Policy Details
From the policy list, click a policy Name to open its detail page. The detail page displays the policy name as the title and shows all configuration on the Overview tab.
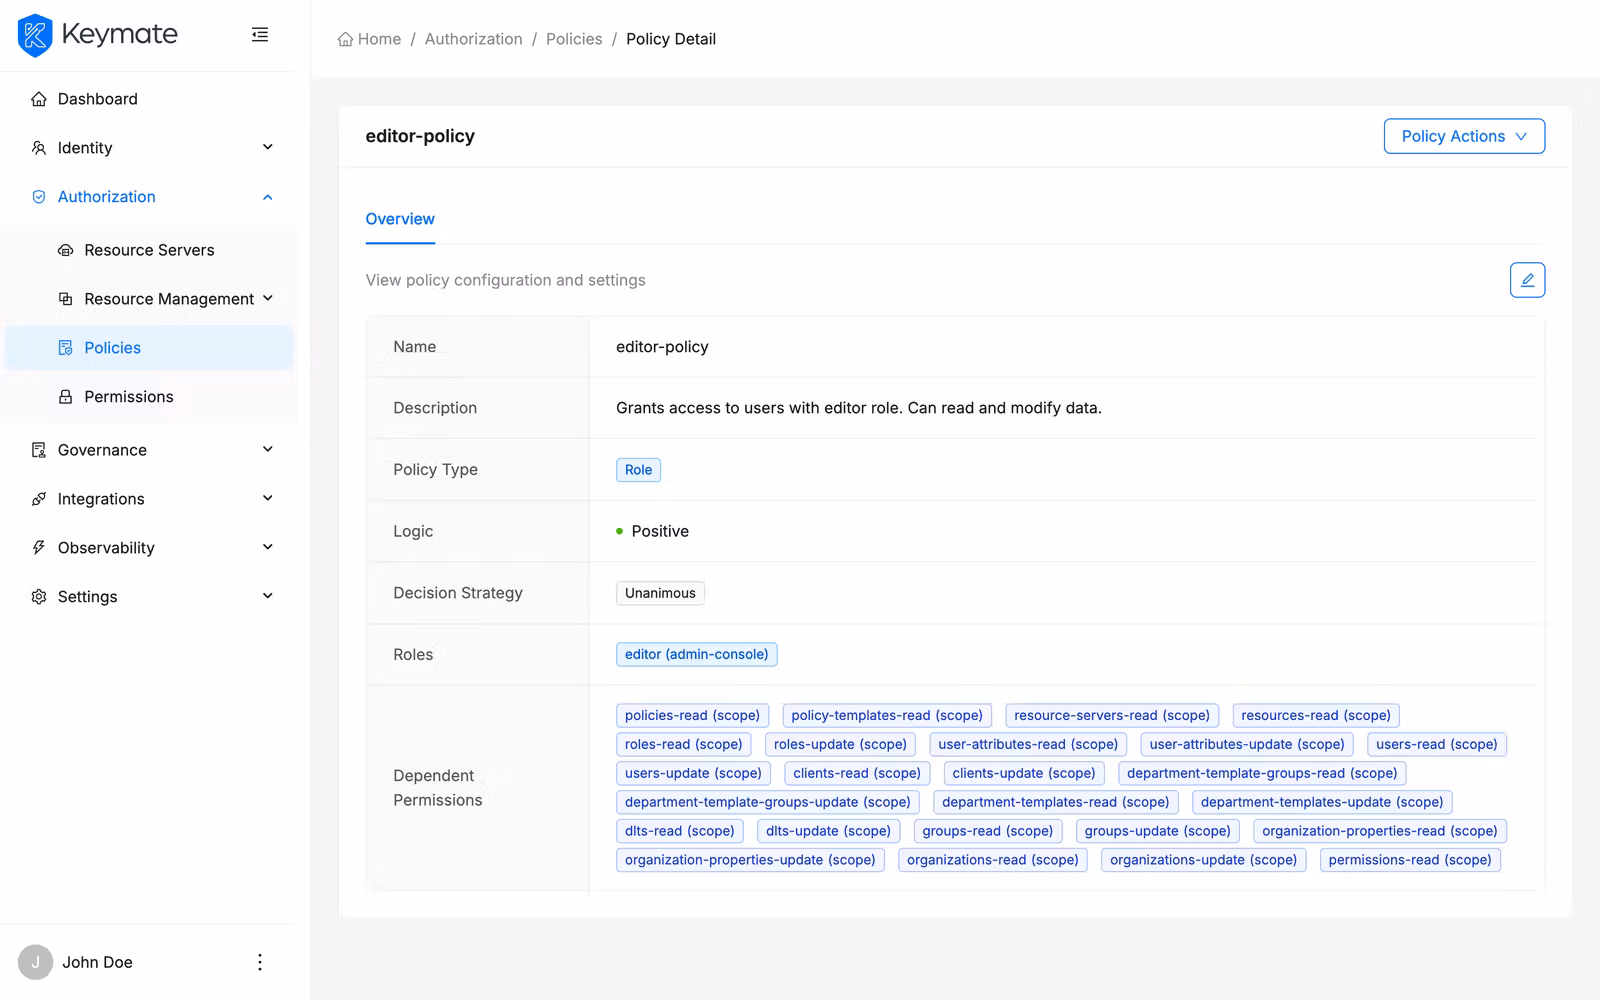
The overview tab presents policy properties in a two-column description layout:
- Name, Description, Type (color-coded badge), Logic (green for Positive, red for Negative), Decision Strategy
- Type-specific fields (roles, users, groups, time constraints, code, etc.) displayed with appropriate formatting
- Associated Policies — other policies linked to this one (if any), displayed as purple tags
- Dependent Policies — policies that reference this policy (if any), displayed as blue tags
The detail page header provides two action buttons: Edit (pencil icon) and Delete (trash icon).
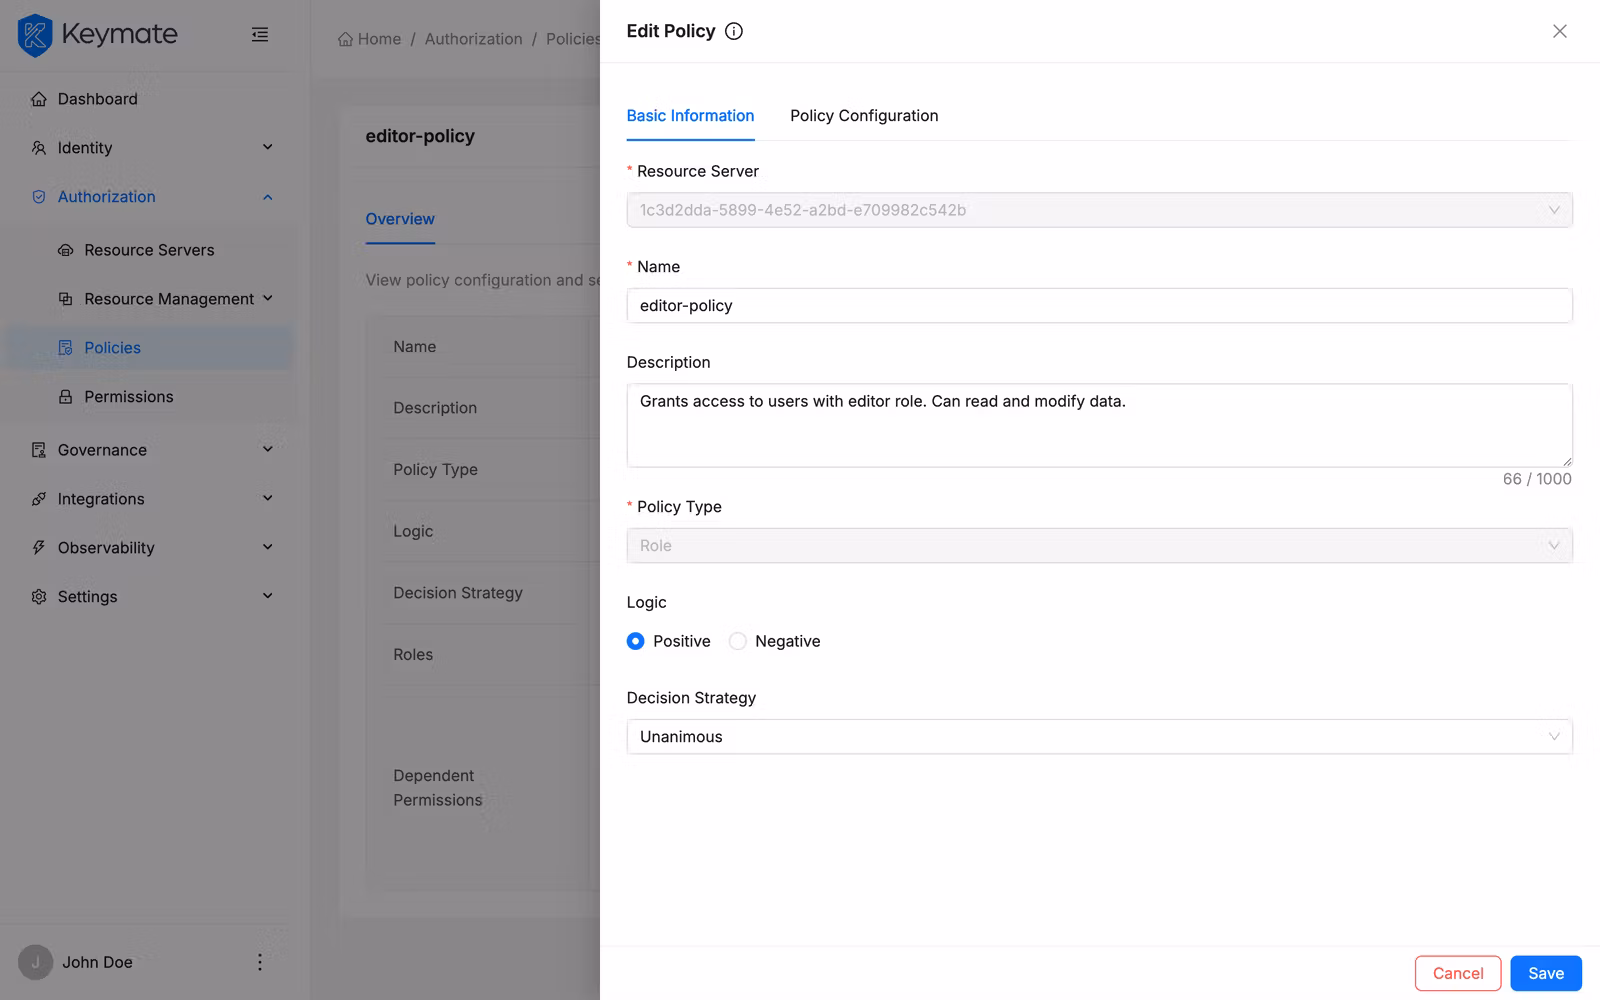
11. Edit a Keycloak Policy
From the policy detail page, click the Edit button. An edit drawer opens from the right side with two tabs:
| Tab | Description |
|---|---|
| Basic Information | General properties — Name, Description, Type (locked), Logic, Decision Strategy |
| Policy Configuration | Type-specific fields matching the wizard step 2 |
The Policy Type card selector is visible in the Basic Information tab but locked in edit mode — you cannot change a policy's type after creation.
Modify the fields you need and click Save. On success, a confirmation toast appears and the detail page refreshes.
12. Delete Keycloak Policies
You can delete Keycloak policies individually or in bulk.
Single delete: From the policy detail page, click the Delete button (trash icon) in the header. Alternatively, from the policy list, click the row action menu and select Delete. A confirmation modal appears asking "Are you sure you want to delete this policy? This action cannot be undone."
Bulk delete: Select multiple policies using the row checkboxes, then click Delete Selected in the bulk action bar. A confirmation modal shows the count of policies to be deleted and asks you to confirm.
Deleting a Keycloak policy removes it from the resource server. Any permissions that reference this policy lose their policy association. Verify that the policy is not in active use before deletion.
Validation Scenario
Scenario
Create an RBAC policy named Acme Editor Access, assign the editor role, assign the policy to a tenant named Acme Corp, and verify the assignment appears in the assignments view.
Expected Result
The policy is created, visible in the policy list with type RBAC, and the Acme Corp tenant appears in the policy's tenant assignments tab.
How to Verify
- UI evidence: Navigate to the Authorization Policies page, confirm the policy row shows the name Acme Editor Access with type RBAC. Open the row action menu and click View Assignments — verify that Acme Corp appears in the Tenants tab.
- API evidence: Query the authorization policies endpoint to confirm the policy exists with the expected name and type.
- Logs / traces: Check the Admin Console browser console for successful mutation responses with HTTP 200/201 status codes.
- Audit evidence: Review the audit log for policy creation and assignment events.
Troubleshooting
Authorization policies:
- Add Policy button is not visible — Your account lacks the Create scope on the Policies resource. Contact your platform administrator to assign the required permission.
- Assign option is disabled — Your account lacks the Update scope on the Policies resource. Assignment operations require update permissions.
- Expression Builder shows "no vocabulary data" warning — The policy vocabulary has not been configured. Set up attribute definitions before creating ABAC policies.
- ReBAC Relation field is disabled — Select an FGA Model first. The relation options are populated dynamically based on the selected model.
- PBAC sub-policy search returns no results — Only existing authorization policies can be composed. Create the individual policies before creating a composite PBAC policy.
- Delete button is not visible — Your account lacks the Delete scope on the Policies resource.
- Delete confirmation fails — The name you typed must match the policy name exactly, including capitalization.
Keycloak policies:
- Policy table is not visible — You must select a Resource Server from the dropdown before the policy list appears. If no resource servers are listed, configure one first.
- Add Policy button is not visible — Your account lacks the required permissions for the selected resource server.
- Keymate policy type cards are not clickable — The six Keymate policy types (RBAC, ABAC, ReBAC, PBAC, RADAC, Dynamic) shown in the right column of the type selector are under development and not yet available for creation.
- Policy Type is locked in the edit drawer — The policy type cannot be changed after creation. To use a different type, create a new policy and delete the old one.
- JavaScript editor is empty or unresponsive — The code editor requires the page to fully load. Refresh the page if the editor does not initialize.
Next Steps
After creating and assigning policies, you typically:
- Simulate authorization decisions to verify your policies behave as expected
- Review decision traces to debug policy evaluation results
- Configure policy versioning for change tracking and promotion workflows
- Manage permissions to connect policies with resource-level access controls
Related Docs
Admin Console Overview
Introduction to the Admin Console and its core workflows
Authorization Models
Understand RBAC, ABAC, ReBAC, and PBAC concepts
Policy Model
How policies are structured, authored, and governed
Permission Management
Connect policies with resource-level access controls
Tenant Management
Create and manage tenants where policies are assigned
Resource Management
Manage resource servers and scopes for Keycloak policies