Tenant Management
Tenant management in the Admin Console lets you create, view, edit, and delete tenants — the top-level isolation boundaries in Keymate's multi-tenant architecture. Each tenant encapsulates its own users, organizations, roles, policies, clients, and resource servers.
This guide walks through the full tenant lifecycle using the Admin Console UI.
Goal
Create and manage tenants through the Admin Console. By the end of this guide you will know how to browse existing tenants, create a new tenant with domains, view tenant details across eight configuration tabs, edit tenant properties, and delete a tenant with full awareness of cascading consequences.
Audience
Platform engineers, operators, and architects who need to provision and manage tenant environments.
Prerequisites
- Access to a running Admin Console instance
- Your account has the required permissions for the operations you need to perform:
- Read scope on the Tenants resource — to view and list tenants
- Create scope on the Tenants resource — to create new tenants
- Update scope on the Tenants resource — to edit tenant properties
- Delete scope on the Tenants resource — to remove tenants
The Admin Console enforces permission gates on every action. Buttons and menu items for operations you lack permissions for are hidden automatically.
Before You Start
- Plan your tenant naming conventions before creating tenants. The tenant Name is displayed throughout the Admin Console and cannot be changed without an update operation.
- Decide which domains to associate with each tenant. Domains help identify the tenant's web presence and can be added or removed at any time.
- Understand that deleting a tenant is a destructive, irreversible action that cascades to all associated resources.
Worked Example
Throughout this guide, we use a fictional tenant named Acme Corp with the domain acme.example.com. You can replace these values with your own tenant details.
Steps
1. Navigate to the Tenant List
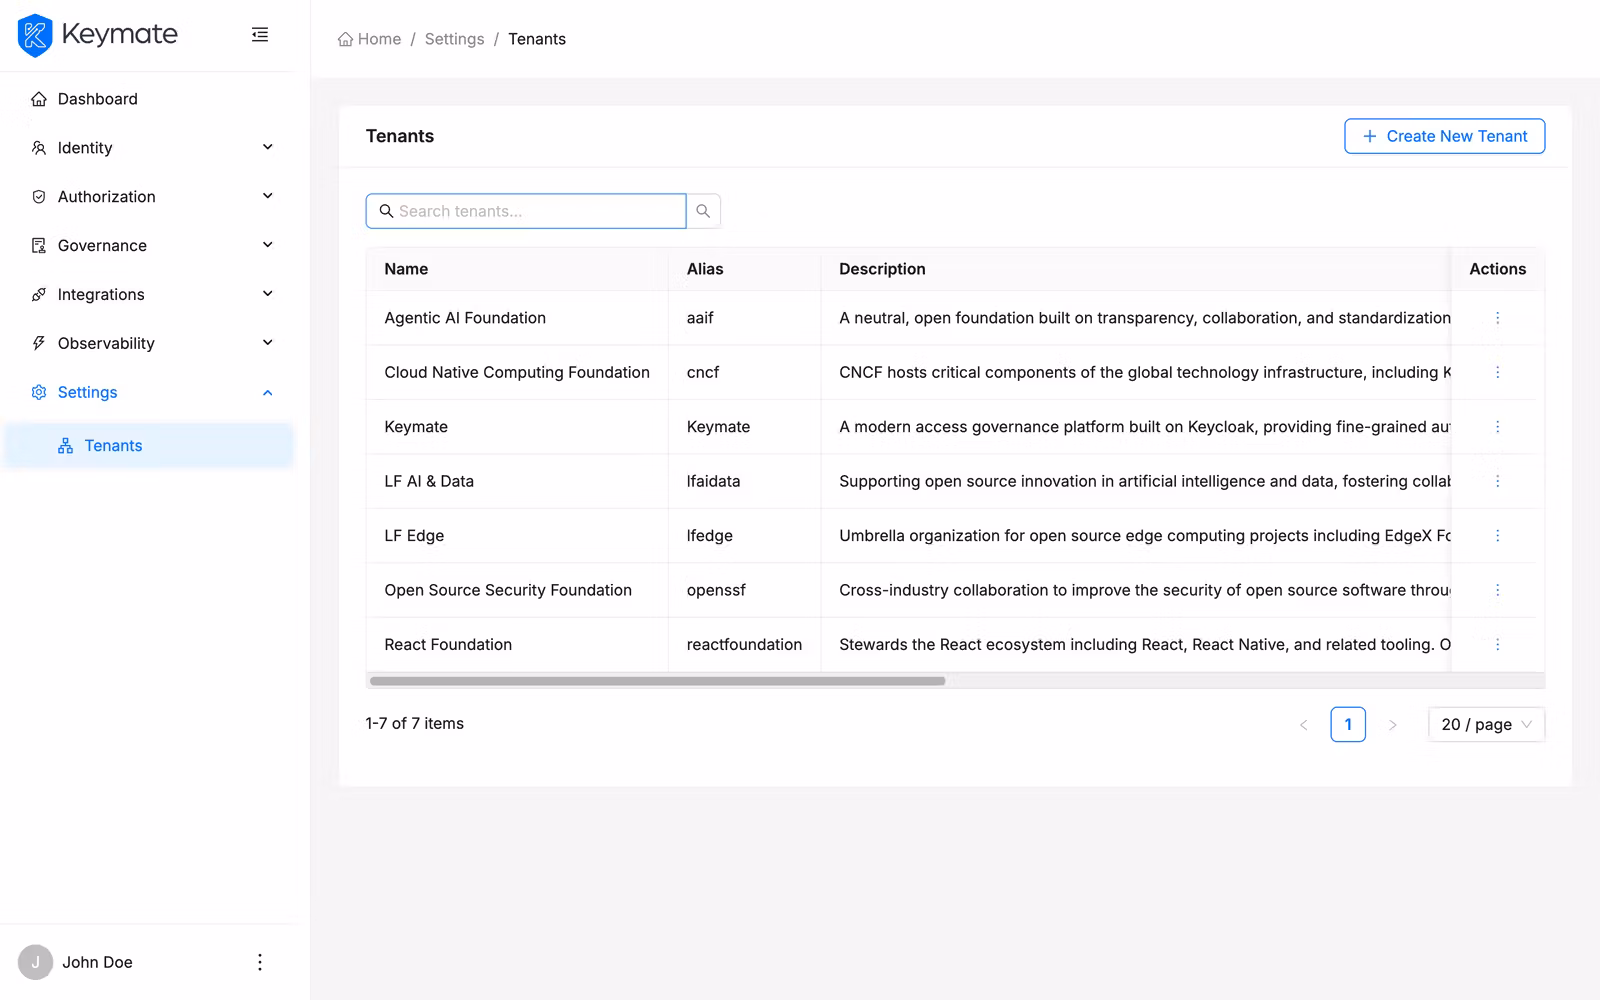
Open the Admin Console and go to Settings > Tenants. The tenant list page displays all tenants in a searchable, paginated table.

The table shows the following columns:
| Column | Description |
|---|---|
| Name | Tenant name (links to the tenant detail page) |
| Alias | Optional short identifier |
| Description | Optional description text |
| Domains | Associated domains displayed as tags |
| Status | Shows Enabled or Disabled with a status badge |
Use the search bar at the top of the table to filter tenants by name, alias, description, or domain.
2. Create a New Tenant
Click the Create New Tenant button in the top-right corner of the tenant list page. A drawer panel opens from the right side of the screen.
Fill in the tenant form:
| Field | Required | Description |
|---|---|---|
| Name | Yes | A unique name for the tenant (max 150 characters) |
| Alias | No | An optional short identifier (max 150 characters) |
| Description | No | A free-text description (max 1000 characters, character count displayed) |
| Domains | No | Associated domain names — type a domain and press Enter, or separate multiple domains with commas or spaces |
The Domains field accepts domain names and full URLs (for example, acme.example.com or https://acme.example.com:8080/app). Each domain appears as a tag that you can remove individually.
Click Submit at the bottom of the drawer to create the tenant. On success, a confirmation toast appears: "Tenant created successfully". The drawer closes and the tenant list refreshes automatically.
3. View Tenant Details
Click any tenant Name in the list table to open its detail page. The detail page shows the tenant name as the page title and organizes all tenant-related information into eight tabs:
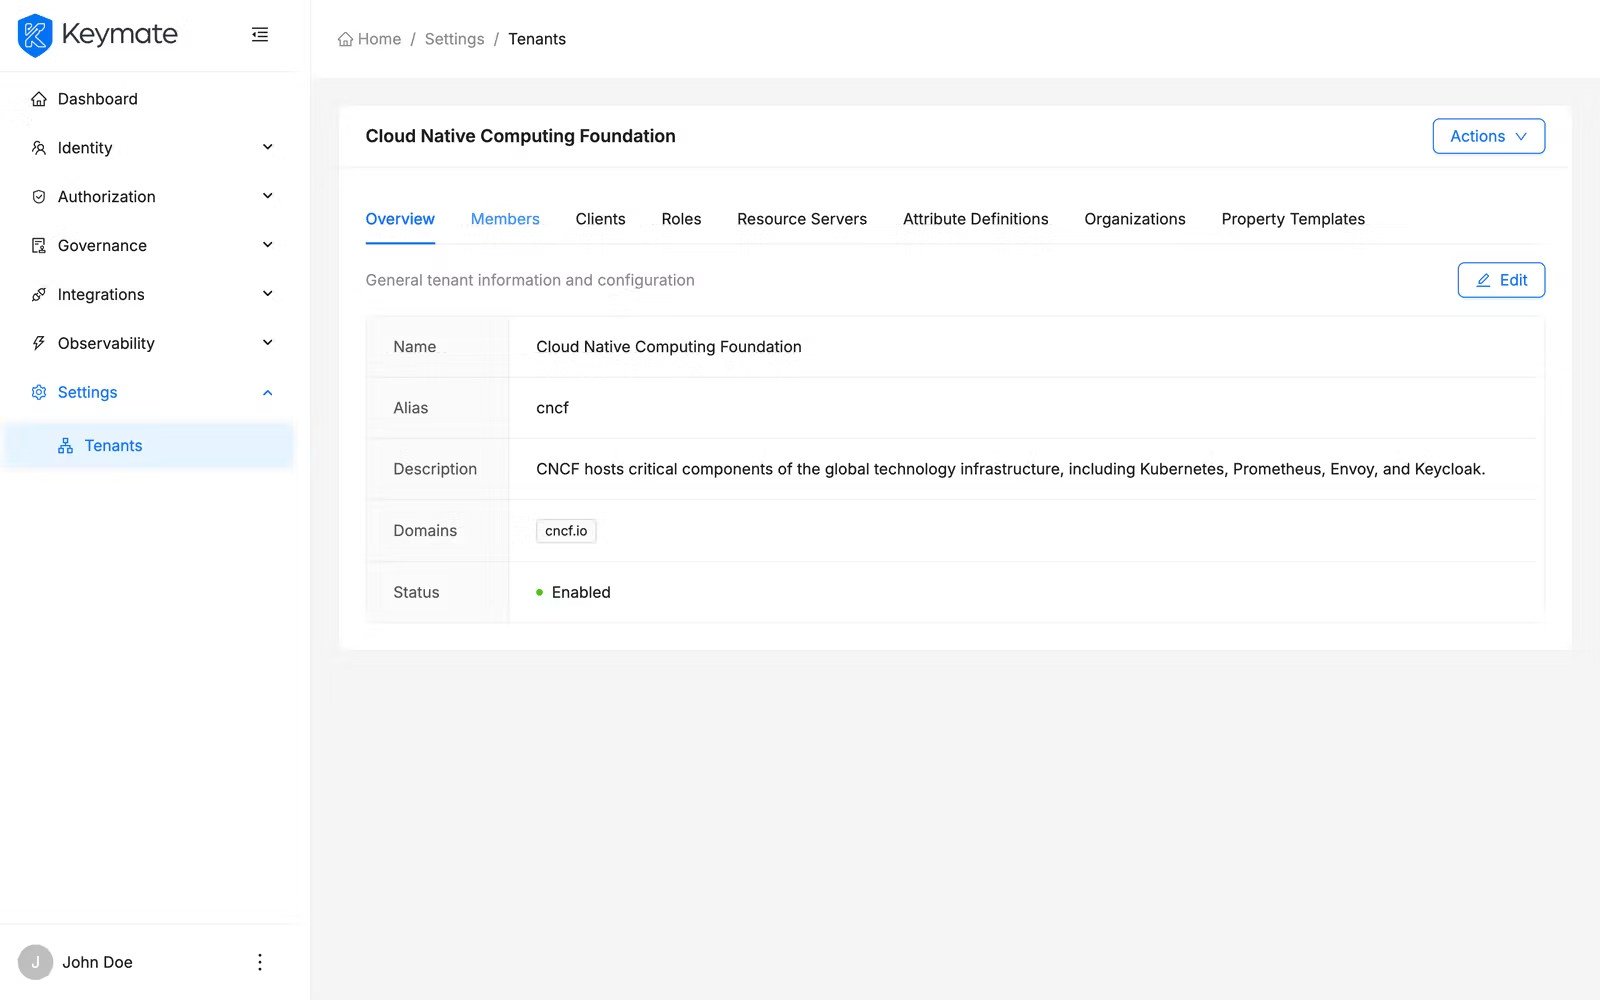
| Tab | Description |
|---|---|
| Overview | General tenant properties (name, alias, description, domains, status) |
| Members | Users assigned to this tenant |
| Clients | OAuth/OIDC clients registered under this tenant |
| Roles | Roles defined within this tenant's scope |
| Resource Servers | API resource servers associated with this tenant |
| Attribute Definitions | Custom user attribute definitions for this tenant |
| Organizations | Organization hierarchy tree within this tenant |
| Property Templates | Organization property templates for structuring organization metadata |
Overview Tab
The Overview tab presents tenant properties in a labeled description list:

- Name — the tenant's display name
- Alias — the optional short identifier (displays
-if not set) - Description — free-text description (displays
-if not set) - Domains — each domain rendered as an individual tag (displays
-if none) - Status — a badge showing Enabled (green) or Disabled (gray)
Related Resource Tabs
The remaining seven tabs let you manage resources scoped to this tenant. Each tab provides a list view with search, pagination, and a Create button that navigates to the relevant creation page:
| Tab | Create action navigates to |
|---|---|
| Members | User creation page |
| Clients | Client creation page |
| Roles | Inline role creation drawer (opens within the tab) |
| Resource Servers | Resource server creation page |
| Attribute Definitions | Attribute definition creation page |
| Organizations | Organization creation page |
| Property Templates | Property template creation page |
Create buttons on each tab are only visible if you have the Create scope on the corresponding resource type.
4. Edit a Tenant
From the tenant detail page, select the Overview tab and click the Edit button. A drawer opens with the tenant's current values pre-filled.

In edit mode, all fields from the creation form are available plus one additional control:
| Field | Description |
|---|---|
| Status | A toggle switch to enable or disable the tenant |
Modify the fields you need to update and click Submit. On success, a confirmation toast appears: "Tenant updated successfully". The overview tab refreshes with the new values.
5. Delete a Tenant
You can delete a tenant from two places:
- From the tenant list — click the delete icon in the Actions column of the row
- From the tenant detail page — open the Actions menu and click Delete
Both actions open the same confirmation modal.

The deletion confirmation modal displays a list of cascading consequences:
- All clients associated with this tenant will be removed
- All role assignments will be revoked
- All registered domains will be unlinked
- All policy assignments will be removed
- All organizations will be deleted
- All organization templates will be deleted
- All attribute definitions will be removed
- All organization attributes will be removed
- All resource servers will be deleted
Tenant deletion is irreversible. All associated resources — clients, roles, domains, policies, organizations, templates, attribute definitions, and resource servers — are permanently removed.
To confirm, type the exact tenant name in the confirmation field and click the delete button. On success, a toast appears: "Tenant deleted successfully". You are then redirected to the tenant list.
Validation Scenario
Scenario
Create a new tenant named Acme Corp, verify it appears in the list, edit its description, and confirm the change persists.
Expected Result
The tenant is created, visible in the list with correct metadata, and the updated description is reflected on the overview tab.
How to Verify
- UI evidence: Navigate to Settings > Tenants, confirm the tenant row shows the correct name, alias, domains, and status. Open the detail page and verify the Overview tab displays the updated description.
- API evidence: Query the tenants endpoint to confirm the new tenant appears with the correct metadata. See Tenant API for endpoint details.
- Logs / traces: Check the Admin Console browser console for successful mutation responses with HTTP 200/201 status codes.
- Audit evidence: Review the audit log for tenant creation and update events.
Troubleshooting
- Create button is not visible — Your account lacks the Create scope on the Tenants resource. Contact your platform administrator to assign the required permission.
- Domain validation error — Ensure domains follow a valid format (for example,
example.com,sub.domain.org, orhttps://example.com:8080/path). IP addresses and malformed URLs are rejected. - Delete button is not visible — Your account lacks the Delete scope on the Tenants resource.
- Delete confirmation fails — The name you typed must match the tenant name exactly, including capitalization.
- Form shows "Please fill in all required fields correctly" — The Name field is required and cannot be empty. Check for validation errors highlighted on specific fields.
Next Steps
After creating a tenant, you typically:
- Manage organizations within the tenant to model your customer's hierarchy
- Configure users and roles for the tenant
- Set up policies governing access within the tenant