Users
Goal
Manage the full lifecycle of users and roles in the Keymate Admin Console. After completing this guide, you can create users, define roles (including composite roles), assign roles to users, and control role visibility across tenants.
Audience
Platform engineers, operators, and solution engineers responsible for identity and access management in a Keymate deployment.
Prerequisites
- Access to the Keymate Admin Console
- Permissions on the Users resource (
READ,CREATE,UPDATE,DELETEas needed for each workflow) - Permissions on the Roles resource (
READ,CREATE,UPDATE,DELETEas needed) - At least one tenant configured in the platform
The Admin Console uses permission-gated controls. If you do not see a button described in this guide (for example, Create User or Delete), your account lacks the required scope on the corresponding resource. Contact your platform administrator to request the appropriate permissions.
Before You Start
The Admin Console organizes user and role management under the Identity section of the sidebar. Users and roles are accessed through the following navigation paths:
| Destination | Sidebar Path |
|---|---|
| User list | Identity > Users |
| Role list | Identity > Roles |
| Tenant-scoped roles | Settings > Tenants > (select tenant) > Roles |
| Tenant members | Settings > Tenants > (select tenant) > Members |
Roles in Keymate exist at two levels:
- Realm roles (also called global roles) — available across the entire Keycloak realm and can be assigned to any user.
- Client roles — scoped to a specific OAuth client application. These roles appear under the client name when assigning roles to a user.
Both role types can be assigned to users. A user can hold a mix of realm roles and client roles. Roles can also be composite — a composite role automatically grants all of its child roles to the assigned user.
Worked Example
Throughout this guide, we use the following scenario:
- Tenant: Acme Corp
- User:
jane.doe(jane.doe@example.com) - Realm role:
document-reviewer— grants read access to document resources - Client role:
reporting-app:report-viewer— grants access to the reporting dashboard
Steps
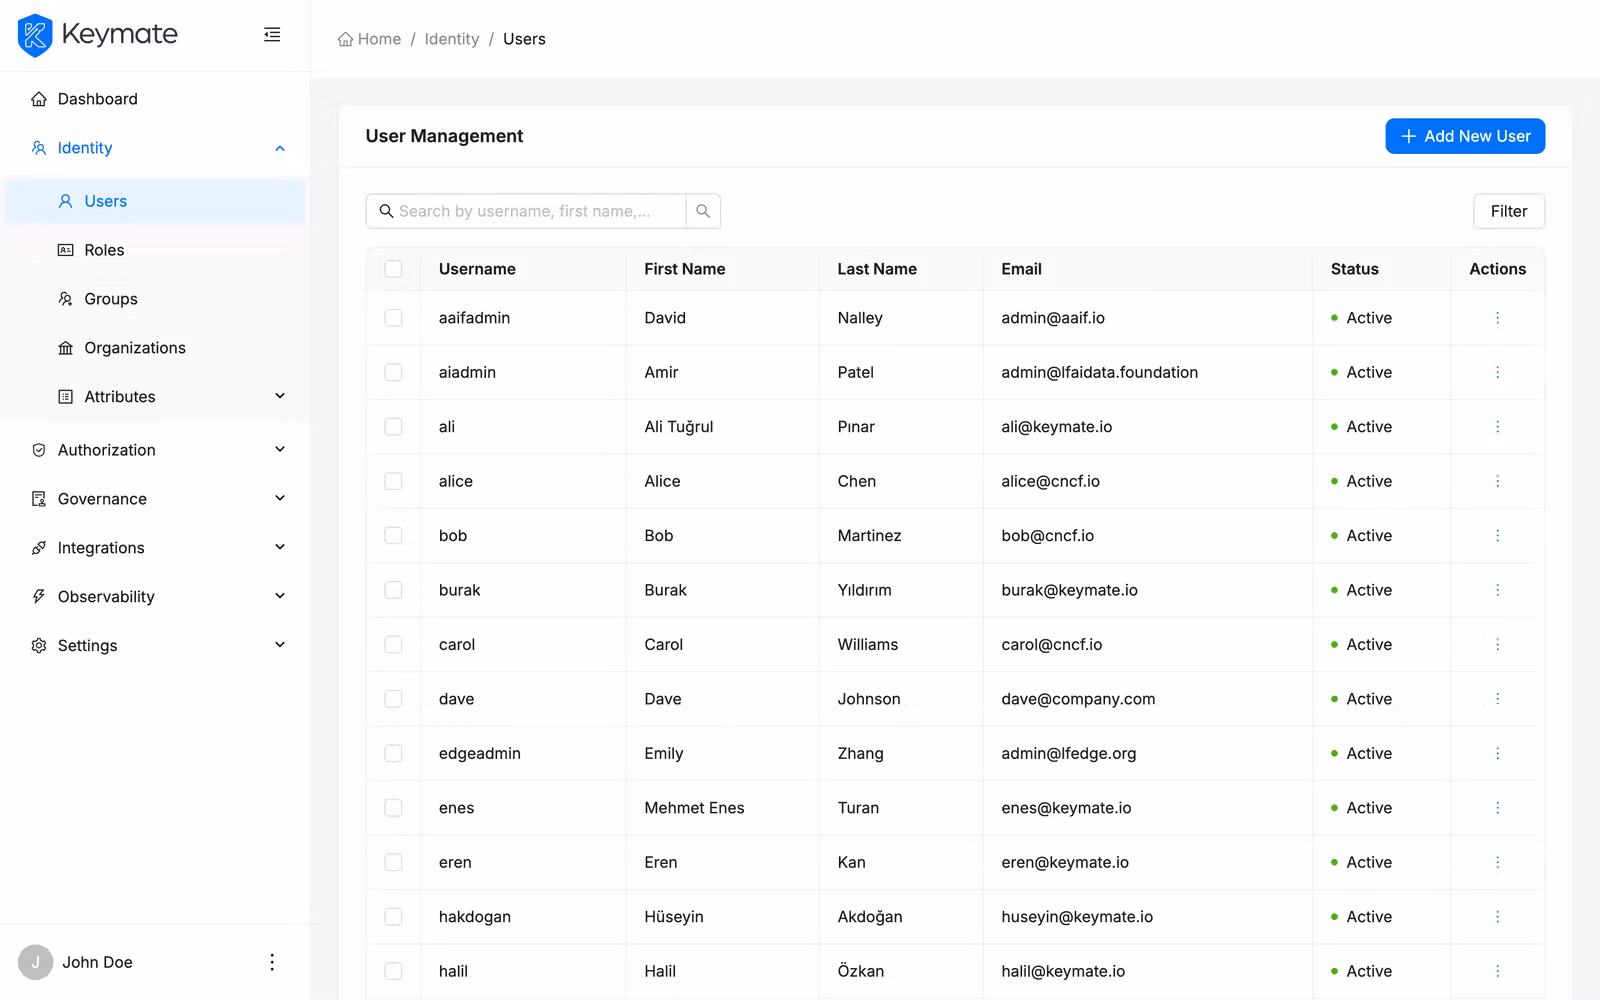
1. View the user list
Navigate to Identity > Users in the sidebar. The user list displays a paginated table with the following columns:
| Column | Description |
|---|---|
| Username | Clickable link to the user detail page |
| First Name | User's given name |
| Last Name | User's family name |
| User's email address | |
| Enabled | Status badge — green for active, red for disabled |
Use the search bar to filter by username, email, or name. If your deployment has multiple tenants, use the Tenant filter dropdown to scope the list to a specific tenant.
To delete multiple users at once, select the checkboxes next to each user and use the Delete bulk action in the toolbar.
2. Create a new user
Click the Create User button in the top-right corner of the user list page. This opens a three-step wizard.
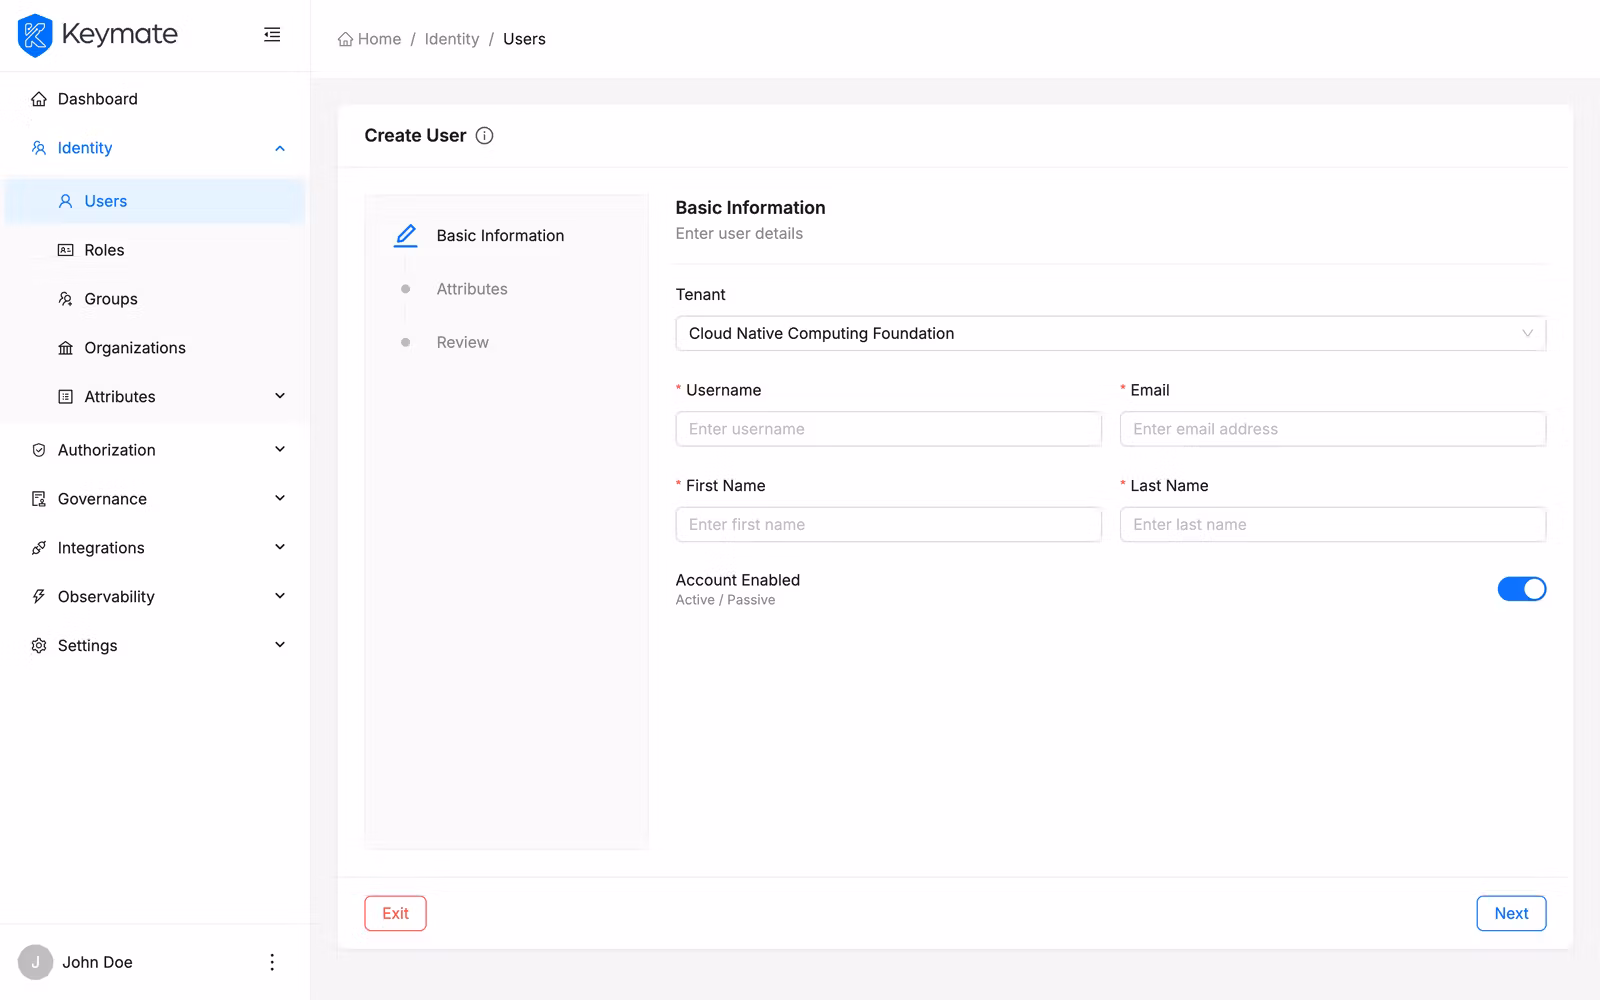
Step 1 — Basic Information
Fill in the following fields:
| Field | Required | Notes |
|---|---|---|
| Tenant | No | Adds the user as a member of the selected tenant and scopes the available attribute definitions to that tenant. When left empty, the user is created without a tenant membership |
| Username | Yes | Minimum 3 characters, maximum 50 |
| Yes | Must be a valid email format | |
| First Name | Yes | Minimum 1 character, maximum 150 |
| Last Name | Yes | Minimum 1 character, maximum 150 |
| Account Enabled | — | Toggle switch, enabled by default |
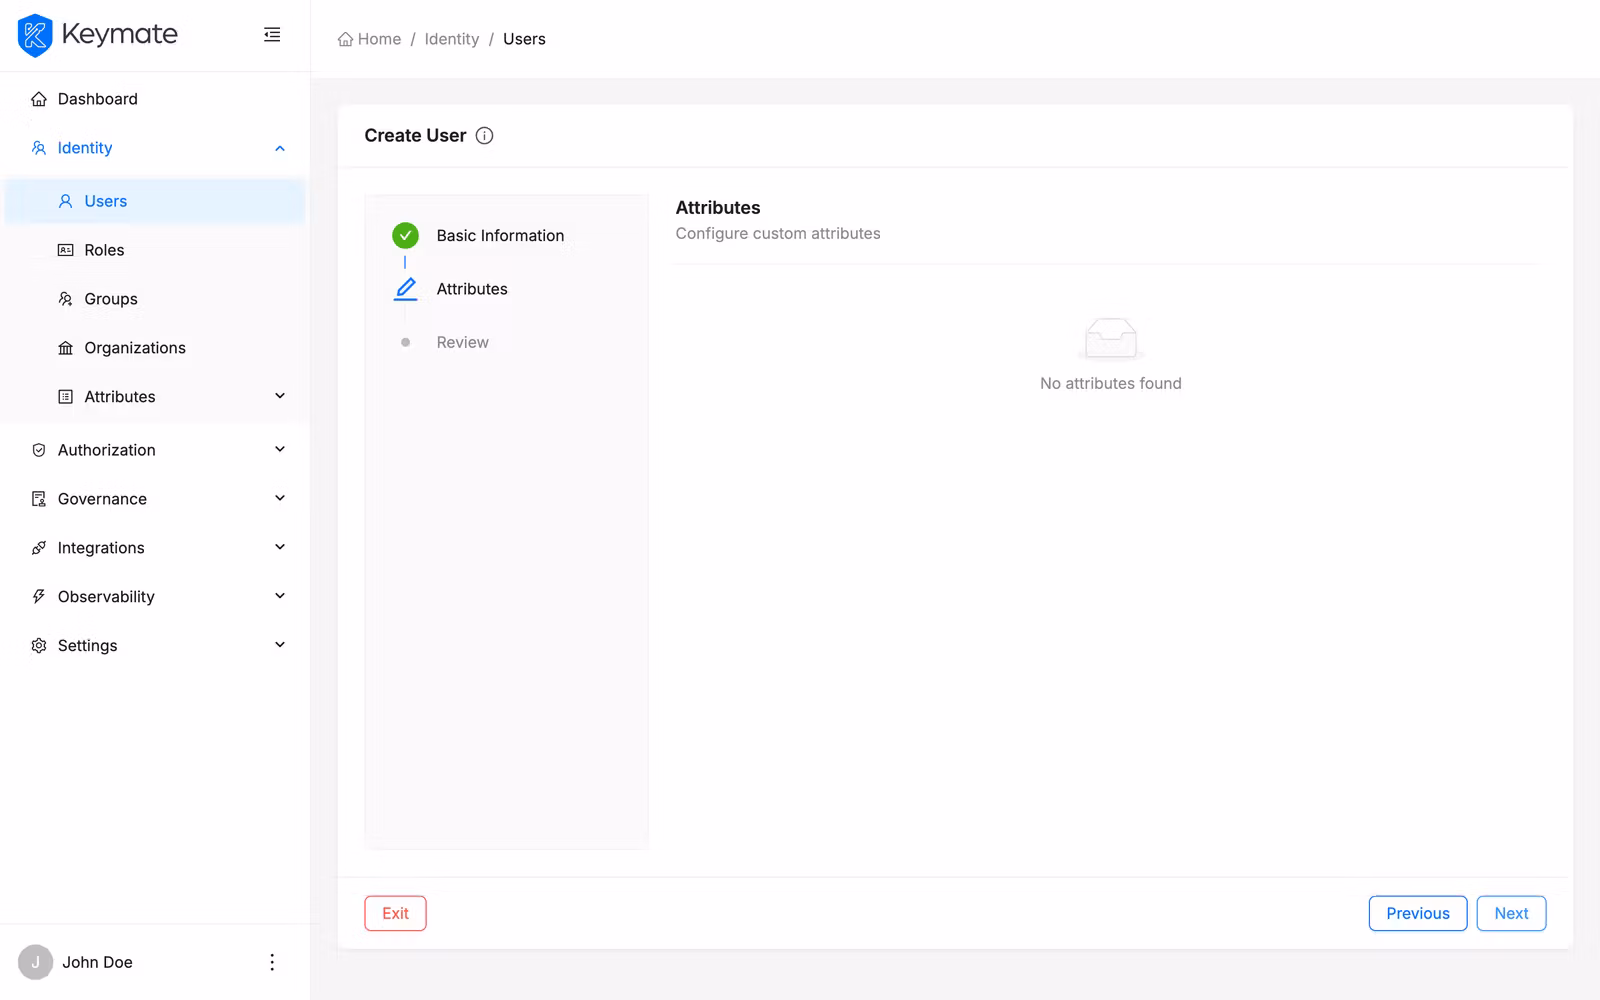
Step 2 — Attributes
This step displays attribute definitions fetched based on the selected tenant (or global definitions if no tenant was chosen).
Attributes are split into two sections:
- Required Attributes — always visible in a table with columns: Label, Type, and Value. Click Edit on any row to set its value in a side drawer.
- Optional Attributes — initially empty. Click Add Attribute to open the attribute drawer, select an attribute, and set its value. Optional attributes can be removed.
If no attribute definitions exist for the selected tenant, this step shows an empty state message and you can proceed to the next step.
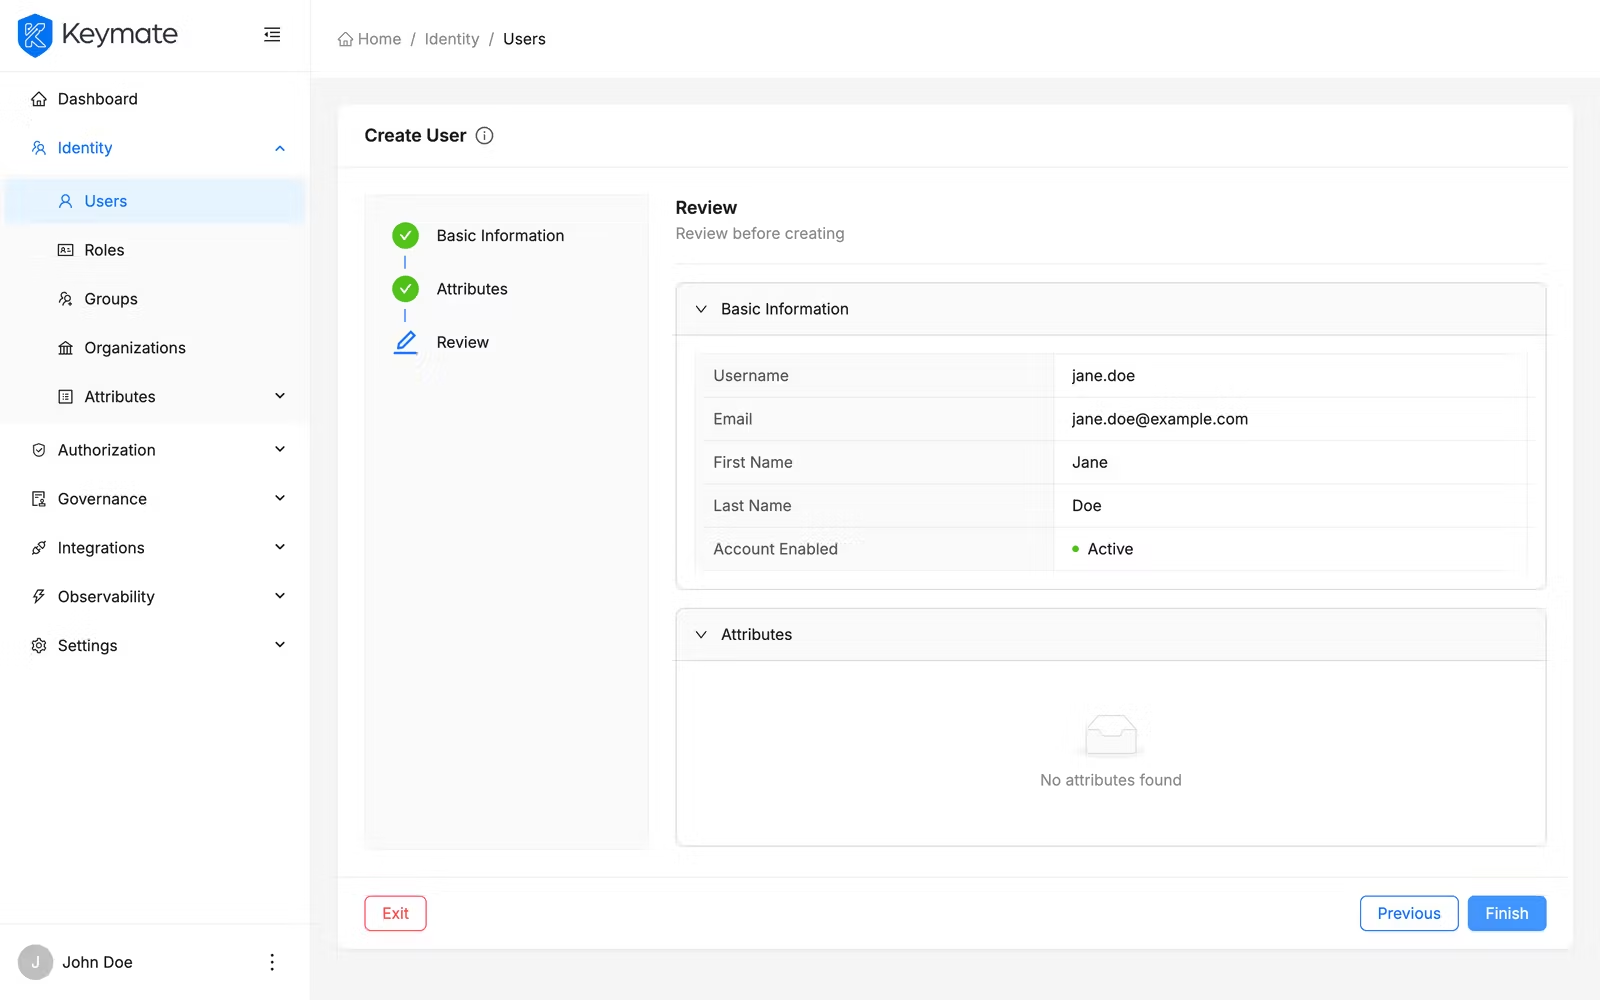
Step 3 — Review
The review step displays all entered data in collapsible panels:
- Basic Information — shows username, email, first name, last name, and account status in a description list.
- Attributes — shows a table of all filled attribute key-value pairs.
Review the information and click Finish to create the user. On success, you are redirected to the user list.
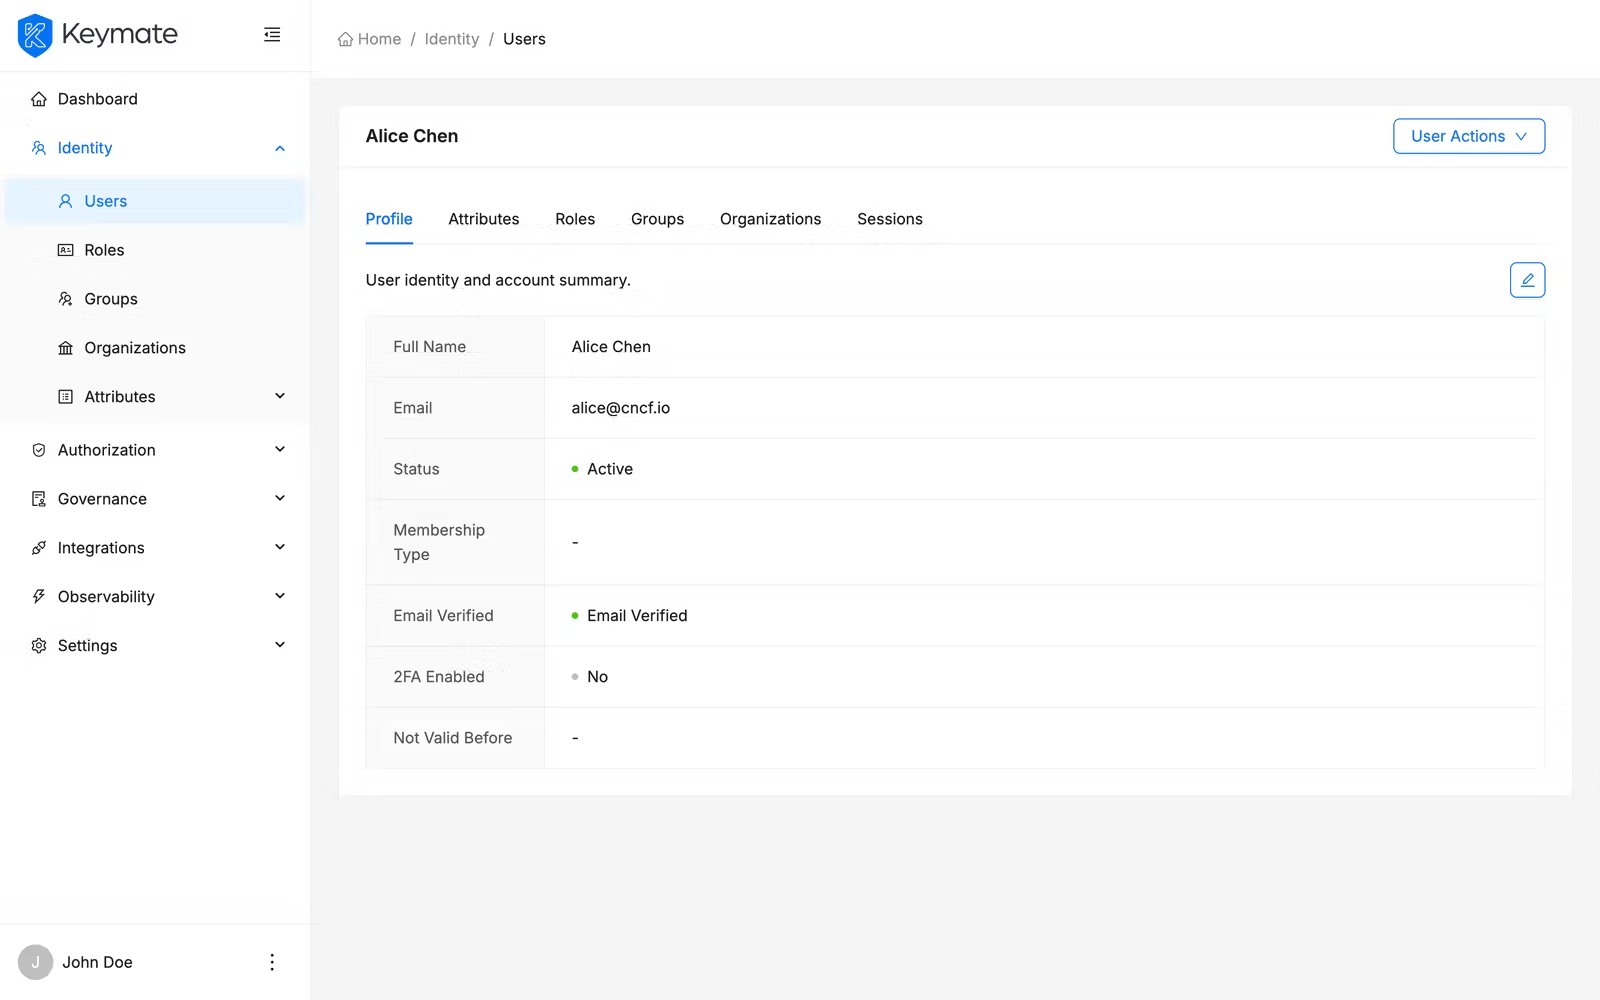
3. View and manage a user
Click a username in the user list to open the user detail page. The detail page organizes information across six tabs:
| Tab | Contents |
|---|---|
| Overview | User profile information with an Edit button that opens a side drawer |
| Attributes | Custom user attributes — add, edit, or remove |
| Roles | Assigned roles (direct and inherited) — see Step 4 |
| Groups | Groups the user belongs to — join or leave groups |
| Organizations | User's organization memberships |
| Sessions | Active sessions with logout/delete actions |
The Actions menu in the top-right provides:
- Deactivate User / Activate User — toggles the user's enabled status (requires
UPDATEpermission). A confirmation dialog appears before the action is applied. - Delete User — permanently removes the user (requires
DELETEpermission). A confirmation dialog appears before deletion.
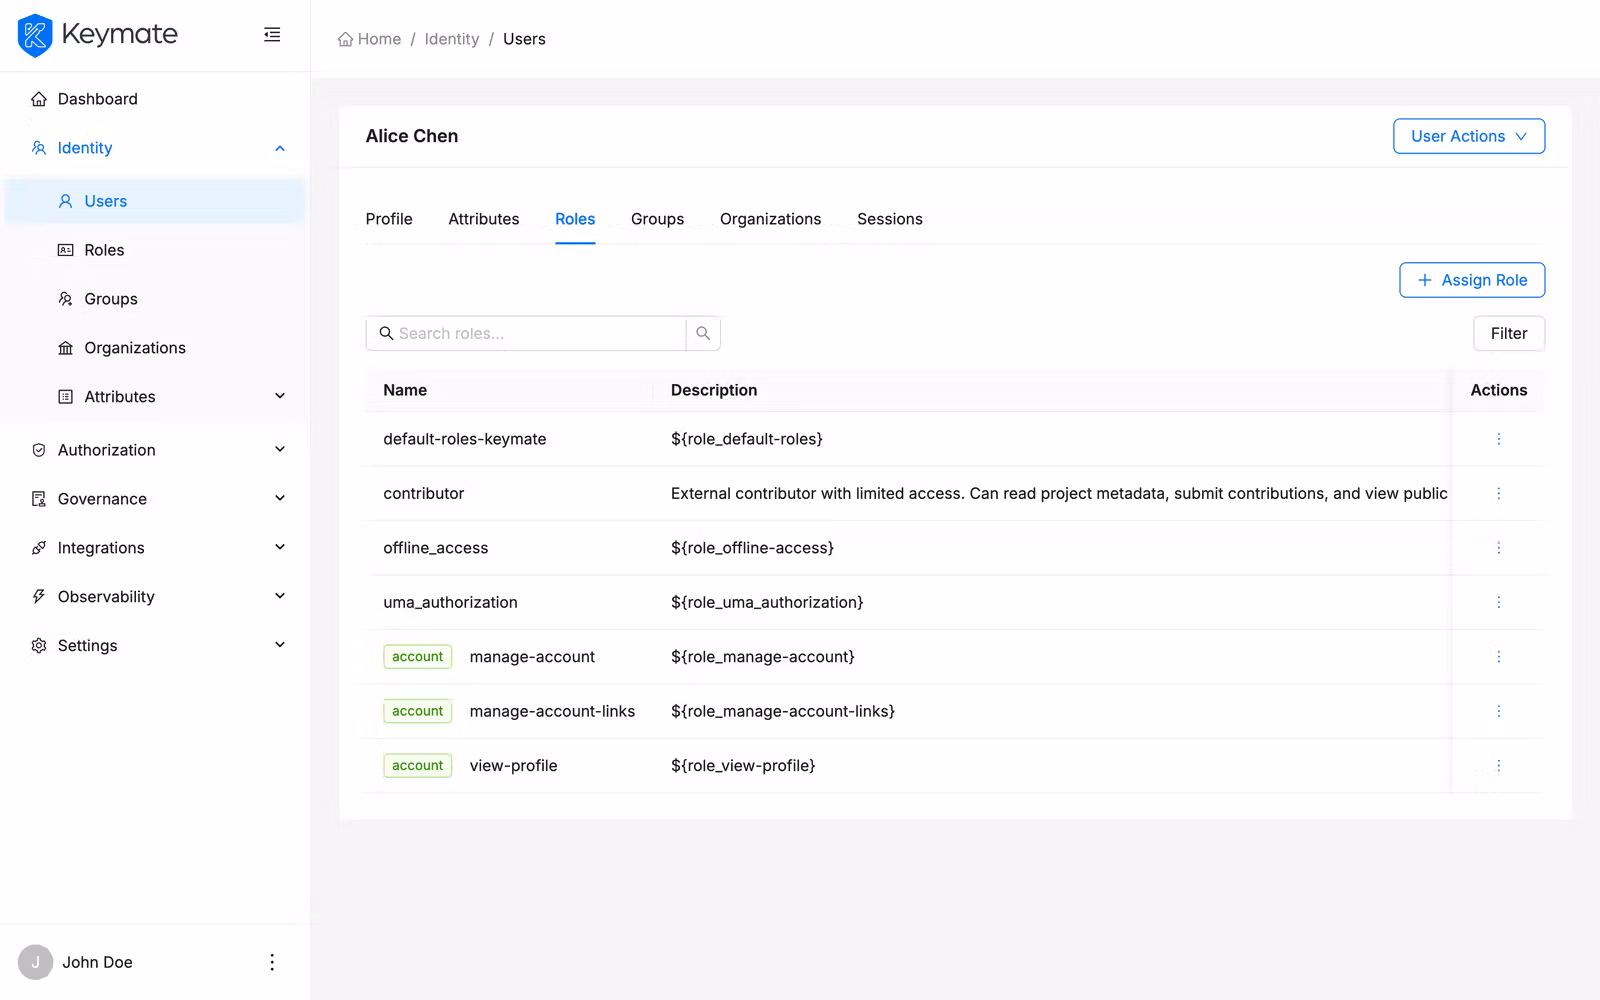
4. Assign roles to a user
Open a user's detail page and switch to the Roles tab. This tab displays a table of all roles currently assigned to the user:
| Column | Description |
|---|---|
| Name | Role name. Client roles show the client name as a green tag before the role name |
| Description | Role description |
| Inherited | No (cyan tag) for directly assigned roles, Yes (orange tag) for roles inherited through composite roles |
Use the search bar to filter by role name, client name, or description. Use the Source filter dropdown to show only direct or only inherited roles.
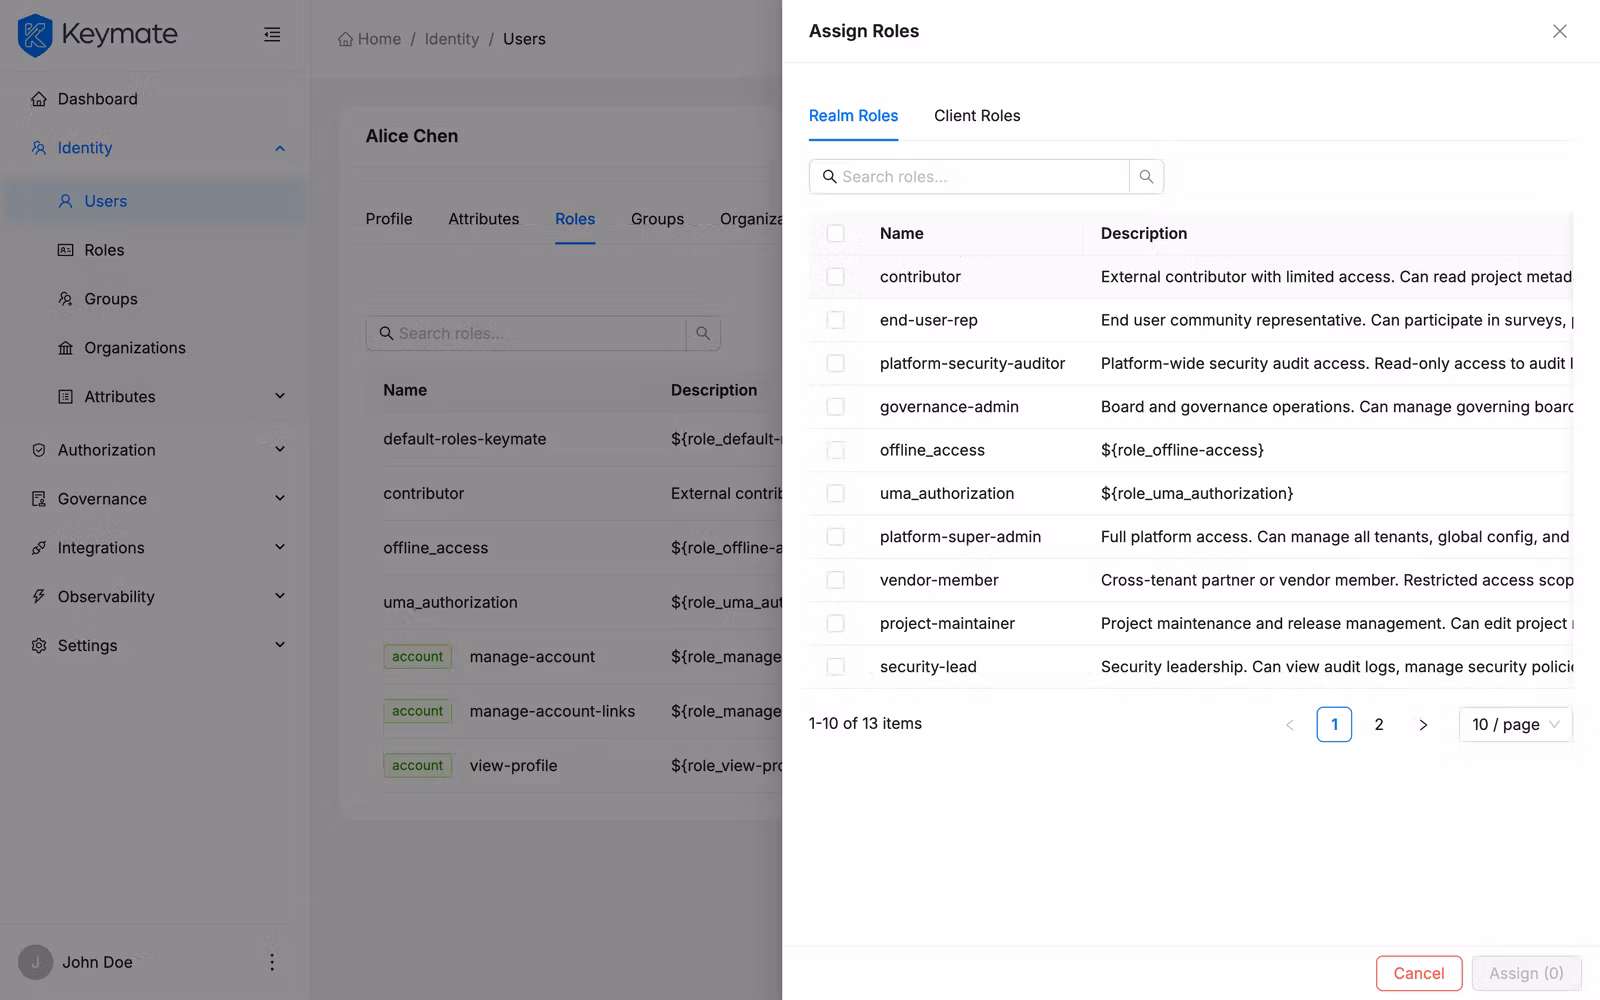
Assign new roles
-
Click the Assign Role button above the roles table (requires
UPDATEpermission). -
The role selection drawer opens with two tabs:
Realm Roles tab — lists all available global roles not yet assigned to the user. Search is client-side. Select roles using the checkboxes.
Client Roles tab — lists available client-specific roles. Columns show the client name, role name, and description. Search is server-side with debounced input.
-
Select one or more roles across both tabs. The Assign button at the bottom shows the count of selected roles.
-
Click Assign to confirm. The roles are immediately visible in the user's roles table.
Remove a role assignment
Only directly assigned roles can be removed — inherited roles must be managed at the composite role level.
- Locate the role in the roles table (ensure the Inherited column shows No).
- Click the Delete action on the role row.
- Confirm the removal in the dialog that appears.
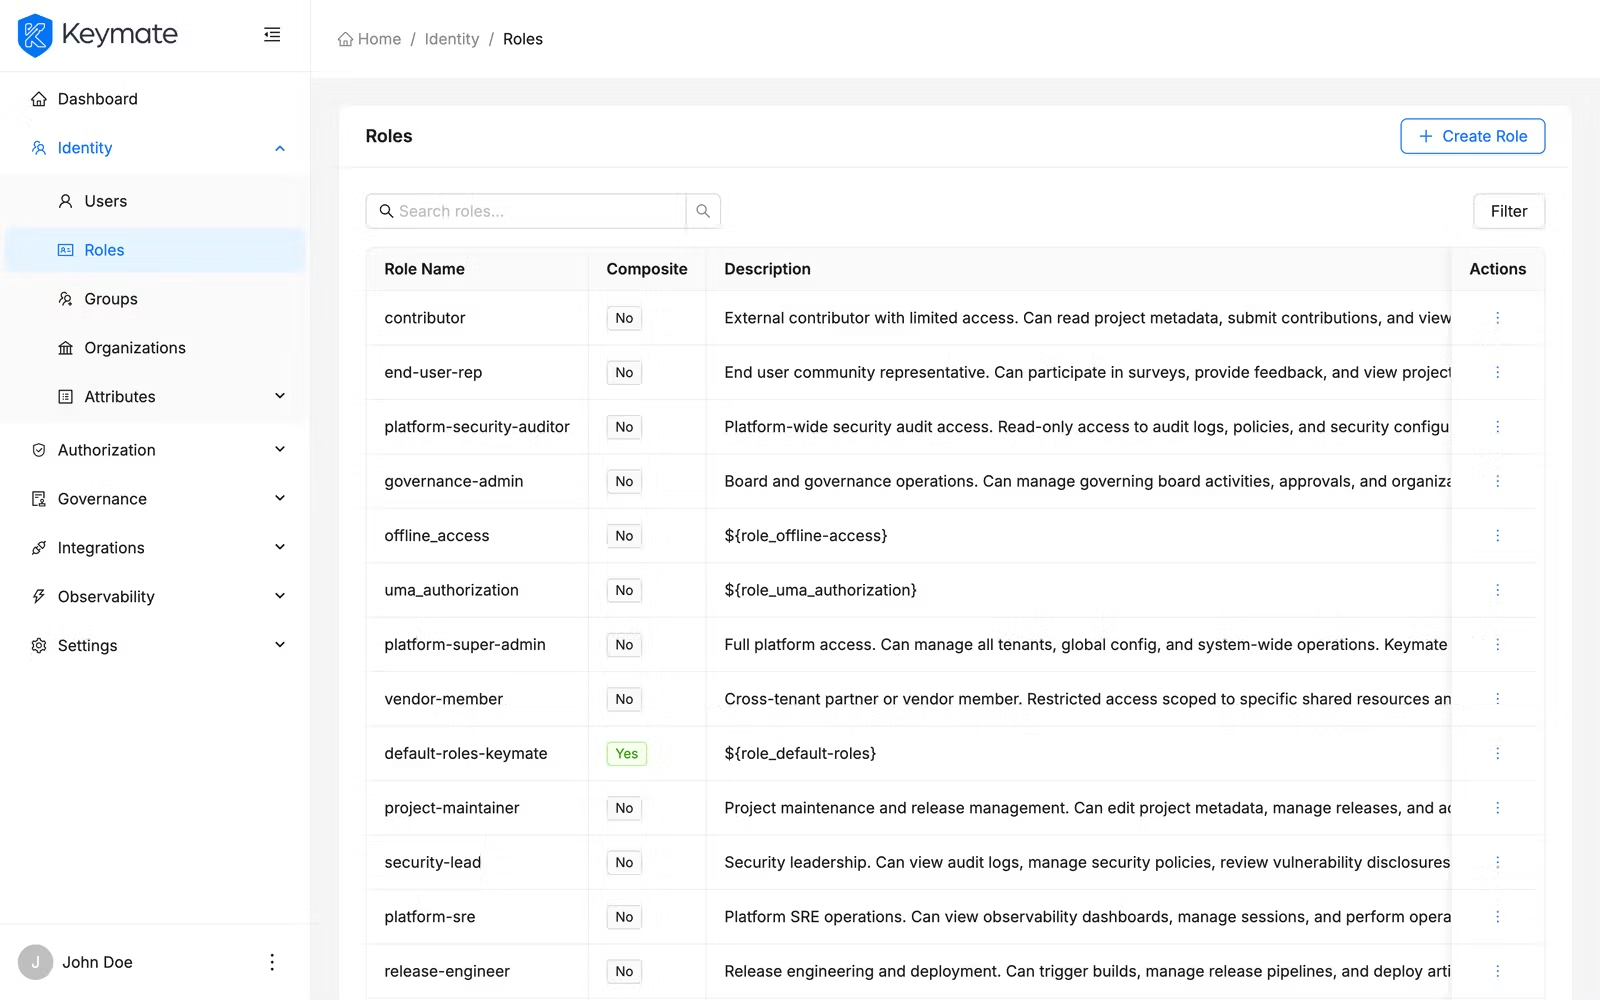
5. View the roles list
Navigate to Identity > Roles in the sidebar. The roles list page displays a paginated table:
| Column | Description |
|---|---|
| Name | Role name |
| Composite | Yes (green tag) if the role contains child roles, No otherwise |
| Description | Role description |
Use the search bar to filter by role name. Use the Composite filter to show only composite or only non-composite roles. If your deployment has multiple tenants, use the Tenant filter to scope the list.
Each role row provides the following actions:
| Action | Description |
|---|---|
| Assignments | Opens a drawer showing which tenants have this role assigned |
| Edit | Opens the role edit drawer |
| Assign | Opens a drawer to assign the role to tenants |
| Delete | Deletes the role after confirmation |
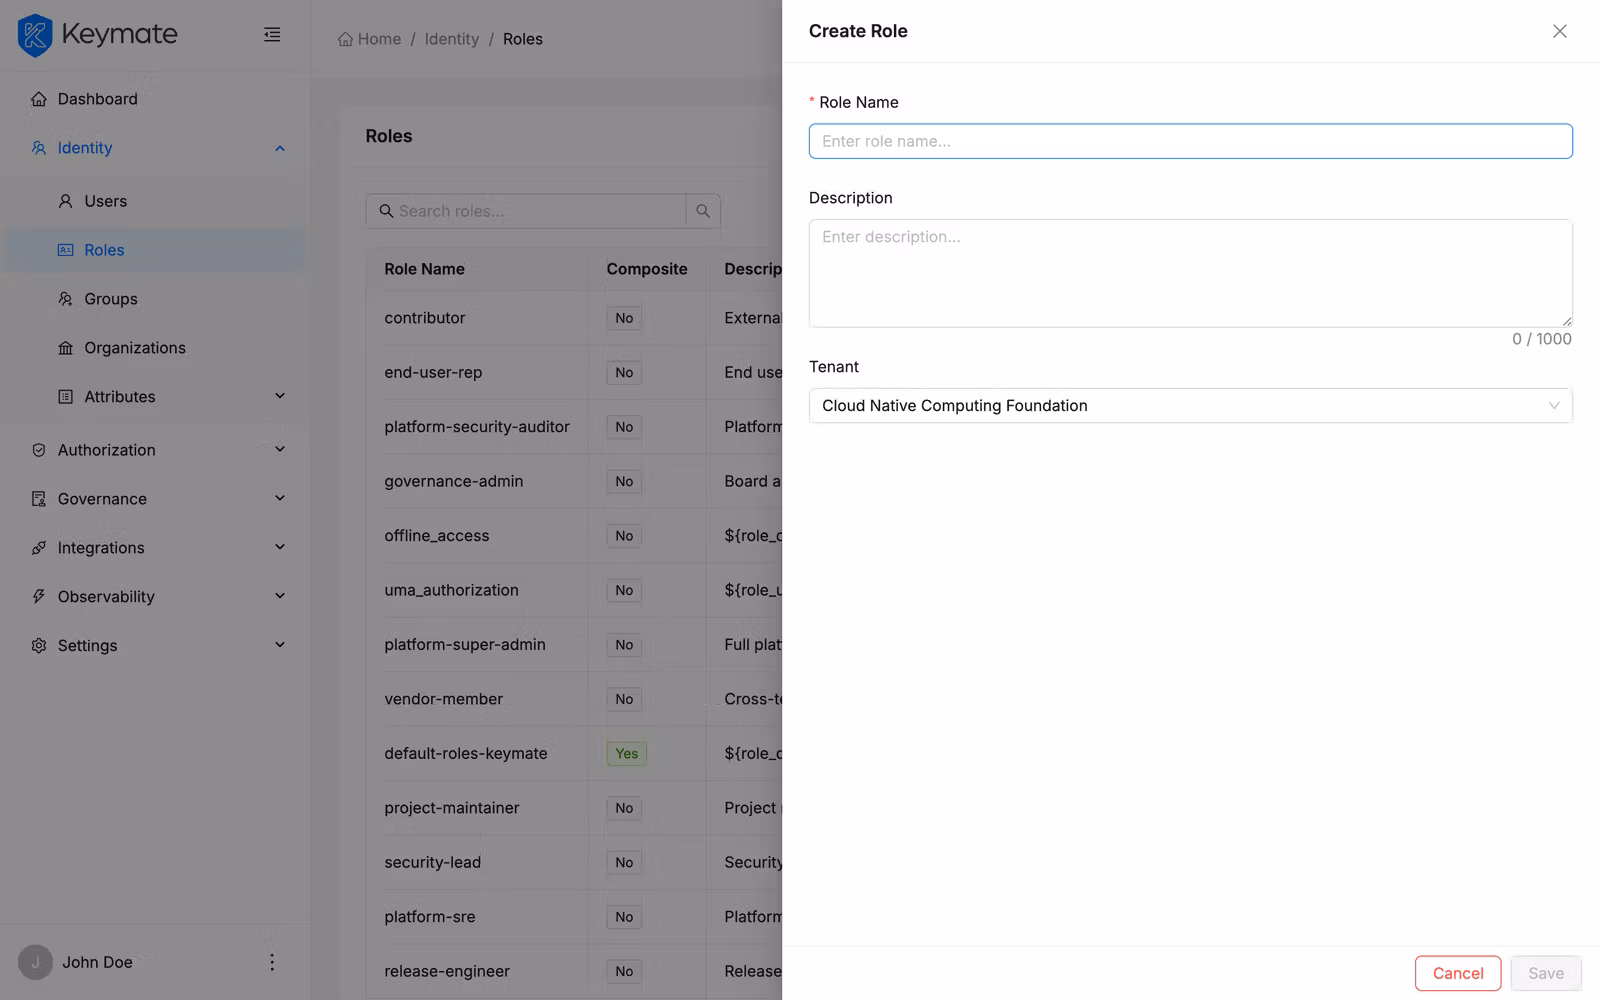
6. Create a role
-
Click the Create Role button in the top-right corner of the roles list page.
-
The role creation drawer opens with the following fields:
Field Required Notes Name Yes Minimum 1 character, maximum 150, trimmed Description No Maximum 1000 characters with character counter Tenant No Optional tenant scope — only available during creation -
Fill in the fields and click Submit.
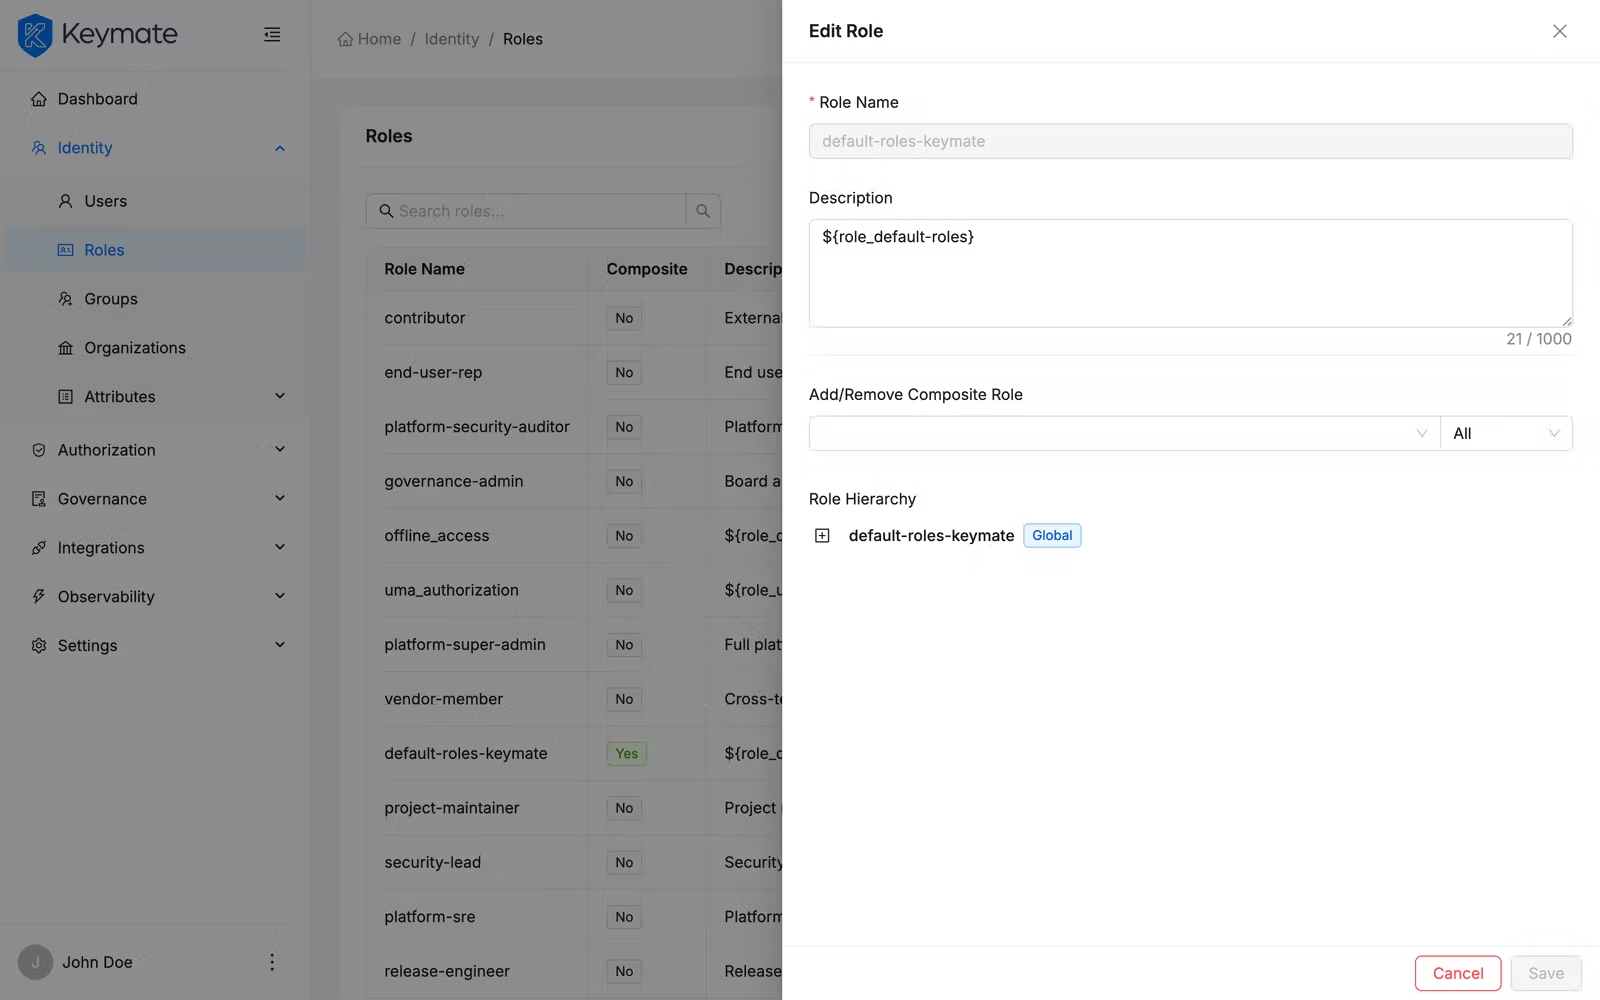
7. Edit a role and manage composites
Click Edit on any role in the roles list. The edit drawer opens with:
-
Name — displayed but not editable after creation.
-
Description — editable text area.
-
Composites section — available only in edit mode. This section allows you to build composite roles by adding child roles:
- Use the search dropdown to find roles by name. A category filter lets you narrow results to All, Global, or Client roles.
- Select roles from the dropdown to add them as composites.
- The hierarchy tree below the search shows the composite structure. Each node displays the role name with a Global (blue tag) or client name (green tag) indicator.
- Click the minus button next to a direct child node to remove it from the composite.
- Click Submit to save changes. The system calculates the diff between original and current composites, then adds and removes accordingly.
8. Manage role-to-tenant assignments
Roles can be assigned to specific tenants, controlling which tenants can use them.
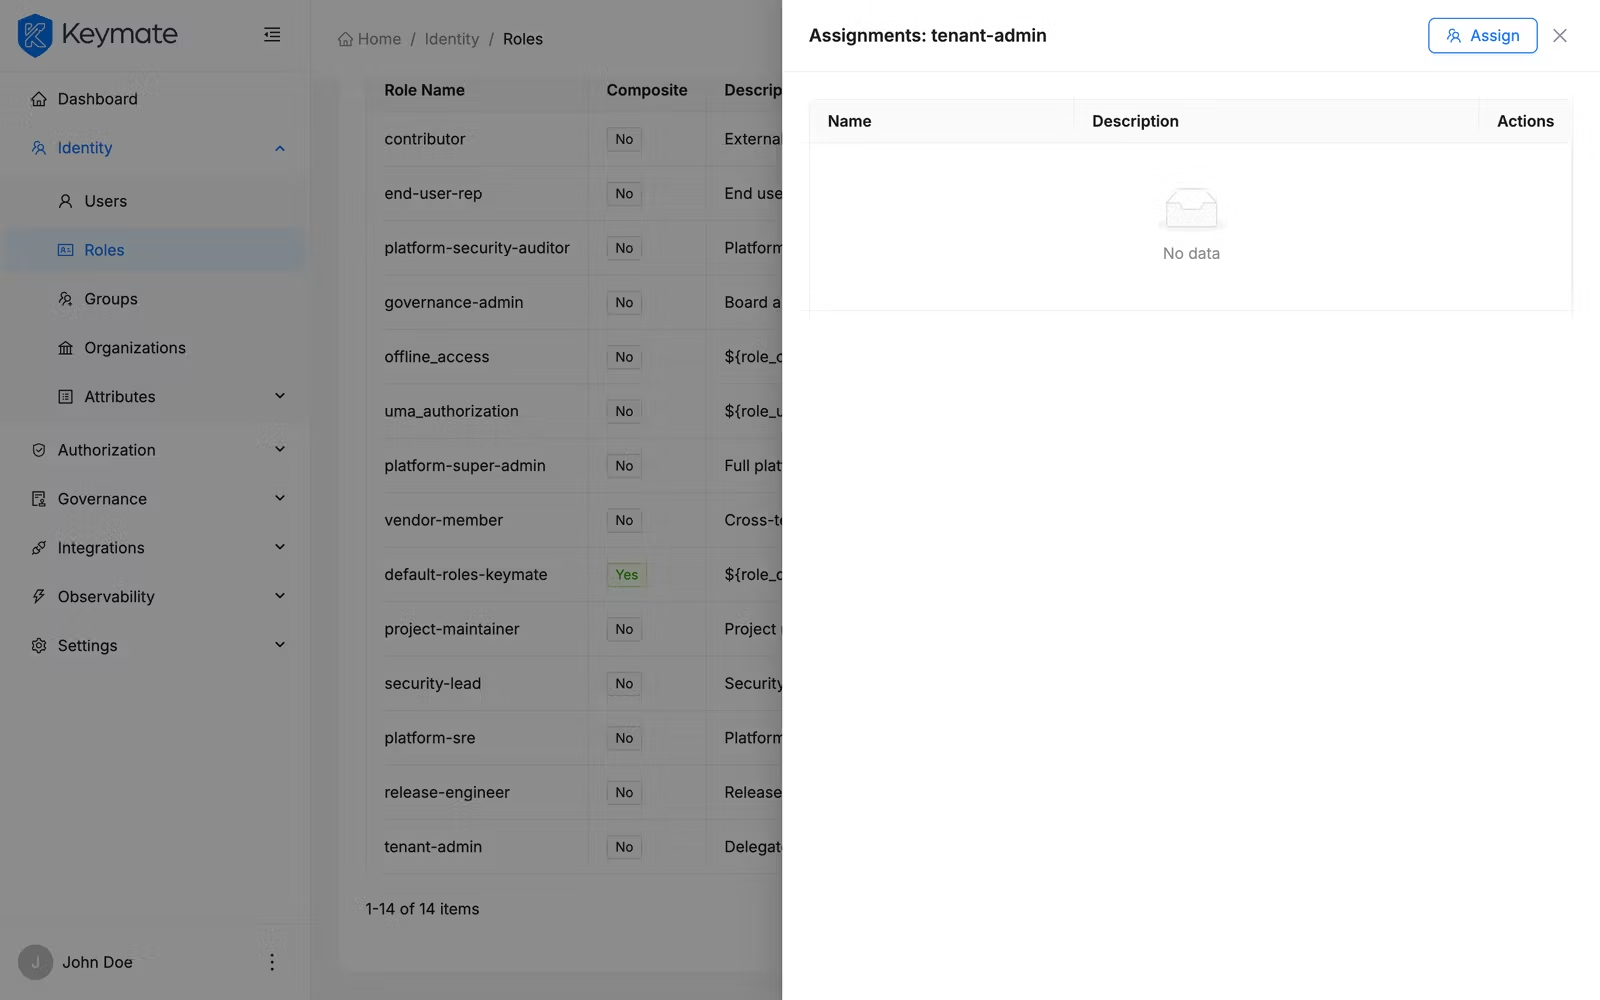
View assignments
- Click Assignments on a role in the roles list.
- A drawer opens showing a table of tenants that currently have this role assigned, with columns for tenant name and description.
- To remove a tenant assignment, click the Unassign action on the tenant row and confirm in the dialog.
Assign to tenants
- Click Assign on a role in the roles list, or click the Assign button inside the assignments drawer.
- A drawer opens listing all available tenants (excluding already-assigned ones) with columns for name and description.
- Select one or more tenants using checkboxes and click Assign.
Validation Scenario
Scenario
Create a user jane.doe in the Acme Corp tenant, then assign the document-reviewer realm role.
Expected Result
The user appears in the user list with status Enabled. The Roles tab on the user detail page shows document-reviewer with an Inherited: No tag (direct assignment). Any composite child roles of document-reviewer appear with an Inherited: Yes tag.
How to Verify
- UI evidence: Navigate to Identity > Users, search for
jane.doe, open the detail page, and confirm the Roles tab shows the expected roles and inheritance tags. - API evidence: Query the user's role mappings endpoint to confirm the assigned role appears in the response.
- Logs / traces: Check the Admin Console's network tab for a successful role assignment request.
- Audit evidence: Verify the audit log captures the role assignment event with the user ID and role name.
Troubleshooting
- Create User button is not visible — Your account lacks the
CREATEscope on theUSERSresource. Request the permission from your platform administrator. - Assign Role button is not visible on the Roles tab — Your account lacks the
UPDATEscope on theUSERSresource. - Cannot remove an inherited role — Inherited roles are granted through composite roles. Edit the parent composite role to remove the child, or unassign the composite role from the user instead.
- Attributes step shows an empty state — No attribute definitions are configured for the selected tenant (or globally). Configure attribute definitions under Identity > Attributes > Attribute Definitions before creating users that need custom attributes.
- Tenant filter does not appear — The tenant filter is hidden when viewing users within a specific tenant context (such as Settings > Tenants > Members).
Next Steps
After creating users and assigning roles, explore these related workflows:
- Group Management — organize users into groups for bulk role assignment
- Organization Management — structure users into hierarchical organizations
- Attribute Management — define custom user attributes scoped by tenant
- Permission Management — define fine-grained permissions that roles can grant