Groups
Goal
Create and manage groups in the Admin Console, including assigning members and roles. By the end of this guide you will know how to create a group with the multi-step wizard, manage group membership, assign realm and client roles, and edit or delete existing groups.
Audience
Platform engineers and operators who manage user groupings and need to assign permissions at the group level rather than per user.
Prerequisites
- Access to the Admin Console with group management permissions (
CREATE,READ,UPDATE,DELETEscopes on the Groups resource) - At least one user account available for membership assignment
- Familiarity with realm and client roles if you plan to assign roles during group creation
Before You Start
This guide uses the Admin Console web interface. All group operations require the appropriate permission scope — buttons and actions are hidden if your account lacks the required scope. Group names must be between 1 and 255 characters. Descriptions are optional and can be up to 1,000 characters.
Worked Example
Throughout this guide, we create a group called Backend Engineers with a description, add two users as members, and assign both a realm role and a client role. We then update the group description, remove a member, and verify the final state.
Steps
1. Open the groups list
Navigate to Identity > Groups in the Admin Console sidebar. The groups list page displays all existing groups in a paginated table with Name and Description columns.
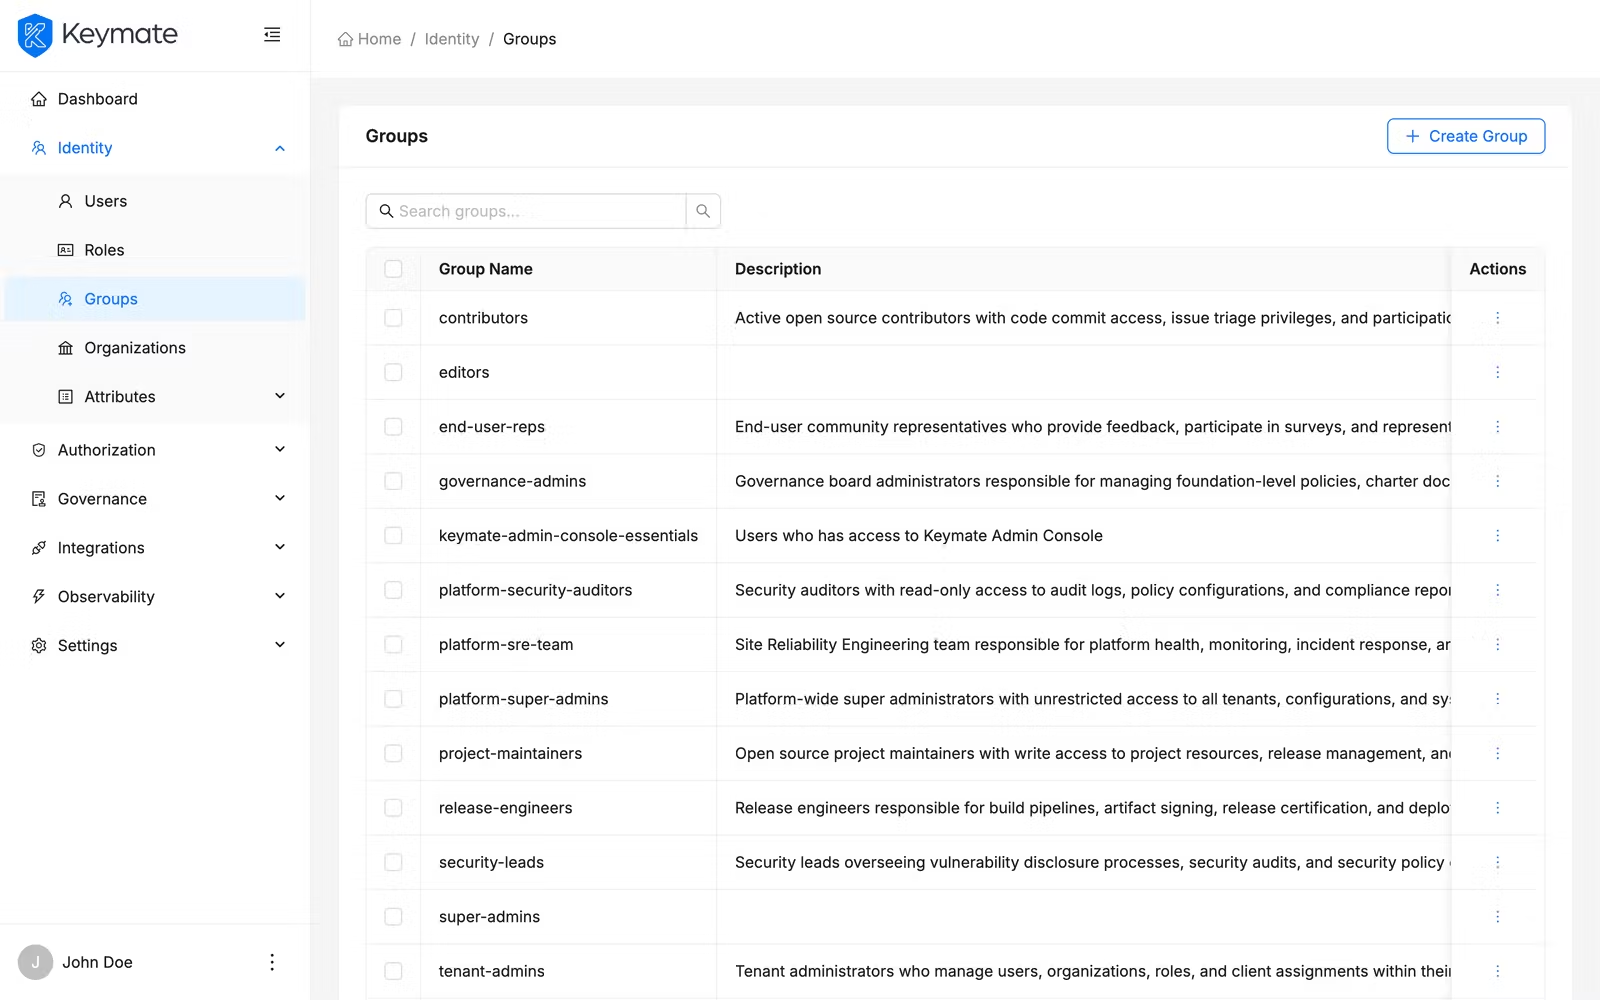
You can search for a group by typing in the search bar above the table. The search filters groups by name. Pagination controls at the bottom of the table let you navigate through large group sets (default page size: 20).
2. Start the create group wizard
Click the Create Group button in the top-right corner of the groups list page. This opens a four-step wizard that guides you through group creation.
The create button is only visible if your account has the CREATE scope on the Groups resource.
3. Enter general information (Step 1 of 4)
Fill in the group details:
- Name (required) — enter a descriptive group name. Must be between 1 and 255 characters.
- Description (optional) — describe the group's purpose. Maximum 1,000 characters. A character counter is displayed below the field.
For this example, enter Backend Engineers as the name and Engineering team members working on backend services as the description.
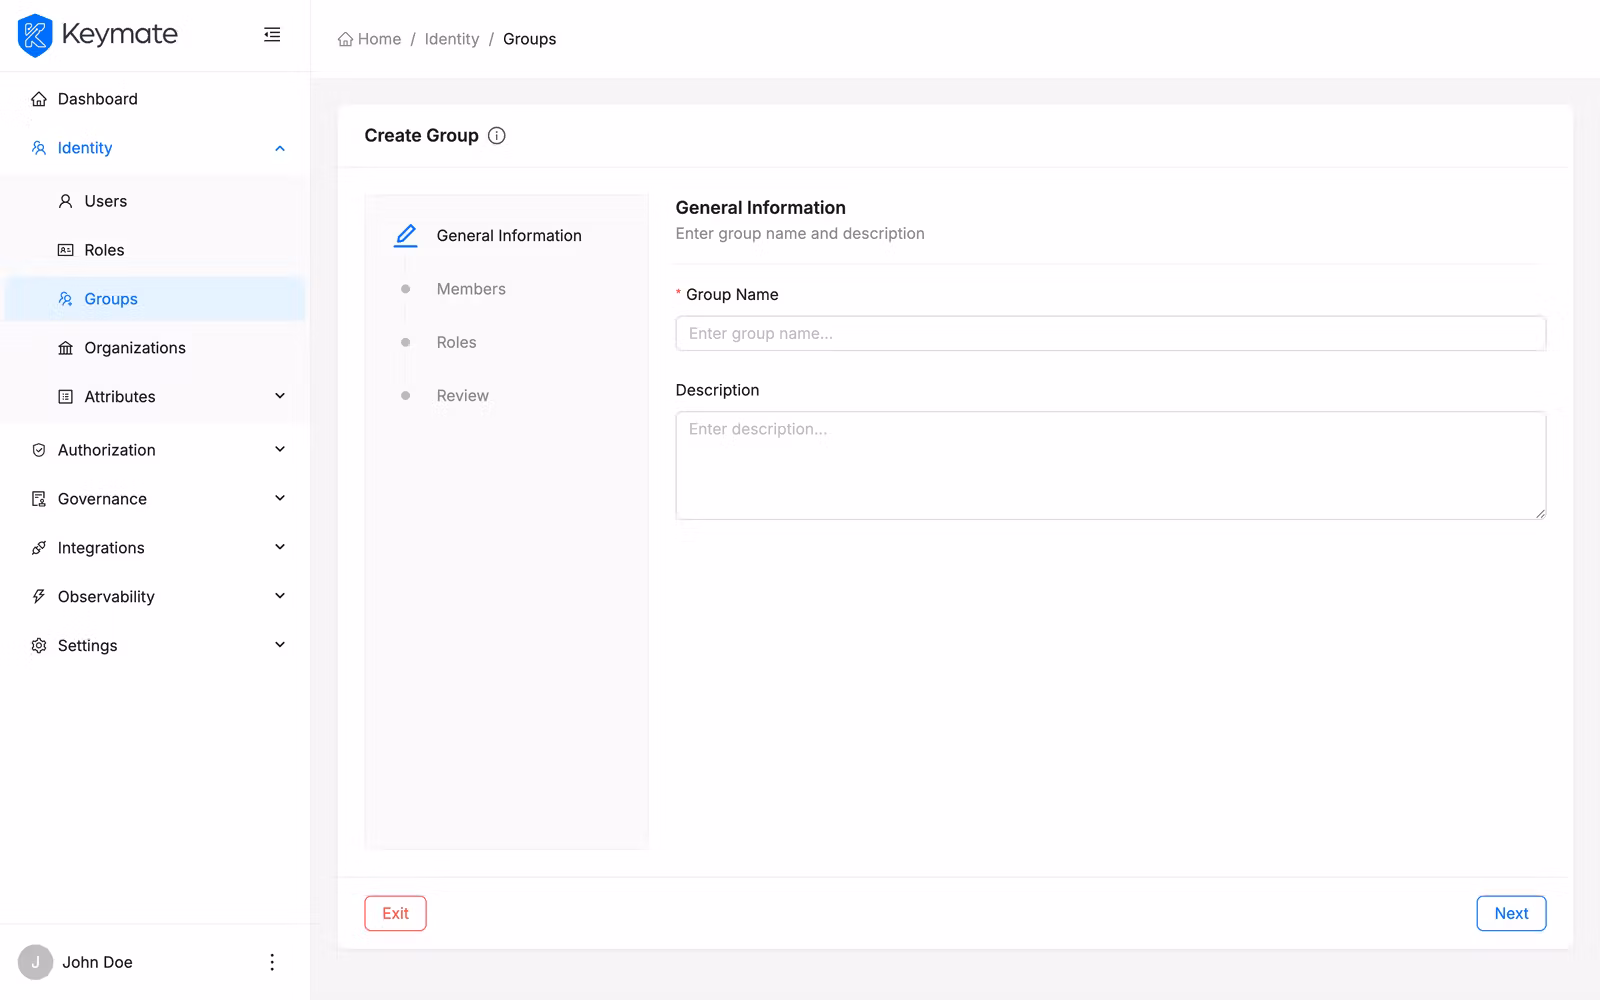
Click Next to proceed to member selection.
4. Select members (Step 2 of 4)
The second step displays a user list in picker mode. Select the users you want to add as members by checking the boxes next to their names. You can search and filter the user list to find specific users.
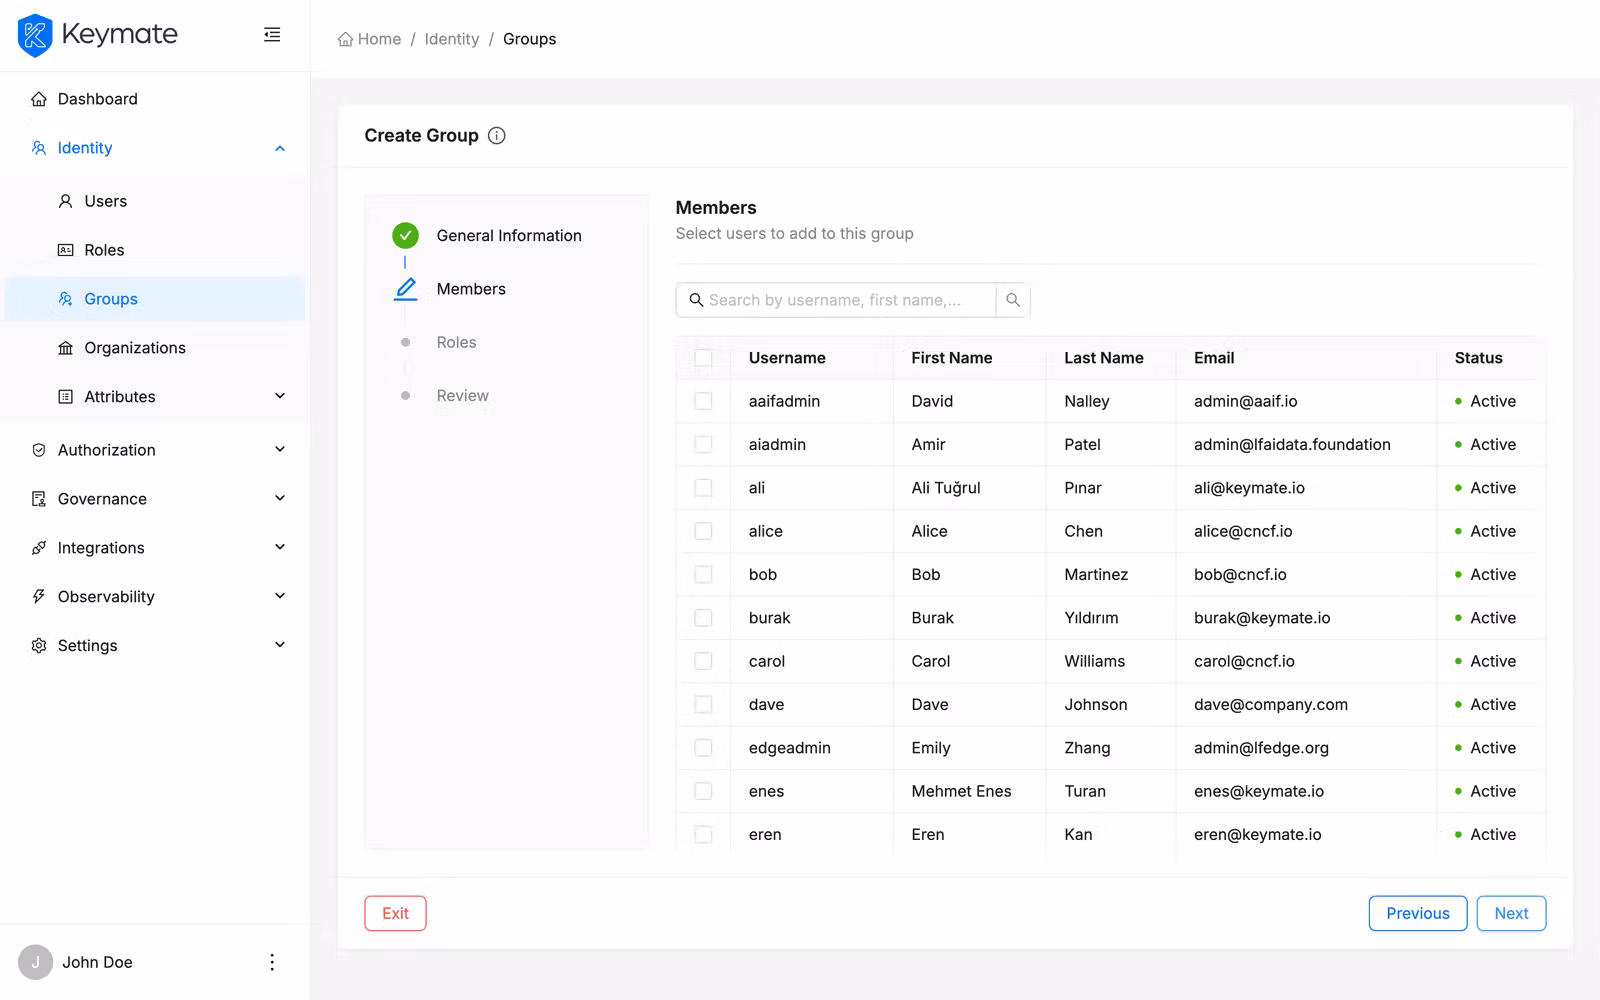
Member assignment is optional — you can skip this step and add members later from the group detail page.
Click Next to proceed to role selection.
5. Select roles (Step 3 of 4)
The third step displays a role picker where you can assign both realm roles and client roles to the group. All members of the group inherit these role assignments.
The role picker displays all available roles in a single table. You can filter by role type using the Role Type dropdown to show only Realm or Client roles. Select the roles you want to assign by checking the boxes. Client roles display a green tag next to the role name indicating which client application they belong to.
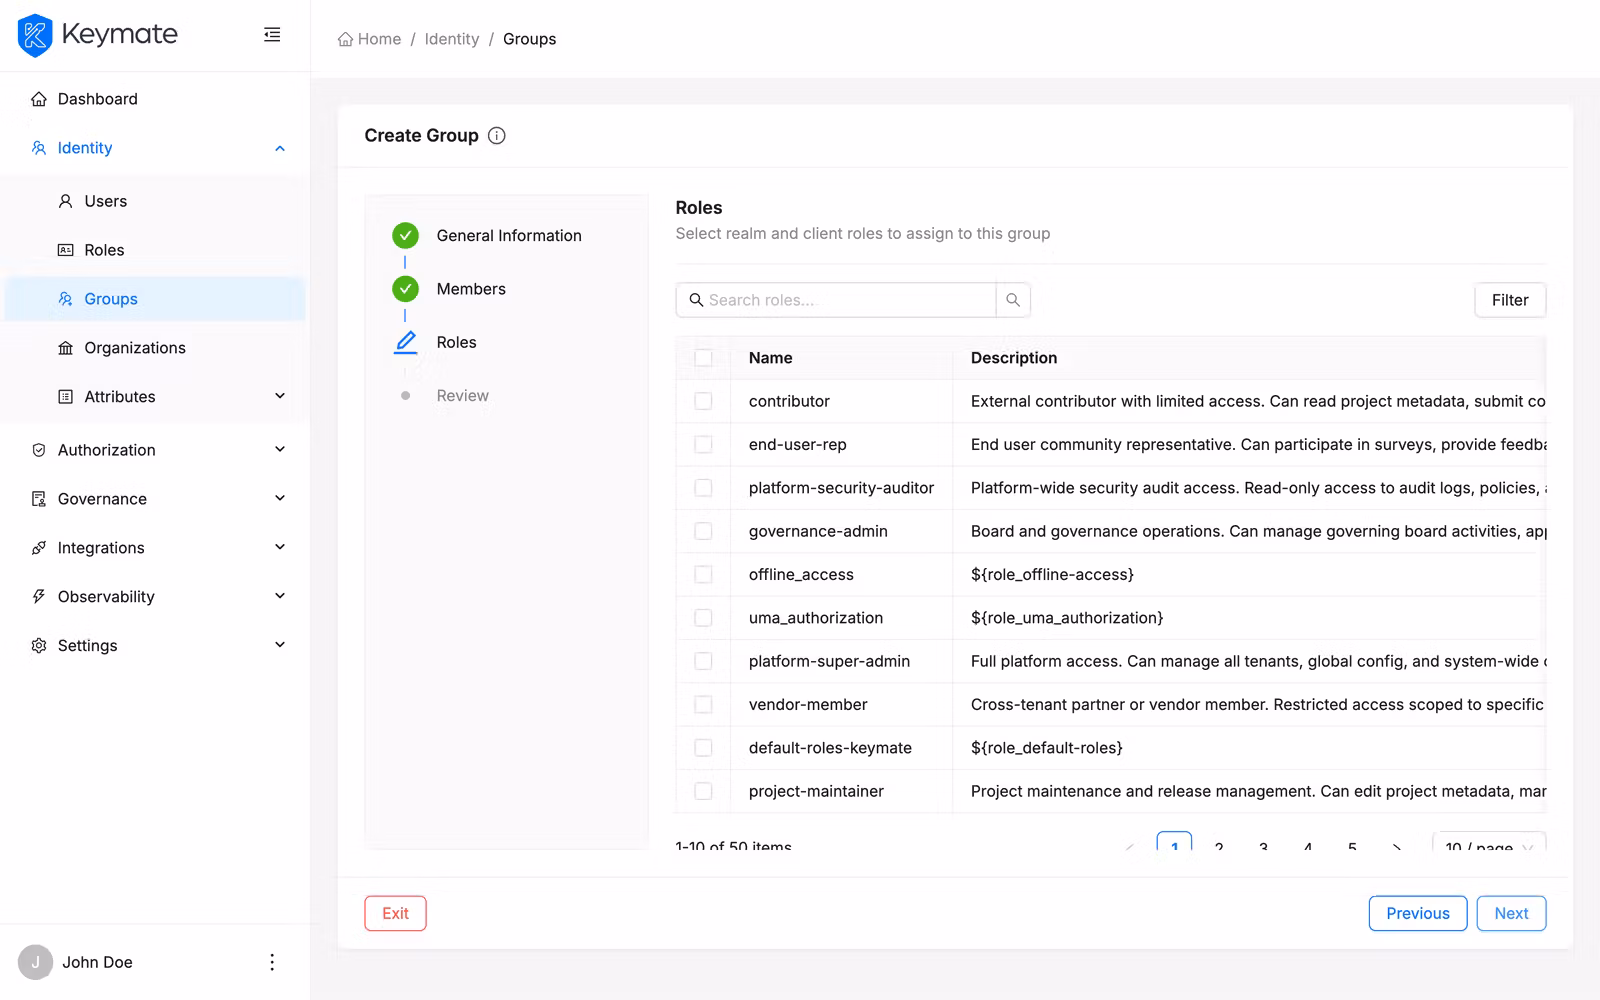
Role assignment is optional — you can skip this step and assign roles later from the group detail page.
Click Next to review your selections.
6. Review and confirm (Step 4 of 4)
The review step displays a summary of your selections in collapsible sections:
- General Information — group name and description
- Members — number of selected users, displayed as tags
- Realm Roles — selected realm roles
- Client Roles — selected client roles grouped by client
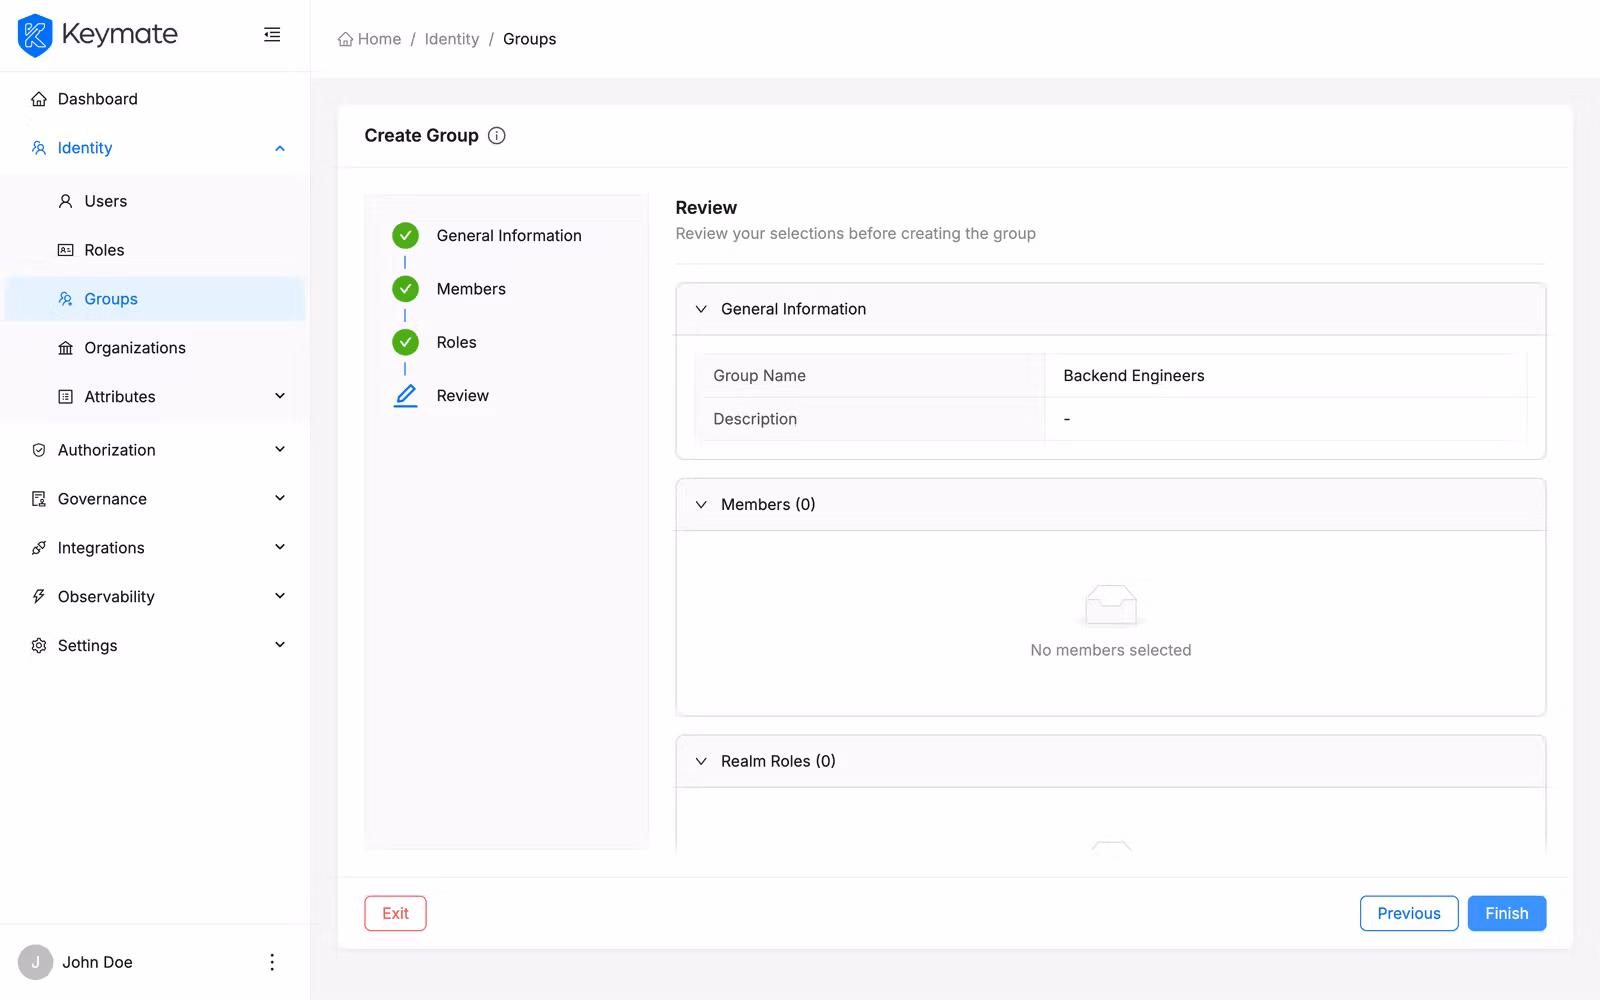
Verify the summary and click Create to finalize. The system creates the group first, then assigns members and roles in parallel. If any assignment fails, a warning notification appears with details about the partial failure — the group itself is still created.
On success, you are redirected to the groups list.
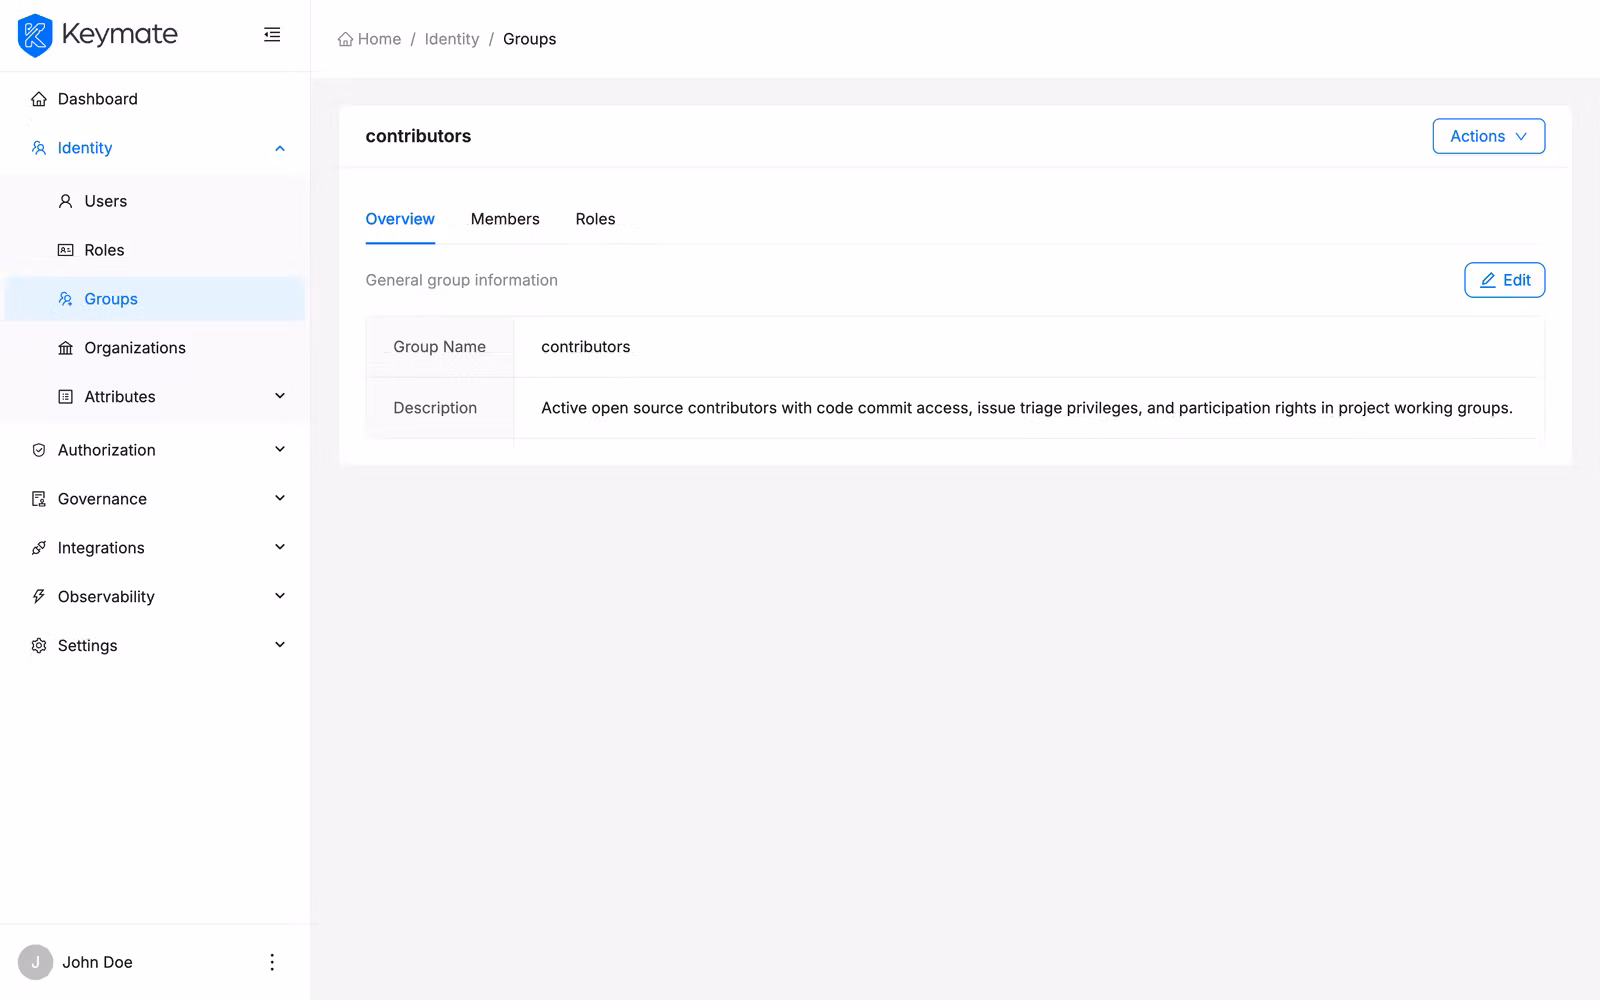
7. View group details
Click on a group name in the groups list to open the group detail page. The detail page has three tabs:
- Overview — group name and description with an edit option
- Members — paginated list of group members
- Roles — assigned realm and client roles
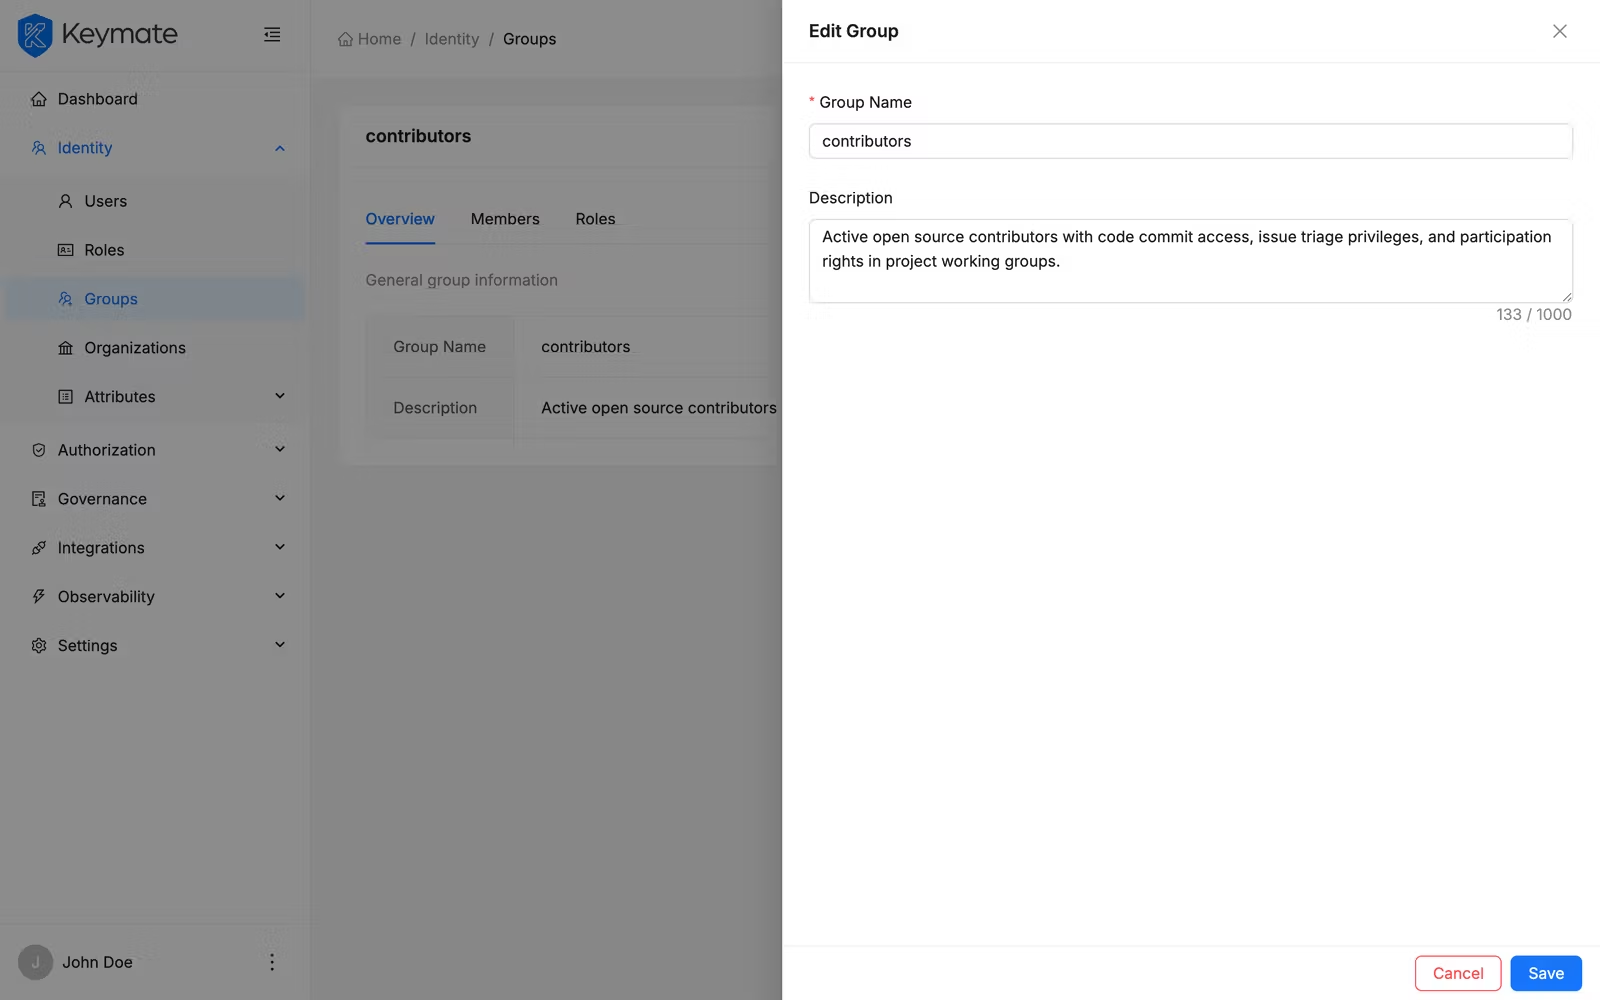
8. Edit group information
On the Overview tab, click the Edit button to open the edit drawer. The form is pre-populated with the current group name and description. Modify the fields as needed and click Save.
9. Manage group members
Switch to the Members tab to view current group members in a paginated table. The table displays the following columns:
| Column | Description |
|---|---|
| Username | The member's login username |
| First Name | Given name |
| Last Name | Family name |
| Email address | |
| Enabled | Account status shown as a badge |
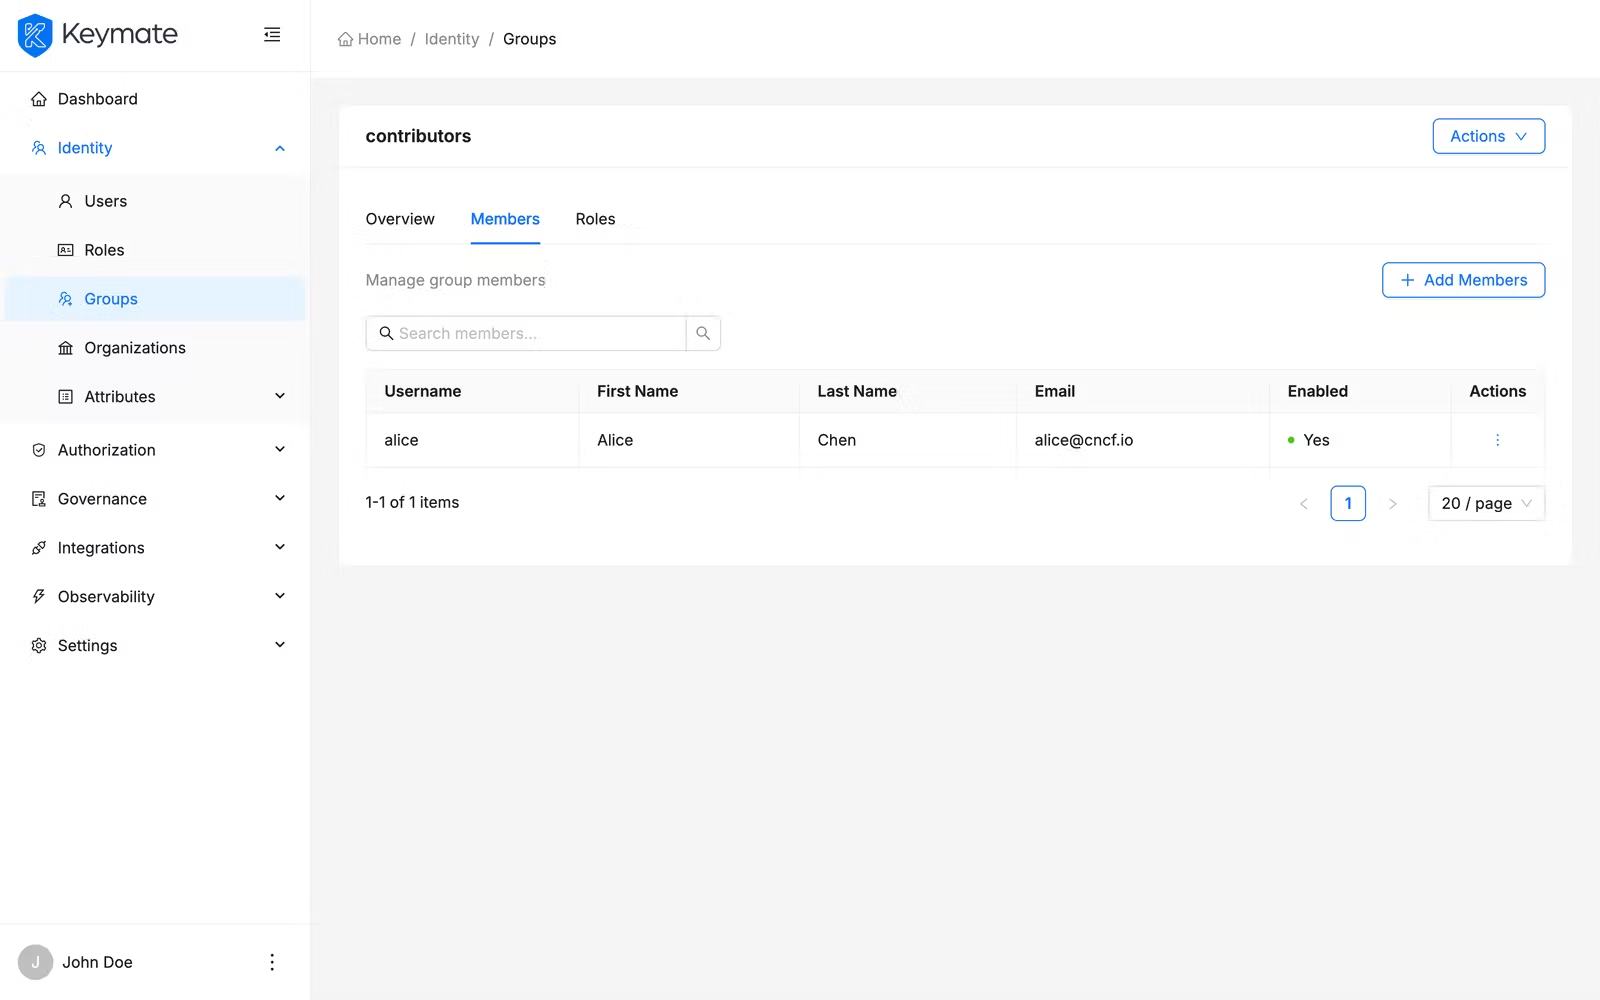
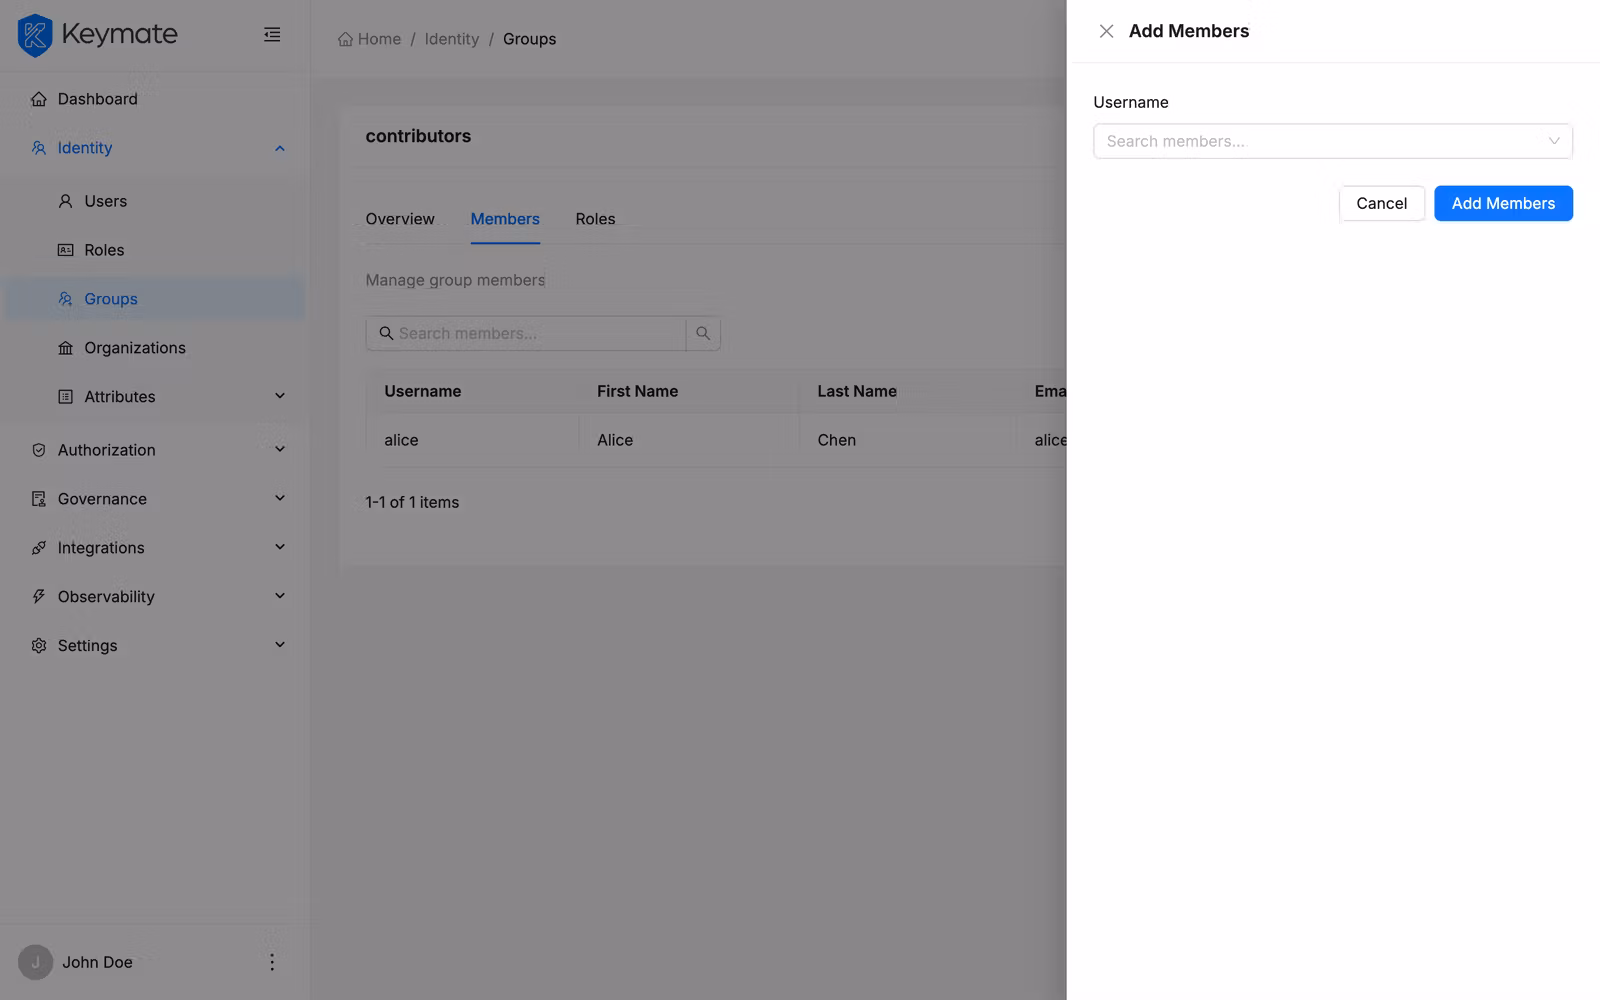
Add members
Click the Add Members button to open the add members drawer. Use the search field to find users — the search uses debounced input for performance. Select one or more users and click Save to add them to the group.
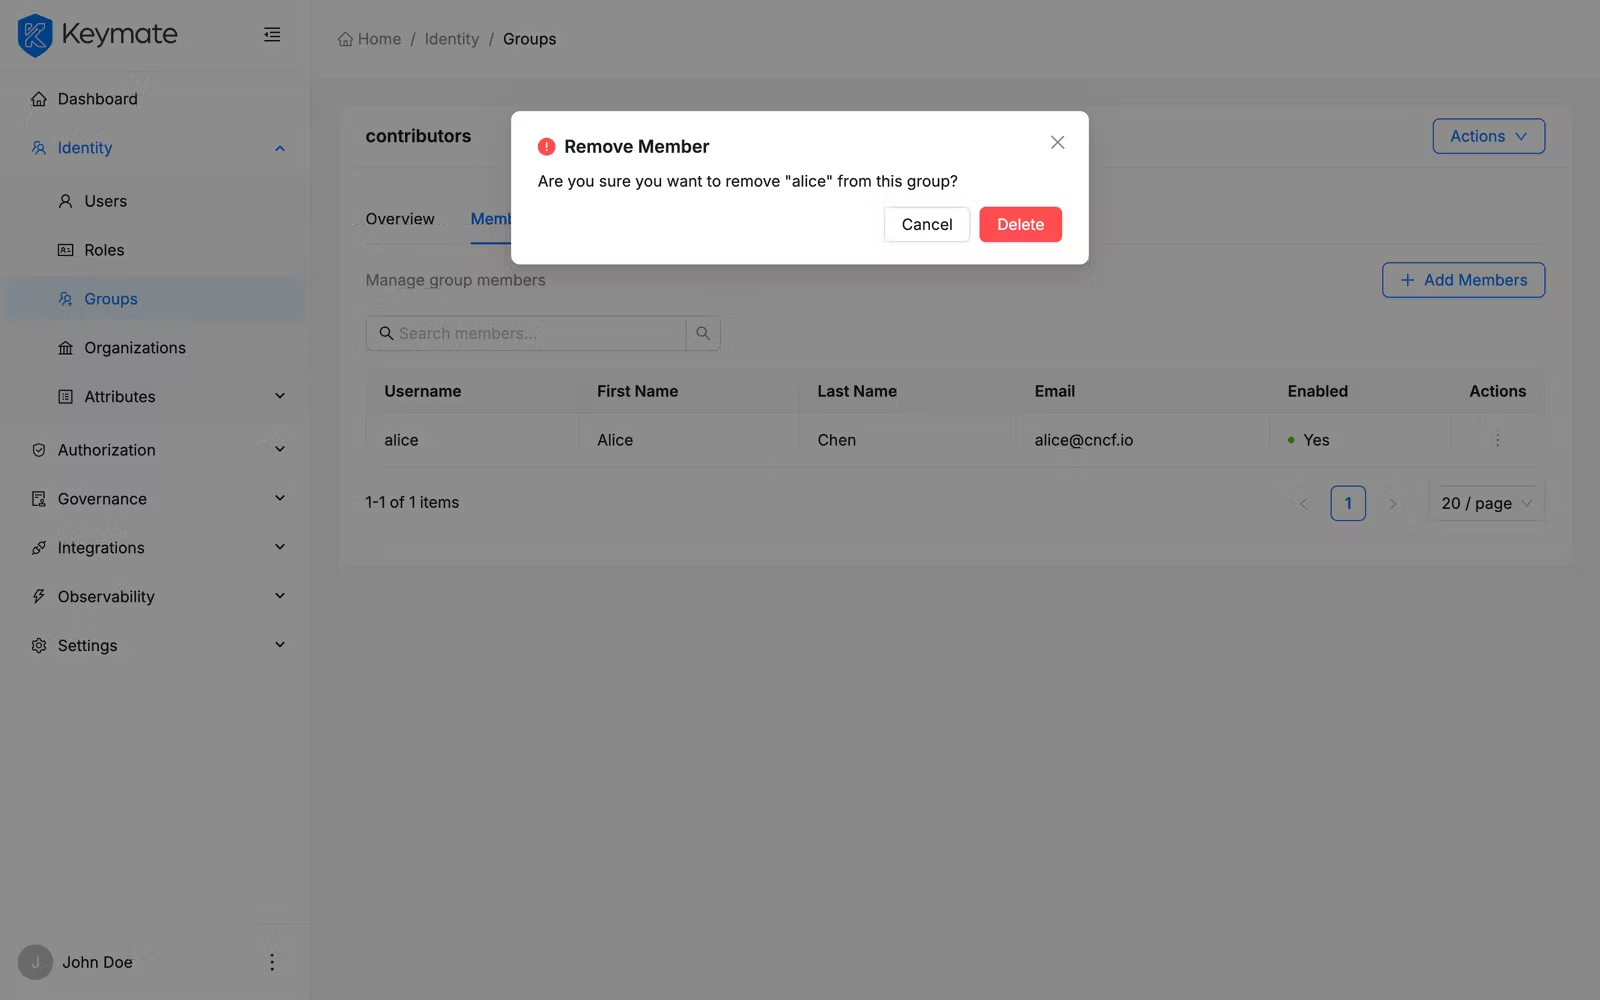
Remove a member
Click the delete action next to a member's row. A confirmation modal appears showing the username. Confirm to remove the member from the group.
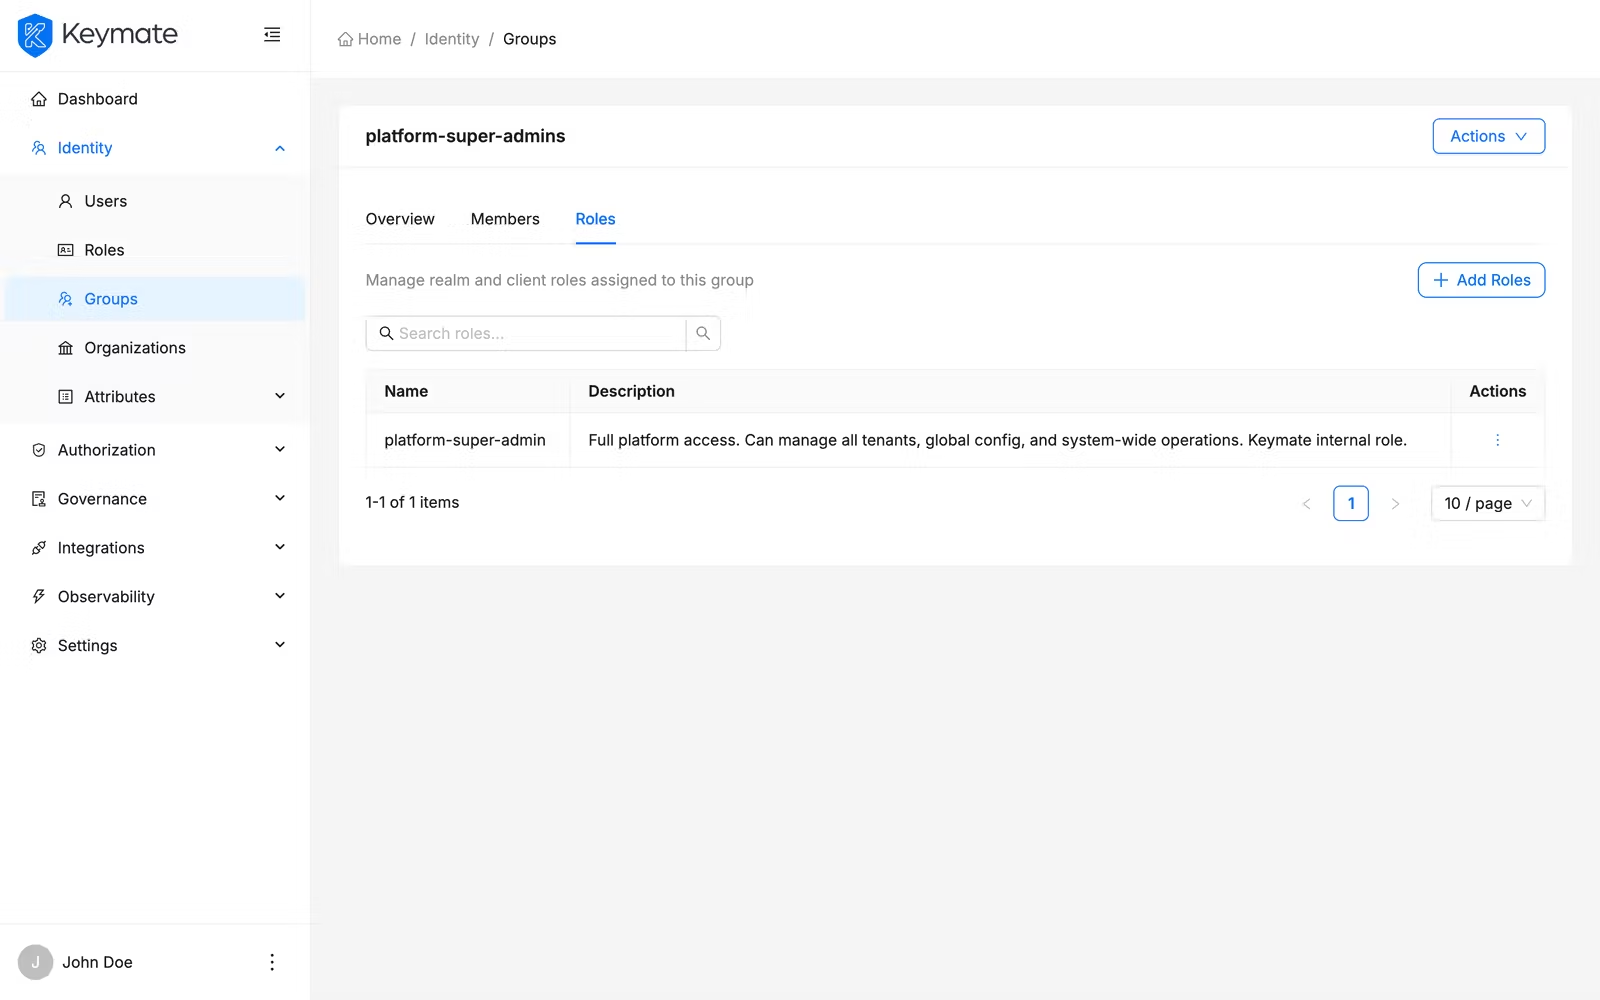
10. Manage group roles
Switch to the Roles tab to view all roles assigned to the group. The table displays role name, description, and a source tag for client roles that indicates which client the role belongs to.
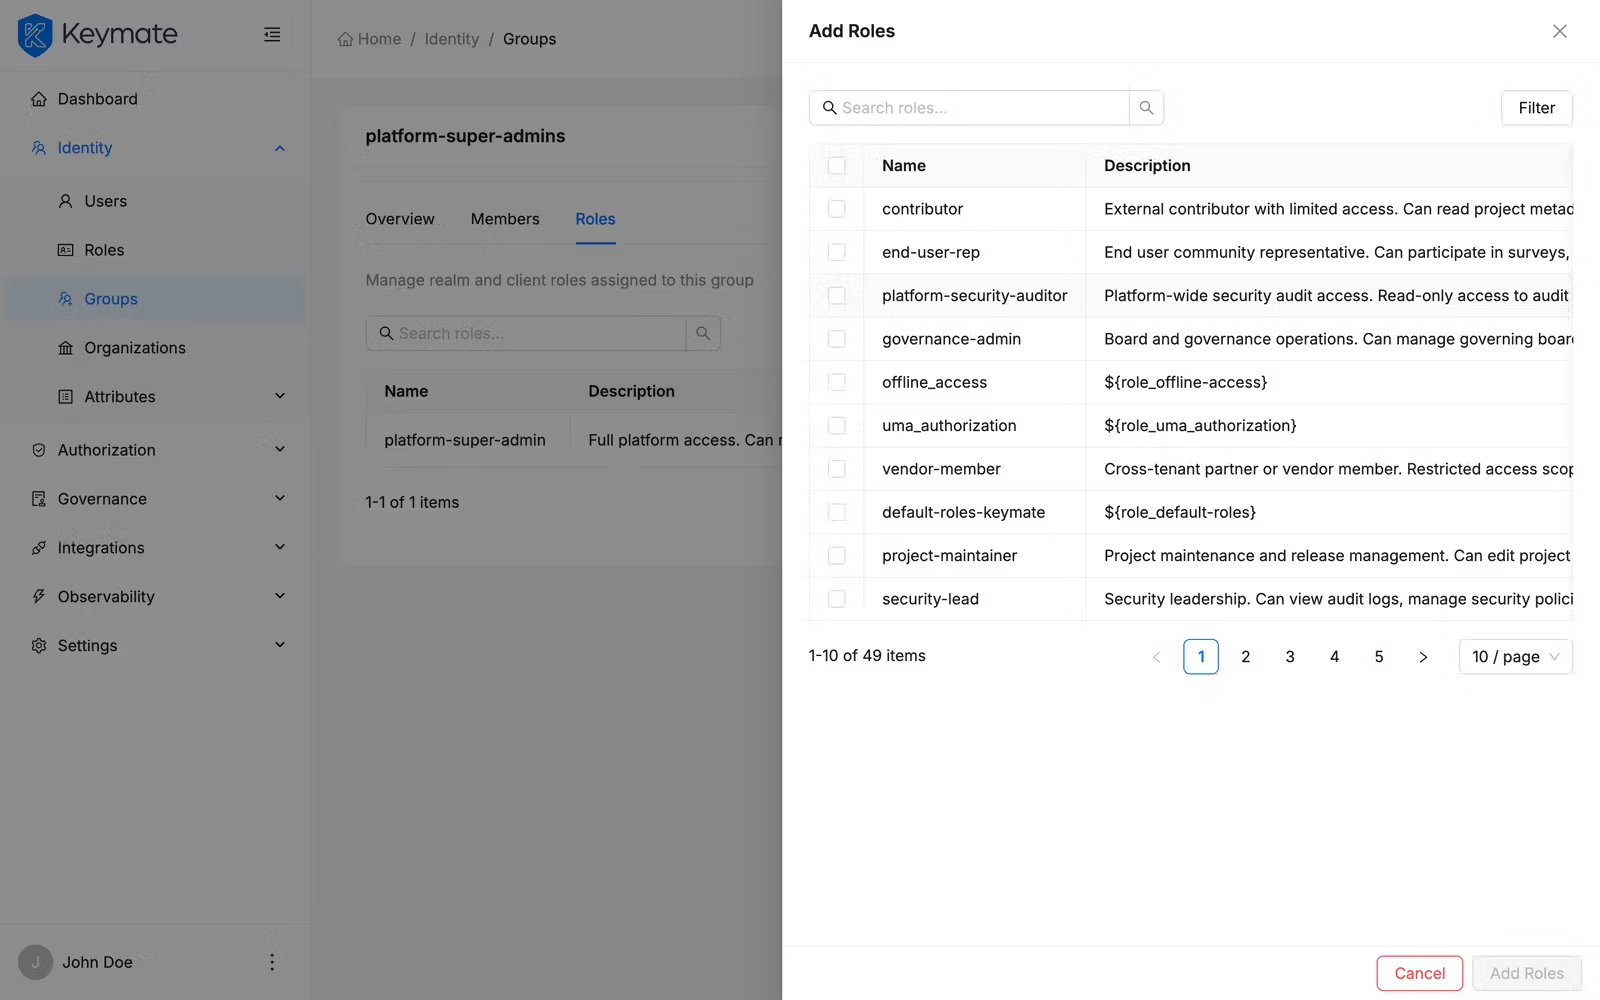
Assign roles
Click the Add Roles button to open the role picker drawer. The picker displays available realm roles and client roles. Select the roles you want to assign and click Save. Realm roles are submitted in a single request, while client roles are grouped by client and submitted in parallel.
Remove a role
Click the delete action next to a role's row. A confirmation modal appears. Confirm to remove the role assignment from the group.
11. Delete a group
You can delete a group from either the groups list or the group detail page. Click the Delete action to open a confirmation modal. The modal asks you to type the group name to confirm deletion.
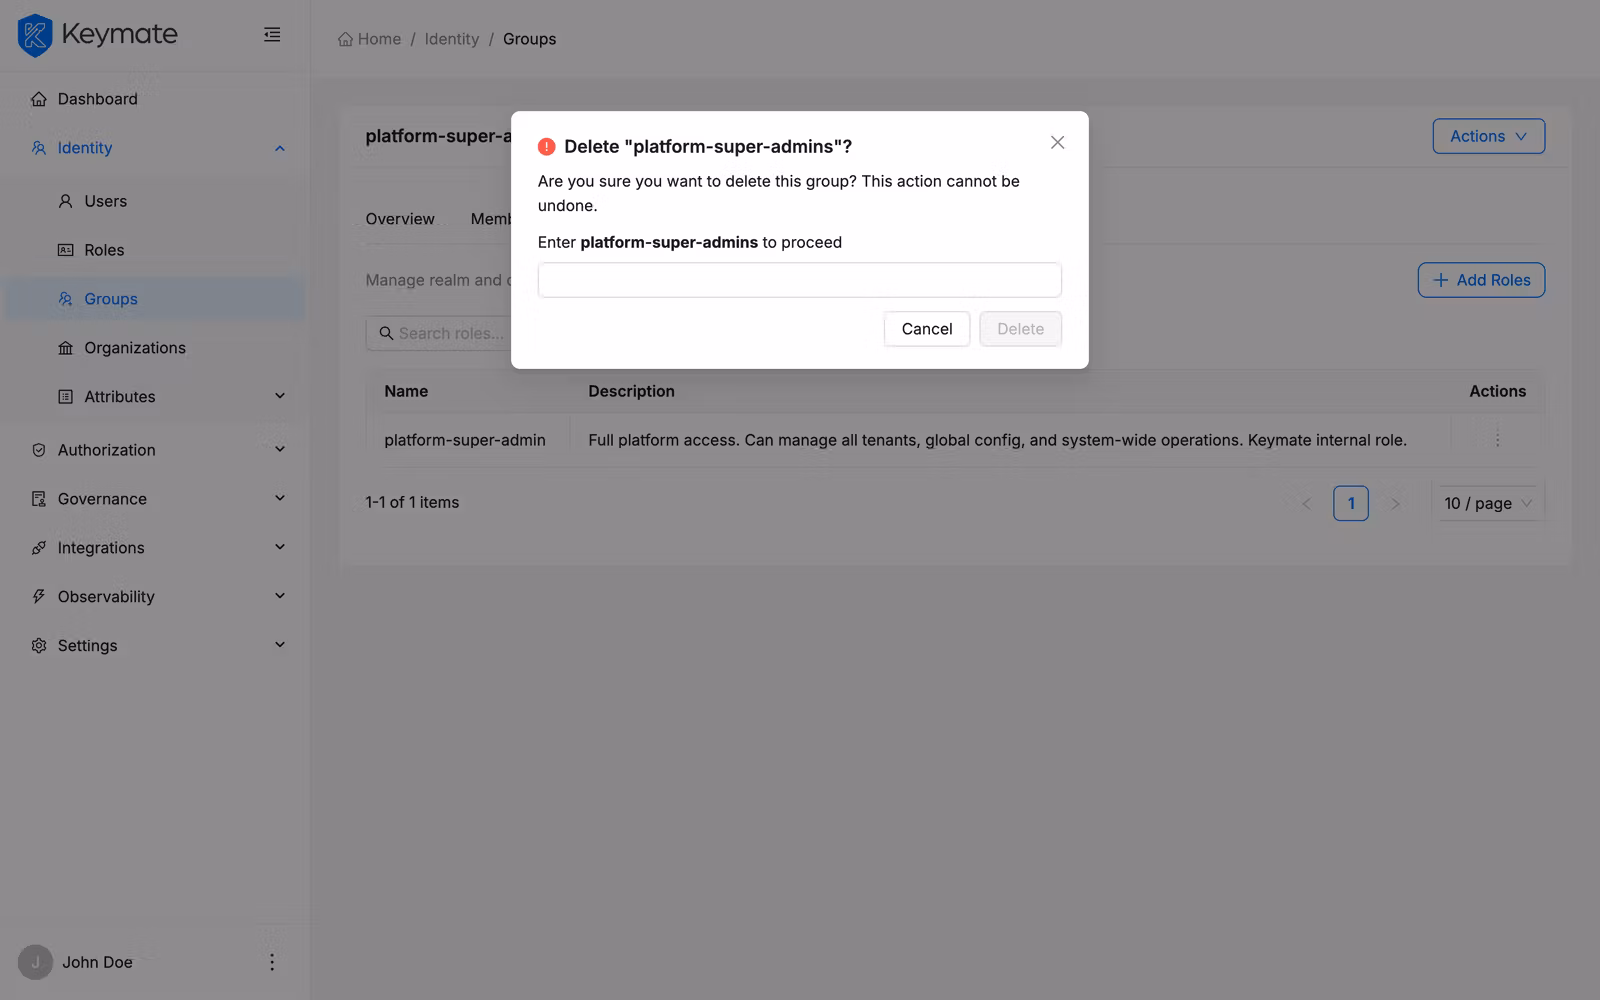
Deleting a group removes all member associations and role assignments. This action cannot be undone.
Validation Scenario
Scenario
Create a group named QA Team, add one member, and assign a realm role.
Expected Result
The group appears in the groups list. Opening the group detail shows the member on the Members tab and the role on the Roles tab.
How to Verify
- UI evidence: Navigate to Identity > Groups, confirm "QA Team" appears in the list. Click it and verify the member count and role assignment on the respective tabs.
- API evidence: Query the groups endpoint to confirm the group exists, and check the members and role mappings endpoints to verify assignments.
- Logs / traces: Check server logs for successful group creation and member/role assignment requests.
- Audit evidence: Review the audit log for group creation and assignment events.
Troubleshooting
- Create button is not visible — your account lacks the
CREATEscope on the Groups resource. Contact your platform administrator to request the appropriate permissions. - Member assignment fails during wizard — the group is still created, but member assignment produced an error. Navigate to the group detail and retry adding members from the Members tab. Check that the target user accounts are enabled.
- Role assignment fails during wizard — similar to member assignment, partial failures are reported via a warning notification. Navigate to the Roles tab and retry the assignment.
- Cannot find a user in the member picker — the search filters by username and name. Verify the user exists and the account is enabled. The search uses debounced input, so wait briefly after typing.
Next Steps
- Learn about the Group Model to understand how global and tenant groups differ
- Explore Tenant Group Inheritance to see how group memberships flow through organizational hierarchy
- Review User & Role Management for managing individual user role assignments